Description
- The original password is 0-0-0, set your own password, please follow the steps below: 1. Dial the password to the original password: 0-0-0; 2. Press button A with a pen or other tool until you hear the 'tick' sound. 3. Dial the password ring B to set your own password. For example: 8-8-8; 4. Press button C in the direction of the arrow to hear the "tick" sound once again. Button A is popped up and the password is successfully set. Now that you have completed the password settings, please keep t
- Repeat the above steps. Battery Removal Instructions Before disassembling, check if the power is off, open the package, pull open the lining zipper, open the lining, unplug the battery cable, pull out the tape outside the battery compartment and the battery will be lifted and the battery removed. (When the battery is removed for the first time, the cable tie can be cut and removed.)
- Cycling precautions 1. It is recommended to fully charge before using for the first time. 2. It is not recommended to suddenly brake and turn to prevent side during driving. Slip or tip over. 3. Please observe the traffic regulations and various site management during use. Regulations. 4. Avoid using this product in bad weather such as rain, snow or ice. 5. When not riding, please turn off the power.
- note: Acceleration, deceleration, sharp turn or over speed is strictly prohibited. Cycling is not recommended when the phone APP displays a battery or the SE3 display voltage shows a battery. Please keep at low speed while riding. If you are at risk of falling, protect your personal safety. Do not consider SE3. SE3 may be lost during cycling and during parking, affecting product performance. So before you ride SE3, you have to do it. The following checks: 1. It is necessary to che
- 2. The quick connector mechanism is locked. 3. You need to thoroughly understand, the surrounding cycling environment: make sure you are not disturbed by cars, pedestrians, pets, bicycles and other obstacles. Before driving SE3 safely, you need to do a lot of practice to master safe riding skills. If the riding technique is not skilled or this guide does not require the use of this product, it may cause personal injury or property damage to the rider or third party. The company is solely respons
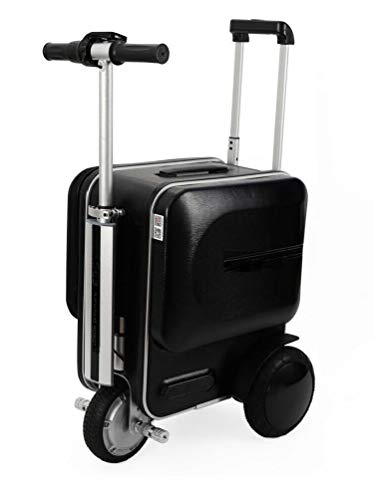
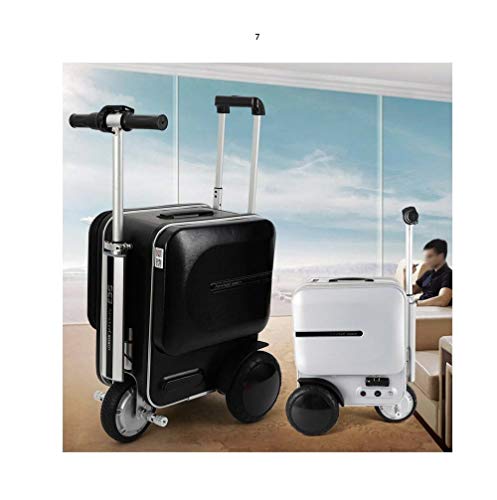
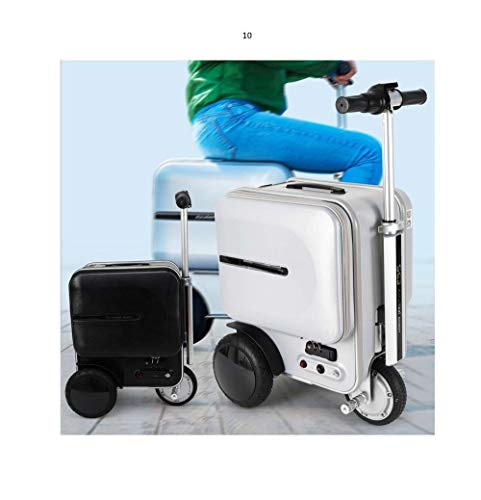
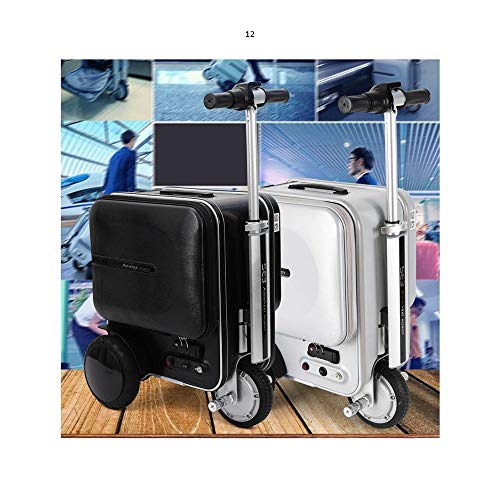
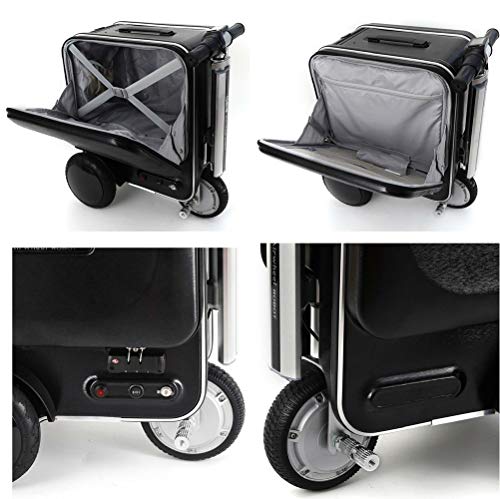
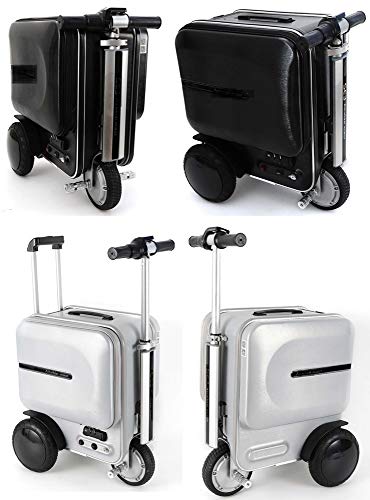
Electric Business Travel Carry Luggage Scooter Suitcase Our products make your travel more convenient. Intelligent products, so that you no longer have to worry about towing heavy luggage. Applicable to users under 90kg. You can save you time and travel in a small space. What are you waiting for? Come and buy! ! ! Product specifications: Product Type: Lite edition.Volume: 29.3L Opening size: 629X365X826mm.Folding size: 489X365X580mm Car weight: ~14.5kg Packing weight: 18kgMaximum load: 90kg Maximum climbing angle: ~15° Internal structure: seperate zip pocket + repair pocket + energy storage pocket Top speed: 10km / h Lock type: TSA coded lockApplicable temperature: -10 ° C ~ 40 ° C Front wheel: 6.5 inch motor wheelRear wheel: 8-inch inflatable wheel Color: black / silver Material: shell ABS + PC aluminum alloy frame Smartphone support: IOS / Andriod Pull rod: three-speed aluminum rod Charging voltage: AC100-240V 50-60Hz Battery specifications: Battery capacity: 185Wh. Charging time: 3h / 2h Battery type: lithium batteryBattery voltage: 37V Removable: Yes Motor specifications: Motor size: 6.5 inches.. Number of motors: 1 Motor weight: 3kg. Motor power: 250W The package includes:1X suitcase scooter youth version. Instructions for use: Unfold 1. Turn on the power switch and set the expansion switch to the "I" position. Handle will Expand automatically. When the expansion is complete, the expansion switch will be reset to the "o" position. 2. Release the quick connector. Quickly fix the handlebar after pulling it into the proper position Connector. The check is not loose and the expansion is complete. fold 1. Turn on the power switch and set the unfolded switch to the "II" position. When the fold is over, the handle will automatically fold and the unfold switch will reset to the “o” position. Turn off the power. 2. Loosen the quick connector, tighten the handlebar until it stops, and secure the quick connector.