🔧 Elevate your flow game with SHURFLO’s twist-on precision!
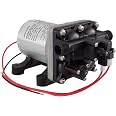
The SHURFLO 255-313 1/2" Twist-On Pipe Strainer is a compact, lightweight plumbing adapter featuring a durable stainless steel exterior and NPSM threaded connection. Designed and manufactured by Pentair in the USA, it offers reliable performance and easy installation for professional-grade water filtration and flow control systems.
| Size | 1/2 Inch |
| Material | Plastic |
| Brand | SHURFLO |
| Color | Black |
| Item dimensions L x W x H | 2.25 x 4.75 x 6.25 inches |
| Connector Type | Adapter |
| Exterior Finish | Stainless Steel |
| Thread Type | NPSM |
| Item Weight | 1.76 ounces |
| Number of Pieces | 1 |
| Global Trade Identification Number | 00752324009329 |
| Manufacturer | Shurflo by Pentair |
| UPC | 752324009329 |
| Part Number | 255-313 |
| Product Dimensions | 2.25 x 4.75 x 6.25 inches |
| Country of Origin | USA |
| Item model number | 255-313 |
| Is Discontinued By Manufacturer | Yes |
| Item Package Quantity | 1 |
| Measurement System | inch |
| Included Components | Great Product |
| Batteries Included? | No |
| Batteries Required? | No |
| Warranty Description | Warranty |
C**S
Complete install guide. Excellent product. Necessary RV upgrade (plus accumulator)
Put this strainer near your inlet to your Shurflo or other brand pump. I DO NOT recommend threading this directly on the pump head, because the pump head is soft thermoplastic, and you are better off following the directions below. Also get an accumulator (Shurflo part, about $44). Together, they make a solid, easy and I think, necessary, addition to your RV plumbing.My suggestions: if your pump is next to your tank, and you have a system that permits this, and has a floor-level outlet on the tank, here is a step-by-step:First phase:Re-plumb from the floor-level outlet of your tank, because it usually has an internal strainer that backs-up garbage in the tank. With the tank empty, look for and REMOVE THE EXISTING TANK STRAINER. It will usually easily come out of the threaded hole your plumbing leaves the tank from. These break and are, for obvious reasons, difficult to clean, backing up an organic sludge, even if you have drained it previously.Do new plumbing. Assuming you have a floor-level tank outlet, 1/2" female thread: Prepare your new plumbing, by building with half of a galvanized union joint, to the end of a 10" plastic nipple, with teflon tape. This leaves an easy joint to hook up the rest of your plumbing later. Run the other end of the plastic nipple into the tank, again, removing any existing tank strainer first. Mount wood to the floor if needed to make the nipple run completely perpendicular to the tank outlet, no cross threading. Use a 1/2" o-ring to help seal the nipple into the tank. Do not overtighten! It's a lot less force than you use with your downstream plumbing fittings. Literally, hand-tight. I found mine crossthreaded easily if overtightened. In my case, I also had a tank on carpet, so I needed wood to level the nipple. Yes, carpeted in the tank area. Use heavy pipe straps (electrical section of hw store) to stabilize the nipple down to the floor.Second phase:Mate the other end of the galvanized union to a 3 to 4" metal nipple with teflon tape, then the other end of the nipple to a galvanized corner T. On mine, shooting off at a 90deg angle, was almost perfect to meet up with the drain hole. It also goes straight up, where you will install another union fitting and an elbow, and the strainer. Finish the floor-level corner T exit with another metal 5" nipple, brass valve, and exit pipe to drain to the outside. Don't add these phase 2 component to the first phase plumbing yet. Just kit everything together, being careful not to disturb the initial 1/2 plastic nipple and union. Although P1 should be mounted solidly down.From the riser part of the corner T, install a short metal nipple and now, a plastic union. I think these are nylon or tough plastic, and used in irrigation. Now you should be able to install, and mount, the phase 2 elbow T/drain, with its fittings, to the floor, solidly, again with wood and straps on the wood if needed to bring it to tank level, and connect it to the first union, the galvanized one.Using a galvanized metal union for the first, has better clearance than the larger plastic kind. Plus, except for the plastic nipple leaving the tank, you want this corner and it's connected pieces, to be galvanized (metal), as it is more rigid. Floor should not flex over the short distance.Use straps to mount Phase 2 to the floor, solidly, both before the elbow, and after to the drain. The half of a plastic union should be sticking straight up.Phase 3Off the plastic union second part, attach a SCH40 elbow w TT. Use one with a male threaded end, and a female threaded end. Into the female end, screw the Shurflo 255-313 Strainer w TT. This way, there should be about 2-3 inches of clearance between the bottom of the clear strainer basket, and the floor. This makes it easy to remove the strainer basket without having to completely empty the tank. You should have to have about a half-full tank to maintenance the strainer. Add a short plastic nipple to the strainer outlet w TT.Add Phase 3 plumbing to the existing plumbing, being careful to only tighten the plastic union joint, and not stress the Phase 2 plumbing.Use a flexible line (ACE has these for about 5-6$, in 12-16" lengths) 1/2" FIP to 1/2" FIP, connect to the strainer outlet to the pump head. The pump can be sitting on the floor, on it's rubber feet. No telfon tape needed on the flexible hose, as it has rubber cone washers embedded in it, and not a ton of torque (BE CAREFUL with the soft pump head). These very flexible lines also greatly reduce vibration into the plumbing. I found that the Shurflo PUMP HEAD especially, is a crappy kind of thermoplastic. VERY SOFT. Much softer than the Twist-on Strainer. So in order to access the strainer basket and reduce stress on the pump fittings, do not screw strainer directly onto the pump.Outlet of the pump, you are going to use another 1/2 FIP to 1/2 FIP. First, build your accumulator: use another short plastic nipple, on one side of a Shurflo accumulator, the side facing towards the pump if you mounted the accumulator. Screw the nipple into the accumulator with teflon tape first, then mount the accumulator, THEN lastly use the 1/2" to 1/2" flexible hose to hook pump to accumulator. This allows you to easily move the pump around to an ideal location, and also, disconnect when changing things like the pump head pressure switch (when it fails).After the accumulator, continue your regular plumbing.Mount the accumulator with the shrader valve pointing up, if you can, to make sure that water completely drains when winterizing. I had the model with the metal bracket, not the one with the rubber feet.
M**
Works great
Easy install simple project
J**W
Good Quality
Works well
T**.
Great for older pipes
Have a 70+ year old house with galvanized pipes. In dire need of repipe. Anytime water is shut off the back on faucets would clog up with debris. 2 of these at each faucet took care of that.
A**E
Fits Shurflo 12v RV water pump
I bought this as an extra for my Shurflo 12v RV water pump. It's always smart to keep extra items on hand when living in an RV
A**R
Great replacement filter
Great replacement filterEasy to install
D**9
Nice filter
Easy to install and doesn’t leak. Good value for the money. Easy to clean and is Quality built. You only need to hand tighten and be careful not to cross thread it. Really just common sense.
R**.
Worked well
Noting outstanding. Shipped quick, packaged well. Worked fine.
Trustpilot
3 days ago
1 week ago