Desertcart purchases this item on your behalf and handles shipping, customs, and support to Sri Lanka.
🐾 Own the future of robotics — build, code, and control your smart companion today!
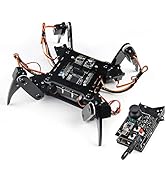
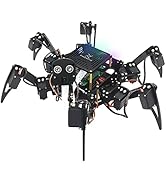
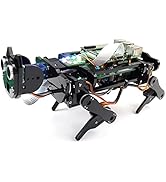
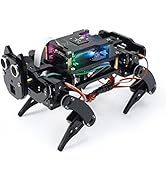
The FREENOVE Robot Dog Kit is a sophisticated DIY robotics project featuring 12 servo motors for agile walking and self-balancing, a rotatable camera paired with ultrasonic sensors for advanced face recognition and ball tracking, and wireless control via dedicated apps on Android, iOS, and desktop platforms. Designed for Raspberry Pi 5/4B/3B+ and compatible models, it includes detailed Python tutorials to elevate your coding skills. Note: Raspberry Pi and batteries are not included.


| ASIN | B08C254F73 |
| Best Sellers Rank | #4,296 in Single Board Computers (Computers & Accessories) |
| Brand | FREENOVE |
| Built-In Media | Cross |
| CPU Model | None |
| Compatible Devices | Android phone or tablet, iPhone, Computer (Windows, macOS, Raspberry Pi OS) |
| Connectivity Technology | USB |
| Customer Reviews | 4.1 out of 5 stars 453 Reviews |
| External Testing Certification | Não aplicável |
| Included Components | Cross |
| Item Dimensions L x W x H | 3.94"L x 0.39"W x 5.91"H |
| Item Weight | 2.1 pounds |
| Manufacturer | Freenove |
| Memory Storage Capacity | 1 TB |
| Mfr Part Number | FNK0050 |
| Model Name | FNK0050 |
| Model Number | FNK0050 |
| Number of Items | 1 |
| Number of Packs | 1 |
| Operating System | Raspberry Pi OS |
| Processor Brand | Freenove |
| Processor Count | 1 |
| RAM Memory Technology | LPDDR4, DDR3 |
| Total Usb Ports | 1 |
| Unit Count | 1 Count |
A**H
High quality kit! Fun to build! Don't be swayed ... get it, commit to it, and you'll have a blast!
Just for some perspective, as a child I built radio control cars and I currently do a little programming at my place of employment so this was something I believed that I would enjoy ... and boy I was right. Over the holiday break, I cleared off our kitchen table and went to work. My first impression was that this kit was packaged well and the pieces seemed to be of a quality higher than I expected since it's price was reasonable. I downloaded the instructions and programming. After review, I also ordered a raspberrry pi 4, memory card, hdmi cable adapter for the pi, and made sure to purchase the recommended special batteries that are mentioned in the instructions. I didn't want to mess around as others who complained about charging or other power issues because they wanted to use batteries that came in their $10 fleabay flashlight. The instructions are great. I learned about installing the operating system on the pi which was cool and will come in handy for future projects. I needed a usb mouse, keyboard, and hdmi computer monitor to get the pi setup. I just used my iphone charger to power the pi. As far as building the dog itself, please note that some of the pieces are very small but just take your time and you'll be fine. The kit included a few extra pieces with I appreciated. I felt a great amount of satisfaction once I actually powered it up for the first time. The software did crash once but a quick reboot fixed that. It doesn't go on carpet. I cannot recommend this kit enough and I hope I can find others who have this so we can share ideas! Five Stars!
M**S
Fun and Challenging
This was a gift and it was I while before I collected all of the required additional components--FAR more than the bare Raspberry Pi I received with it. If you haven't used a Raspberry Pi previously you will likely need an appropriate power supply, a micro-SD card and micro HDMI to HDMI cable/adapter. Initial setup of both the Raspberry Pi and its interface with your controlling device(s) is much easier when you connect monitor, keyboard and mouse Raspberry. You will also need lithium ion batteries and charger in a size (18650 with or w/o "button top") that has almost no chance of local availability. The dog is VERY finicky about surface! Pile carpet = impossible. Ceramic tile = fair to poor depending upon the width and depth of the grout lines. Hardwood = fair to good. Laminate = poor to fair. Vinyl/asphalt = good to excellent. Smooth concrete (basement/garage) = excellent. Rough concrete = excellent but certain to damage the little "teeth" in the hard acrylic feet that provide the friction/grip. Smooth, unfinished plywood = perfect. While this kit certainly serves as a fair introduction to robotics and especially robotic control (as in the actual programming of such and not just supplied "tricks" and basic operation) only an extremely precocious youth below their mid teens is likely in my estimation to successfully assemble and operate the kit without considerable assistance. I found the protective adhesive paper on both sides of the acrylic body pieces very difficult to remove--impossible for me start with my fingernails and surprisingly difficult with the common x-acto blade that typically works very well in such applications. The acrylic is obviously laser cut so perhaps such makes the edges particularly difficult to "start." STUDY THE INSTRUCTIONS WELL!!!! There are three separate tasks--hardware preparation, software installation/setup in both the host (controller) and client (robot dog) and assembly of the robot itself. You will work at these three tasks simultaneously at times. Assembly instruction for the physical robot and its hardware are based almost purely on a sequence of illustrations. I've worked with such instructions many times. These are easily in the bottom third of quality. I made a few assembly errors one of which required significant disassembly. The problem as I saw it was not related to the complexity of the construction but the lack of clarity in the illustrations to include the full scope of a single step and proper orientation of some pieces. The three-conductor ribbon cable serving the LED light module on mine had a reversed connector on one end. I noticed the problem during assembly as the wire colors did not match the illustration at one end. I didn't know if it was a problem with the instructions or the cable until testing when the LED module proved dead. I wrote the email address in the instructions to have a reply the next morning. I was given instruction on how to remove the conductors from the connector but unfortunately a solder burr on one of them damaged the connector during disassembly as it was "stuck" compared to the rest. I again wrote to have a reply the next morning that a new cable was being shipped. It came from China as I suspected and took about two weeks. Otherwise the general quality of the materials seems good for something of this nature--a slightly glorified toy. The surprisingly short safe running time of three minutes doesn't say much for the durability of the servos but the "next step" in still "toy" robot quality involves a pretty much exponential increase of price. Nearly everything assembles with tiny bolts and nuts provided in somewhat excess quantity. While highly dexterous my fingers are very large yet I had no undue problem with the tiny hardware. The seemingly far too long bolts used in some places are so long to make them reasonably easy to access. Many of the pieces have tiny ridges to aid in positioning nuts making it reasonably easy to install particularly difficult connection with the bolt beneath. Even with nothing to hold down the tiny nut but gravity and not perfectly upside-down you can thread the bolt through it with far less frustration than you may imagine. This construction means that you can easily and repeatedly assemble and disassemble the robot without damage. An important exception to this construction are gears that attach to the servo pinions. Made of white nylon like the pinions and all the rest of the gears, they attach with sheet metal type screws. These gears take a LOT of pressure to push onto the pinions yet the servos feel rather flimsy and not able to take the pressure. The gear is often installed after the servo with things so positioned to make it even more difficult to press the gear onto the pinion without forcing and almost certainly damaging something. The mounting screw will fully seat the gear--the first time you assemble. Do not expect the same degree of such "pull down power" should you need to reassemble! One of mine is perilously close to becoming a full-blown "spinner" with little or no holding power.
R**I
An outstanding robot kit
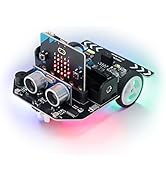
I am a seasoned roboticist with extended experience in building robots from commercial kits as well as my creations. Searching for an inexpensive micro controller for my students, I stumbled on a cute and inexpensive robot called Micro Rover by Freenove, based on the ubiquitous BBC MicroBit card. I then realized that this company offered other, more sophisticated robots based on Arduino and Raspberry Pi at a very competitive price. I tried a few and the last I built is the Robot Dog for which I’m writing this review. This Kit is one of the best I have ever built. It consist of no less than thirteen servos, a Pi Camera, an ultrasonic sensor, some RGB LEDs, sturdy laser cut body parts, all the necessary cables, connectors and accessories plus a well-designed PCB that connects everything together. As a bonus, Freenove provides an outstanding instruction booklet in PDF format (122 page with clear pictures, codes and data tables). This kit may be a little daunting for rank beginners, but it is so well designed, built and documented that I would unconditionally recommend it for anybody interested in learning how modern autonomous robots are built, programmed and controlled. It runs on two easy to find 18650 3.7V batteries and it needs a Raspberry Pi as a controlling SBC (Single Board Computer). This is not a frustrating kit with missing parts, incomprehensible instructions and inexistent customer support. Even in the remote case of you getting stuck, Freenove offers excellent personalized online help. Roberto Pensotti
P**P
beautiful toy - top quality support
Building and running this Robot Dog Kit was a very fun and educational experience. We assembled it together my 11 year old granddaughter and myself, following the instructions of the very well written manual. The assembly is no more complicated than the assembly of any model and was performed almost completely by my granddaughter while I intervened in the programming step, also within the reach of anyone who can follow installation instructions and write commands to the terminal. I recommend not to rush and follow the instructions step by step; skipping a step or performing it improperly can prevent the robot from working. It happened to us a couple of times and, as indicated in the tutorial, we wrote to the company. We got really top notch support, they always answered kindly and practically in real time (but consider the time difference). Don't hesitate to write to them if you run into a problem. The kit we received was of excellent quality, with the gears of the stepping motors made of metal and not plastic. Some of the screws are very small indeed, but if you drop one on the ground you don't have to worry too much: the kit generously includes many spare screws and small mechanical components. Excellent ! Peppe Cirotti - Costa Rica
A**M
Nice adult toy but picky to PSU, battery type and some parts could be faulty
I'm 35 years old software development engineer with no robot building experience. Purchased just to play around. Nice adult toy to play with, challenging. Has issues, see below. Be ready to DIY (do it yourself) and FIY (fix it yourself) :-) Pros: - Affordable - Cool puzzle to build :-) - Definitely educational - A lot of components out of the box: camera, ultrasonic, gyro, leds, 13 servos - Vanilla packed parts (no repack), so you can imagine yourself building from parts ordered separately Cons: - My robot after construction has failed servo tests. Some servos did not properly react on control signal. Support require photos and videos, so be ready to provide them to get new parts shipped. Parts are shipped from China, shipping to NJ took 12 days, for example. Anyway, if it doesn't work, then it is easier to return it rather than trying to obtain spare parts. Received parts did not improve situations. I have dive deep on my own what is causing the issue and found that default calibration for servos is incorrect. I have updated Servo.py to properly set angle from 0 to 180 and now all servos started to work well and device has passed finally the servo test. - Picky to PSU (power adapter). Compatible PSU doesn't come with robot. Refused to charge from 5V@3A SMRAZA PSU that can power RPi4 without issues. Refused to charge from USB ports on my power strip. Accepted to charge from iPhone charger. Charger on robots shows blinking white D4 on incompatible PSU but in instructions it is outlined as "damaged battery" condition. Thats not true. - Picky to Battery. Compatible batteries are not included with robot, instructions are not clear what are the best batteries to use with robot. I have purchased IMREN 3500 batteries as they recommended in documentation, but integrated charger charges them too slow and it doesn't properly report charge level. 100% charged battery is reported as 75% (3/4) in my case. The battery that works well is reported as has 0% charge. I have verified the charge level on Nitecore D4. - Hard to detach batteries once attached to charge externally. Why charge externally? See previous bullet point. Have to use screwdriver to pull back batteries. Any accidental physical damage to lithium battery could cause short-circuit in battery and battery fire. Definitely not designed for safety. I advise to learn how to deal with lithium batteries on fire in advance ;-) just to be ready for worst case scenario. - The software is crap. The client is crashing periodically (may be just on mac, did not test on windows) with segfault. Video streaming doesn't work as well (again, mac). Default servos calibration is not sane. - Some assemble steps are hard to do without having tiny fingers :-) - Instructions could be much better. A lot of water in instructions, some statements are incorrect or misleading. Tips: - Follow instructions where "tape" is mentioned. Tape in right place could save a lot of time because tape will hold nut in the places where it is hard to hold nuts using fingers. - If servo test doesn't work, I would recommend to edit "Servo.py" and replace "4096 * ((angle * 10) + 850) / 20000" with "120 + (510 - 120) * (angle / 180)" - Don't trust battery charge indicator - Don't trust battery damage indicator - Use PSU from phone charger - Don't use IMR batteries (charge level, charger and damage indicator is not correct for them), try regular Samsung dig discharge current batteries - To achieve best results you need to properly center servos on 90 degrees position. If you can't get that then try these two advices: a) swap servos - some servos could fit better specific position than others b) rotate white disk servo arm on 180 degrees - it could work better for some positions - If you see missing or damaged parts - return and order new one. It is faster than contacting Freenove support and wait for 12 days, especially, if you have just 30 days to return. I have removed 2 stars because: - Support is more confusing than helping. Asks to run experiments, swap servos, swap pins, etc then record videos and take photos and upload to them. Finally, not being able to detect root cause - they are sending new parts with 12 days shipping from China. And new parts once arrived did not fix the issue. - I have to fix provided software on my own manually to get it working.
J**G
Robo-Cat's RULE!
As a relatively new user of the Raspberry Pi, I was impressed by the setup instructions contained in the tutorial. It starts by explaining the differences between RasPi boards, what cables or adapters are needed, and how to setup and install software. I learned how to use the remote desktop, PuTTY and VNC Viewer to connect to my RasPi instead of using a separate monitor, mouse and keyboard like I had previously done. As a side note, I decided to use the RasPi 3B for this project since it is less expensive than the 4B model and it uses less power. By opening up the tutorial in one window on my laptop and the remote desktop (VNC) view of my RasPi in another, I was able to quickly copy and paste commands from the tutorial to the command prompt window. Concerning the hardware, the most tedious part was peeling the protective coating off of each of the acrylic pieces. The bolts and nuts were in individual, marked bags which made them very easy to locate. Acrylic pieces were not marked, but matching them up to the photos in the tutorial wasn't too difficult. I appreciate that there were some spare acrylic pieces as well as extra nuts and bolts. I thought the directions were simple to follow, but sometimes I had to recognize that only one or two fasteners were shown, when that particular part may require four to be installed. The photos helped a lot, especially when putting the servos together properly. I was able to overlook the minor Chinese to English translation errors because I knew what the text was trying to convey. Overall, I was quite impressed with my new Robo-Cat. I was expecting it to take a lot longer to assemble from other reviews I had read. Maybe that is because I have a lot of experience trying to decipher Air Force technical orders which were written by well-meaning engineers. Ha! Finally, my experience was made much more pleasant by using my magnetic screwdriver, tweezers, needle-nose pliers, and hobby vice.
E**D
Customer support is non existent.
I really want to say this is a great product and for the most part it is but if you buy this then your on your own because support does not exist. I purchased this as a project for the family and after two months of it sitting I decided to build it and then the family can play around with it. First off the instructions you will have to download from the website which is not an issue but the instructions are for the most part correct but there are a few times when I had to figure out the bad drawings because they didn't make sense. As for my biggest problem I got 3/4 of the way done and it wasn't that hard to follow the directions and everything worked until i got to the last servo test and one of the servos was not connected correctly so when it was connected it snapped into place which was not the position it was supposed to be in and it caused a stress fracture on the back support which eventually broke. I reached out to support on the website and got an automatic email back saying they would be out until a certain date and it would take some time to get back with me. Well the email was sent on the certain date and to this day I'm still waiting for an email to answer a simple question of do they sell spare parts. I'm going to assume at this point they do not or they would gladly want my business. So if you buy this item be aware that if something breaks you will be on your own to figure out how to fix it if its even possible to fix it.
P**T
it is not going to replace your cat or dog - power issues and glitchy software
The idea that you can get a kit to make a walking robot from a Raspberry Pi was too much for me to pass up. I had several unused Pi boards laying around, so this seemed like a fun project. First of all, I'm a Systems Engineer by profession. I deal with electronics, electrical, thermal, mechanical, and software engineering on a daily basis. I would not recommend this kit to anyone that is not comfortable with mechanics, electronics, computers, programming, and the Linux operating system. That being said, this was one of the most frustrating builds I've done in a long time. You'll operations where you'll need magnification, 4 hands, and tiny fingers. First of all, you need batteries - 18650 cells to be exact, and you are not going to find these on your local grocery store or hardware store shelves. Luckily, I had a few USB rechargeable flashlights that I could borrow these from. About 30% of the documentation is how to setup the Pi. Basically just make sure that you have it setup with stock Raspberry Pi OS, it connects to WiFi, and you can VNC or SSH into the Pi. You have to enable I2C, Camera, and a few other things and clone their python code from a GitHub repository. In the box is a surprising number of servos, packets of screws/nuts, circuit board, cables, and components. The plastic pieces are punched out of some kind of CNC cut plastic sheet material. They are taped into the sheets to keep them from coming out. Be careful here. It does come out easily if pressed straight out, but the material is quite brittle and I did snap some corners of parts removing them - but nothing that would impact function. There are some spares of critical components which is a nice bonus. The build was quite interesting overall. Not how I would have engineered this kit. Very tedious, small, and next-to-impossible operations. You have to randomly (Yes, the instructions tell you to do it randomly) connect the servos, run a program on the pi to index the servos, and then assemble the legs while the pi is running and power is connected. You have wires going everywhere and it is a bit of a sh*t show. The instructions are vague in areas, and then there are some sentences that are somewhat confusing due to the translation. Once you get the kit built, and all the servos correctly attached, it does have a somewhat fun and satisfying validation check of all the components. After you have everything working, you then need to calibrate it. It comes with a paper sheet and extra calibration legs that you attach to the robot. You align the calibration legs to their places on the sheet, connect to the robot, and then fine tune each leg to the correct spot on the sheet using X, Y, Z adjustments in the calibration software. Once the calibration settings are done the robot is ready to walk. It does not walk very fast or very far. The battery life is not great... maybe 7-8 minutes from a full charge if you are walking around a lot. The client software on Windows is very unstable and crashes often. The robot occasionally gets "tired" and won't let you walk for a while, assuming while it "rests" - mind you, this can be after walking only a few inches. It only walks well on smooth surfaces, and easily gets stuck on the edge of a very low/thin carpet. The camera is OK and does the job, the sonic range finder is somewhat inaccurate while walking around. The facial recognition, an impressive feature, is glitchy like the rest of the software. I had it try to recognize a person, but it was more interested in recognizing the door behind the person. Maybe this could be used for the robot to recognize it's location in a house by recognizing objects? I had plans of making this into a smart roving robot that could navigate my house, take pictures of things, walk up and down stairs, recharge itself wirelessly, etc. Sadly, this robot, as it is designed currently, is not capable of these tasks. It is a fun toy to go put out by the cats and watch them stare at it as it clumsily shuffles around an inch at a time for 7-8 minutes while constantly restarting the client app after it crashes. Then, back to the charger for hours, until the next session. I am using a Raspberry Pi 4, which does have the highest power consumption of all the Pi devices. I tried using the Pi Zero W which is supposed to work. However, the camera ribbon cable appeared to be incompatible with the one supplied. I am curious to see if using a lower power Pi would extend the battery life. This kit took me about 8 hours to build, and I think it was worth it for the price. It was frustrating at times, but does look really cool when powered up and standing, and it is oddly satisfying to be using VNC or SSH on a "robot".
S**H
This
Good product worked as expected.
ま**ー
完成度の高いキットだと思います
以前に、Freenove_Hexapod_Robot_Kit を購入し、 面白かったので、こちらも購入してみました。 マイコンボードRaspberry Piは付属しないので、少し高額になりますが、 私は、使用していないRaspberry Pi 3B+ を持っていたので、迷うことなく購入しました。 サポートは、迅速に対応してくれたので助かりました。 Raspberry Piの使用経験者またはLinuxの経験者であり、 ラジコンなどでサーボを使用したことのある方でしたら、 スムーズに完成まで たどり着けると思います。 ダウンロードしたファイルの場所(ファイルパス)が説明書と異なる場合、 ユーザー名が説明書と異なる場合など、ある程度のLinuxの知識は必要になると思います。 私が使用した機材などは、 Raspberry Pi 3B+ Windows10 パソコン Raspberry Pi OSは64ビットを使用しました。 2022-09-22-raspios-bullseye-arm64.img.xz 今はOSのインストールがとても簡単なことに気付きました。 ダウンロードしたファイルを実行するだけで、イメージャーが起動し、 後は指示に従うだけで、SDカードに書き込めます。 ここで使用する VNCサーバーやPythonなどは既にOSに含まれていましたので、 追加でインストールするものは何もありませんでした。 私はVNCを使って、Windows10マシンからRaspberry Piを操作しました。 (チュートリアルどおり) 以下、大まかな流れを説明します。 ここで使用するソフトウェアは、メーカーサイト、またはGitHubからダウンロードして使います。 本体を組み立てにあたって、サーボのニュートラル点を出す必要があります。 私はサーボテスターを持っていましたので、それを使用しました。 チュートリアルどおり では、各サーボを制御基板に接続し、 setup.py を実行します。 組み立て終了後、 test.py を実行して、配線などをチェックします。 正常であれば、 ロボット側で、main.py を実行し、 WindowsPC側でwindows.exeを実行し、LAN経由でロボットに接続します。 その後、 キャリブレーションなどの調整をします。 ロボットの操作は、パソコンやスマホからLAN経由で行います。 スマホには、メーカーが提供するアプリをインストールします。 Freenoveのキットには、必ず予備パーツが入っています。 このキットでは、 アクリルパーツが数点 サーボが1つ ボルト・ナット・ビスがそれぞれ数個 ですが、サーボが1つ不良品でした。 中を点検したら、モーターのはんだ付けがとれていました。 総合的に、 完成度の高いキットだと思います。特にチュートリアル(組立説明書)はよくできています。 また、サポートも迅速で良いと感じました。
M**T
Really nice Robotdog
It took me some time to put this robot dog together but it was a lot of fun. If you follow the tutorial most most steps are understandable and work well. If things are unclear you can always send a mail to the Freenove support team and they will usually answer already by the next morning. They are very helpful and have in one case even sent me a replacement board. Most difficulties I had with installing the right debian OS and later testing it. Once the camera software didn't work until finally I had to re-install the whole OS and then it worked. Installing the opencv software was a pain since there have been many changes recently and it took me some time to sort it all out. Some Linux troubleshooting skills are certainly helpful. Now the robot dog is all up and running and it can really walk forward, backward and sideways and there are a lot more things to explore. For example the dog can recognize a face and act on it. The tutorial encourages you to write new software and that will be the greatest fun part. I am looking into using some AI to improve the walking or follow or act on seeing some objects. If you like to explore a completely new robot type and have fun putting hardware and software together this is for you! Also a great example for practicing on Python on a practical example.
K**R
Fun but not a smooth journey
Instructions ok. Product quality ok. The perspex may break if one tries too hard. Just repair with superglue if breaks. But the servos were bad. I have 4 down and replacement came free but after a month still not delivered, perhaps due to covid. Ihad to spend another 100$ from amazon to try replace with diff brand s of servos... So what i mean is a finely designed product and very good customer service response, but somewhat servos gave me trouble. They are the lower end servos to begin with. They will heat up as a sign of failure. Presumably so for a basic kit of this price but could freenove do more qc for the servos at packing?
D**Z
Lo bien que está fabricado
Es entretenido de montar pero despues se disfruta haciendolo funcionar
Trustpilot
3 weeks ago
1 month ago