📸 Snap into the Future of Imaging!
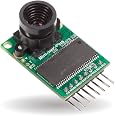
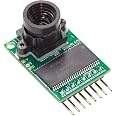
The ArducamMini Module Camera Shield is a high-performance 5MP camera module designed for versatile use across multiple platforms, including Arduino and Raspberry Pi. With its I2C and SPI interfaces, customizable lens options, and lightweight design, it’s the perfect choice for tech enthusiasts and professionals looking to elevate their imaging projects.
| Brand | Arducam |
| Package Dimensions | 16 x 7.1 x 4.2 cm; 30 g |
| Item model number | B0068 |
| Manufacturer | Arducam |
| Colour | Black |
| Standing screen display size | 0.94 Inches |
| Screen Resolution | 2592 x 1944 |
| Processor Brand | ARM |
| Processor Type | Tegra |
| Graphics Chipset Brand | arm |
| Graphics Card Description | Dedicated |
| Graphics Card Interface | PCI Express |
| Connectivity Type | Infrared |
| Wireless Type | Infrared |
| Operating System | Raspberry Pi OS |
| Are Batteries Included | No |
| Item Weight | 30 g |
| Guaranteed software updates until | unknown |
A**O
Great camera, with caveats
UPDATE 11/29/20213 cameras deployed so far on remote mountain tops. They are working consistently, delivering snapshots at 640x480 every 5 minutes.Original ReviewSo now that I've worked on this for awhile, it's time for the review. My reactions to this camera have veered from a single star to the 5 I'm giving it now.TLDR: Camera is great, IF you put the time in.I specifically chose this camera since I needed something that would sip power (for solar/remote applications), interface easily with small MCUs, and take pictures of at least 1600x1200 resolution.The camera's documentation is challenging, but accessible. The libraries are not clean or designed for the beginner, and in some cases cause corruption themselves. The camera is susceptible to interference, so short cables, faulty and cheap breadboards, and other things of that nature will give unexpected results. Even in the best case scenarios, the camera is a bit inconsistent, so your code needs to account for that. Sometimes when you ask the camera to snap a picture, it'll work somewhere between the first to 5th try.After heavy modification of some of their example sketches, isolating and correcting sources of interference, and building enough redundancy in the code, this camera is consistently snapping pictures and uploading via cellular to a server, without the use of an SD card. The camera's large 8MB buffer is extremely useful in this regard.Will this camera work out of the box. No, it will not. Not without some work put in. This camera is for the amateur electronic hobbyist, not for the regular consumer or for commercial applications. Have fun!
J**R
Trouble in Paradise
I got both the 2mp & 5mp cameras and the mating shield. The 2mp camera keeps coming up with an error saying it can't find the 5mp camera. I have got images from the 5mp camera up to 1600x1200 but above that resolution no valid images were saved. I have had no success with video. Help seems to elude me on both the Robotshop and ArduCAM websites.
C**C
Fun and worth it
This certainly took some experimenting to get to work with my ESP32 WROOM module but it works well. The frame rate is pretty disappointing but I think it's just the reality of trying to squish video through the I2C interface.
A**L
Great support!
I purchased the Arducam for a project and was initially unable to get it to work. I reached out to their support team and they were super helpful. They patiently worked with me until I got it working. It's awesome to have it backed by a great team.
T**H
ArduCAM Mini_5MP_Plus
Update 01/21/2019Processor-hungry camera meets Arduino…results mediocre.Following another couple weeks of evaluation I’ve got to withdraw some of my enthusiasm for the ArduCAM 5MP Plus camera module. While the ArduCAM Customer Support gets an “A” for effort, that is primarily limited to them insuring the camera works with their Host Application and afterwards they are long on excuses and short on answers.As far as the hardware, please understand that image processing takes a lot of processing power and while ArduCAM includes an 8MB fifo buffer that is not nearly enough to do anything with speed…now, reality sets in. In their Host app, with a “Single” 320x240 image it processes rather quickly, but it is of too small a size to be very useful. A 2592x1944 image provides a lot of detail, but takes nearly 15 seconds to process. For the remainder of my evaluation, I settled on 640x480 resolution. Now, it is my understanding that the camera is constantly generating a video output stream. In the USA that would be 29.97 frames per second, or an “exposure” of ~1/30 second per frame. So, when you capture an image it is actually a frame of video. Any movement within the frame will be blurred. I have found that with “Continuous” mode and a middle-range resolution the images are blurred and unusable as you pan the camera.Next I used their “Capture2SD” sketch to write images to an SD card and I modified the sketch to incorporate a PIR sensor to trigger a three image capture sequence. While it worked “as-advertised” so to speak, the images were abysmal…movement of anything within the frame was blurred. Naturally, without an RTC there is no time reference to when the images were captured and written to the SD. File size of 640x480 images is about 40kB…that’s a lot of compression. If you want a PIR activated camera that writes to an SD, buy a TrailCam…you can find them on amazon, with 8MP for stills or video, a weatherproof enclosure and includes a time stamp and IR low-light capability.They say you can hook up the camera to an ESP8266 ESP-07 and view images on the web. Based upon the images results I have obtained so far, I’m just not going to waste my time. You want to see your images results on the web, buy a WebCam and use the power of your computer, or select a product from any number of companies that provide surveillance equipment; RING, for example.With the amount of processing necessary for images, I think this camera would need to be modified to at least quadruple the processing power and even then, combining it with the Arduino platform limits its usefulness.Update 01/13/2019Now I have gotten the camera working and I've got to give ArduCAM an "A" technology-wise for developing an advanced camera product and applications for Arduino microprocessors. However, documentation-wise, I'll give them a "C" because for something as tricky as a camera, the documentation needs to be spot-on to prevent hours of frustration. Customer support-wise, I'll also give them an "A" as they have been very responsive and also confirmed they will update their user documentation based upon my detailed input of issues. The camera is indeed nearly plug and play, BUT you need to be vigilant and have some level of IDE programming experience. Newbies could go 'round and 'round with minor conflicts/contradictions in the documentation. Here is a list of what I found in following their online Minis Camera Tutorial:1. While the tutorial recommended sketch, ArduCAM_Mini_Video_Streaming, states within that it is specifically for 5MP_PLUS, if you uncomment the 5MP_PLUS in the memorysaver.h file you will receive a compile error. You have to uncomment the 5MP line. Then, for some reason I was getting a compile error for the #if loop in the second (Shield) section of memorysaver.h, so I commented that whole section...complied fine.2. The pdf Application Notes and online tutorial should emphasize that the Host application comes bundled within the arduino-master.zip file. The Application Notes point to github, yet it is not possible to completely download a workable copy that way.3. The Host application does not have a tutorial specifically for the mini_5MP. I finally found a tutorial for a shield version that was somewhat helpful...the main problem is that there is mention of setting the COM port AND the baud rate...well, the Video_Streaming sketch baud rate is 115200, yet ONLY 921600 will work for the Host application...confusing.4. For the Mini_5MP_PLUS, the proper sketch that should have been suggested in the online tutorial is ArduCAM_Mini_5P_PLUS_Video_Streaming and uncomment the 5MP_PLUS line in memorysaver.h According to ArduCAM support, that tutorial was originally written for the Mini_2P and has never been updated.5. The ArduCAM wiring diagram is fine.Next, I'll be investigating some of the other sketch Examples and going on to the ESP8266 platform with my 5P_PLUS.I hope this helps someone.End of Update01/10/2019So, I'm writing this after first attempt at getting it to work. Updates later. Mfr states this is almost plug & play without writing code. After following detailed online tutorial, it WILL NOT compile...I have written to [email protected] for help...let's see when I receive response.
Trustpilot
2 weeks ago
1 week ago