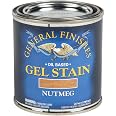
✨ Elevate Your Craft with Nutmeg Magic! ✨
General Finishes Oil Base Gel Stain in Nutmeg is a heavy-bodied stain that provides a lustrous finish, perfect for achieving an even appearance on challenging woods. Its easy application method ensures a mess-free experience, making it a favorite among woodworkers and DIY enthusiasts.

| Color | Nutmeg |
| Brand | General Finishes |
| Surface Recommendation | interior raw wood surfaces |
| Material | Gel |
| Model Name | B267-UL 1/2 Pint |
| Size | 1 Half-Pint |
| Coating Description | Oil-based |
| Item dimensions L x W x H | 2.88 x 2.88 x 3 inches |
| Item Weight | 4.8 ounces |
| Coverage | 35-50 sq.ft. |
| Opacity | 1 inches |
| Compatible Material | Wood |
| Liquid Volume | 0.04 Quarts |
| Package Information | Jar |
| Number of Items | 1 |
| Manufacturer | General Finishes |
| Base Material | oil |
| Unit Count | 8.0 Fl Oz |
| Paint Type | Oil |
| Finish Type | satin |
| Global Trade Identification Number | 00606016102730 |
| UPC | 606016102730 |
| Part Number | NH |
| Product Dimensions | 2.88 x 2.88 x 3 inches |
| Country of Origin | USA |
| Item model number | B267-UL 1/2 Pint |
| Is Discontinued By Manufacturer | No |
| Finish | satin |
| Item Package Quantity | 1 |
| Included Components | General Finishes Oil Base Gel Stain, 1/2 Pint, Nutmeg |
| Batteries Included? | No |
| Batteries Required? | No |
L**.
End result lived up to the hype, but it's a lot of work!
I've been entertaining the idea of gel staining my cabinets for a long time, however I never thought it would come to fruition until we decided to change out our kitchen countertops, floors, backsplash. I was thinking on replacing the doors/drawers and just painting it white, however the budget was already creeping up with other expenses and I feel my existing doors would look better as a dark espresso moreso than white. I've read the reviews, read questions/concerns, viewed many tutorials, etc and decided to pull the trigger. I would say our kitchen is on the larger side that includes 25 doors, 15 drawers, u-shaped with a large island. Overall I am happy with the product, outcome and it lived up to the hype. I knew it would require a lot of time and work, but if I could go back I would probably just hire someone. The amount of time it took in total could have easily been paid off by a professional and more if I used what I feel my time is worth based on what I can do to supplement my source of income through other means. On top of that I did sections of it before our kitchen demo/install and after. Since I am away from home for work10-12 hrs per day M-F,I could not be as efficient as I would have liked. I have oak cabinets stained walnut that were about 10 years old.I took steps similiar to many others, but broke it down into 3 sections of the kitchen since it was too large to get down at once. Prep time was probably the most tedious part that included- 1) Empty cabinets, 2) clean cabinets (I used krud kutter), 3) sand cabinets (I tried various grits and found 220 grit to be perfect lightly by hand; if I could go back I would have used a sander), 4) vacuum/wipe down cabinets, 5) tape down areas as needed. Imagine doing this 3 times. I used the sock method (with two non latex gloves). I just bought cheap socks from target/walmart I believe. I also had a small brush and sponge brush. I would the small brush was a lifesaver for the small crevices and corners. I did 4 layers of the Java stain in total. I waited 48 hours first the first coat to dry and 24 hours for the rest. I was expecting some streakiness, but was a little concerned after seeing it on the 3rd coat. 4th coat was the key winner. I think part of that is not optimally preparing some of my surface areas; poteintially due to different amount of protective coating found in different areas of my kitchen. Also the area above my range was probably not cleaned as well as it should have been. I did all my doors/drawers in the garage and numbered each one. I did not sand inbetween coats. After the final coat the stain was beautiful. Even the floor, granite installers, contrator was impressed with the work. The satin gloss is very subtle. I was damn impressed.Then came the clear coating. I waited an entire week before applying it. I then very lightly sanded with highest grit sanding sponge I could find (I believe it was 220) and wiped the dust down. I used wipe on with rag/sock and sponge brush. I found all methods to work great. Very easy to go on and gives you a lot of wiggle room. I initially purchased the GF Gel Top Coat in Satin. http://www.amazon.com/GF-Gel-Topcoat-Satin-Quart/dp/B001F7R320. I did 3 coats on my island and a standalone cabinet and it came out great. It also whitstanded through the demo believe it or not. The satin sheen was similiar to the Java satin sheen and if anything you could see the grains of the oak cabinets a little more. I did not notice it enriching the color significant either. It kept it pretty consistent. I was very happy about the results, but I decided to try another product due to the high VOC content of the top coat (wife is pregnant and insist to use part of the kitchen). Since this was still 1/4 way through I had to be reasonable and ended up purchasing a non-VOC top coat off in satin from another website. This is when it all went downhill. I didn't realize what type of skill is needed to apply a top coat, until I purchased this. It made me realize how good the GF topcoat was. My cabinets looked horrible. I should have tested it out first. It was 10x more diffiucult to apply and my cabinets not only looked streaky, but their satin looked more like semi-gloss. It also darkened the cabinets noticably more compared to the original coating. I thought I ruined my kitchen. I decided to do more research and found that the most important coat is the last coat. I learned better technique and tools and redid a large portion of my kitchen. Luckily my new technique did wonders and I was able to coat it streak free and the sheen was also a lot less subtle for some reason. Possibly due to putting it on thinner and I made sure I mixed it very well. I did 3 coats total.The end result came out great despite the scare. I ended up using 2 quarts and still have a little left over. It took me about 6 weeks solo to do my large kitchen, working full-time and other priorities that I could not push back. Like I mentioned if I could go back I would have just hired someone, but that is only because I can supplement my income in a lot less time I spent doing this project to just hire someone. I think that there are so much variables to consider before just doing it so do your research, be patient and trial and error. Everyone's surfaces are different; different wood, coatings, dirt, details, etc. So understand the optimal way to prep for your actual surface. I also think technique and having the right tools plays a role especially if you have a more challenging surface such as a door with all types of crevices, details, corners, etc. Too me that was the most difficult part was because of those challenging areas of the door. So my two biggest tips would be good preperation for your project and learning the proper technique/tools to do the job. Oh yeah and patience too.
B**7
LOVE THIS STUFF
I am doing away with all the honey oak in our house - and there is A LOT. I started with the vanity in the bathrooms and then moved on to the kitchen (which is in process now) and railings. This stuff is GREAT. Here is why I like it so much:1. Once you get the process down it's easy-peasy to complete - just takes time (see below for my process)2. It's a very rich color - it may look black and at first glance however it is a very dark rich brown3. I have put the top coat on (GF High Performance water based in satin) for most of my work and it seems to be holding up well - good with humidity (vanities in the bathrooms) and constant use (railings)4. Keeps my wood grain so it looks more natural than painting5. What do you need: gel stain, top coat, sand paper, TSP substitute cleaner, lint free rags, foam brushes, drop cloth, painters tapeYou must have patience while going through the process - not so much for application but making sure you allow sufficient dry time between coats - with proper prep I was able to get to the full dark color in about 3 coats (I may have had to touch up some spots here or there.Here is my process:1. lightly sand surface (break up the top coat) - if you look online you see folks that say you don't need to sand - while that is true, I found I needed an additional 2 coats if I didn't do this prep - thats more material and another 48 hours added on to my time, so I took the time and prepped properly.2. Use a TSP substitute (also a deglosser) to help with what you just broke up. I followed directions for diluting the solution and sprayed it on (cover other surfaces!!) and let sit for at least 5 minutes then wipe off with a damp cloth.3. after that has dried, grab some gloves and crappy clothes and a foam brush and start the application - first make sure you stir the gel stain well and put it on your application area thick - I mean, it looks like you can finger paint in it thick - you shouldn't see much of the actual wood at this point4. Wait - once you apply the gel stain (make sure not to apply to an area too big - you can't have it dry before wiping off) you wait about 10 mins (humidity, temp etc will affect it) you can start wiping it off. I always brush the foam over my rag to put a little down - if you start with a 100% clean cloth you will take off more material than you want to. You want to wipe it down until it looks like there is no more sitting on top - don't press too hard, some of what set was directly on the wood - but you don't want "globs" of the stuff left on there - I'll try and get a pic of this as I work through my cabinets.5. Now wait some more - 24 hours minimum to be exact between each coat - DO NOT SKIMP ON THIS or you will not be pleased.6. After all coats are complete slap a clear coat on there (after waiting 72 hours after last application before clear coat) which thankfully you can get 3 coats on in 1 swoop as there is only a 2 hour dry time (for the GF clear coat)If you're not sure this is for you - pick a small project first, or even just a random board so you know how it goes - it's not for the weak of heart but I do love the outcome and would do it again and have never even considered using another brand of gel stain!
B**H
Amazing product!
This stuff is magic in a can! I watched so many Youtube vid's & read so many articles - I decided to give it a whirl. It's scary at first - looks a bit nasty when applying, definitely panicked a little - but something magical happens during the drying process. Self levels nicely, still shows the grain of the wood - I'm painting it on fairly thick - 2 coats - 48-72 hours dry time in between at 70 degree house temperature. Try to eliminate any back brushing - once you apply - move on - you will cover any missed spots during 2nd coat. (windows open a little with vents on during application process). I'm just waiting for top coat to come in (Arm R seal satin is a little too shiny for me during testing) - I'm waiting for high performance top coat in Flat. Pictures are mid-project.
J**R
Great product has me loving the results!
Very forgiving & easy to use. As you can see, it's also very versatile! I used stain on both kitchen cabinets (2coats) &on top of stools (3 coats), with different results based on technique. For cabinets & banister (1 heavier coat), I used a foam brush & they did not get "wiped off" between coats, so coverage is darker, more opaque & more like that of paint. On stool tops & stair treads (3 coats), stain was wiped on using old white socks &, therefore, is more translucent & more grain is showing through. Mantel only got one coat using sock method & the pretty grain is showing through beautifully. Looks a lot like a walnut stain.I'm very happy with the results! Gorgeous upgrades to golden oak without the price tag of a replacement. WIN!A few tidbits: 1- it does have an odor. I have sensitivities to chemical vapors, so I wore a carbon filtered mask & kept windows open while I worked in short time frames & was fine. I then ran ceiling fan & sat outside or ran errands while it dried a bit & the odor dissapated. The one time I took the mask of early to clean up in the kitchen I got a huge headache & did not make that mistake again!2-Do not go over previous stained spots until they are completely dry (I gave them 24 hrs between coats). You end up pulling the previous stain & you now have a splotch w/very little pigment. Not pretty! Wait, and just add the extra coverage you want on the next coat. Otherwise you just end up pushing the pigment around & it doesn't stick to anything already gone over before.3-And the BEST tip for last. I put off using this product (& thus my projects) for a long time due to the fear brought about by people warning it stains skin, nails, & basically everything it touches & their horrible experiences of trying to get it off. Well, turns out it's SUPER EASY to get off your body if you use coconut oil! I just scoop a dab from my jar, rub it all over where I have stain (it smears all over & looks like you're just making a bigger mess, but don't worry!!). It then just comes right off & transfers to the paper towel I use to wipe it off. Another WIN!I then did not use my jar for any other purpose, but for this since some stain did transfer from my hand & onto oil in the jar. So I recommend pulling some out & placing in a second container to use specifically for this purpose & not having to sacrifice a huge container of it. Also, I have not had any luck finding a way to get it out of clothing, though, so I do recommend wearing your appointed "Painting clothes" when working with this.Hope this helps & have fun with your project!
J**E
Colour is dark and rich
Bought to transform my bathroom vanity and it turned out good for the first bathroom.Will I try to do this again? Answer is No!Lost count of how many coats I applied cos each time I try to apply, it scrapes some of the previous application, and yes I waited 24 hrs between coats but had to keep touching up some scratches. The finished work looks good, but no worth the stress for me to be honest.I’ll do the second vanity and that’s it. I had plans to do kitchen at some point but No I will not be. If you are not the most patient person, use of this product might not be for you.That said, seems a great product.Caution, the Java is really dark and might be too heavy for say a kitchen.
Trustpilot
2 months ago
2 months ago