Some deliveries may take a little longer than usual due to regional shipping conditions.

DOWNLOAD THE APP


Customer Services
Copyright © 2025 Desertcart Holdings Limited
DOWNLOAD THE APP

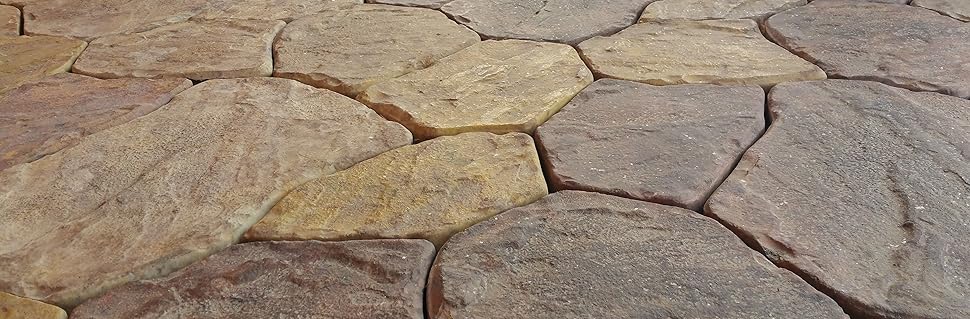
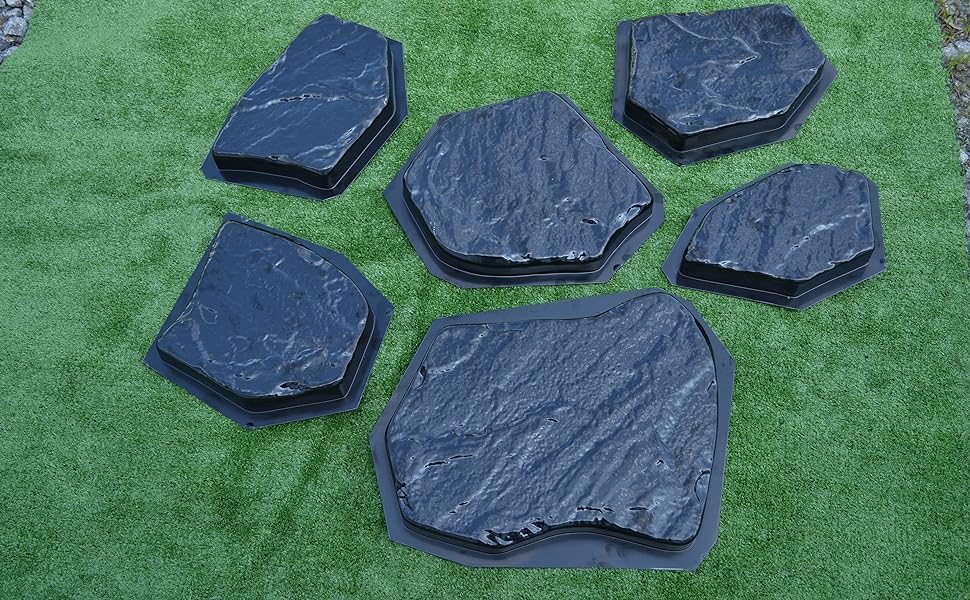
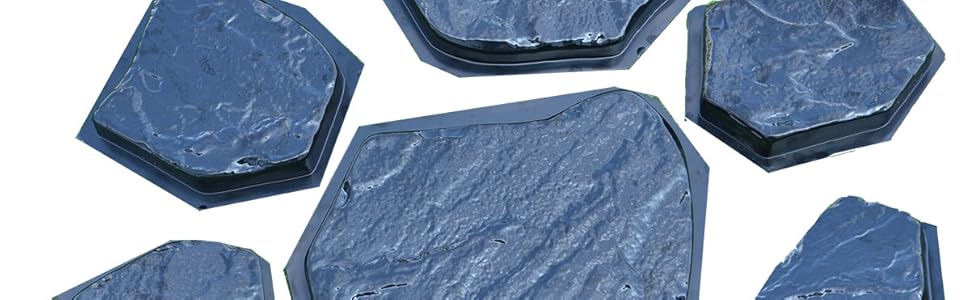
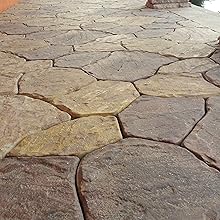
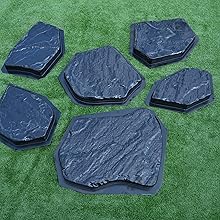
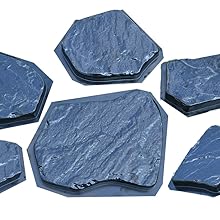
🛠️ Mold your dream garden path—because your outdoor space deserves a glow-up!
SvitMolds offers a 6-piece set of durable ABS plastic concrete molds designed for crafting textured flagstone pavers covering 0.37 square meters per pour. Each mold is 38mm thick, reusable, and supports custom coloring, enabling DIY enthusiasts and professionals to create personalized, long-lasting garden walkways and patios with ease.

| ASIN | B071FT57FF |
| Best Sellers Rank | #160,836 in Tools & Home Improvement ( See Top 100 in Tools & Home Improvement ) #5 in Outdoor Landscaping Stone Masonry Forms |
| Brand | SvitMolds |
| Brand Name | SvitMolds |
| Color | multi-color |
| Customer Reviews | 4.5 out of 5 stars 825 Reviews |
| Manufacturer | Betonex |
| Material | Plastic |
| Material Type | Plastic |
| Number of Pieces | 6 |
| Shape | Rectangular |
M**S
These are wonderful!
I love these. I used old cooking oil (canola and olive) as mold release and swooshed a bit on paper towel to help get the concrete hardened out of the molds. I also used a massager, the log kind for athletes wrapped in a trash bag to keep it clean, and put a cat litter box on top of it upside down, then put a mold at a time on top of that, to shake out the bubbles that form (cheap shaker table). Home Depot, maybe Amazon too, sells polypropylene sheets about 1/2” or so thick, that replace the slag you would normally put under pavers. Saves your back. The patio I made was about 45 bags of 50 pound each high strength crack resistant concrete. I am not strong enough to move 80 pound bags (a lady). Screed the sand, put down a barrier layer, and tamp down the pavers. I dyed some of them at random. I used pigments but heard you can just add paint too. Took 24 sun hours for them to cure completely, and for a few, instead of cutting with a saw, I used popsicle sticks to partition where I wanted a half sized piece, and forced them into the mold once the concrete had started to set. For filler around the pavers, I used high grade stuff, ~ $25 a bag near me, not the filler you can get at HD. It is called Polybind dust, comes in 2 colors and fills up to 6” gaps. I used it on my driveway too, rather than the caulk filler many use when spaces between concrete are a trip hazard. Have had patio 2 summers now. Looks great. Sealed it with some high $$ stuff. Not one weed came up, and I live near woods. Awesome product. Buy two sets if you can, of molds. Work goes faster. Peace. ADDED A THIRD PHOTO 10/22/2024. THESE ARE THE PAVERS TWO YEARS LATER. IT IS FALL, THEY HAVE NEVER HAD A WEED, and HOLD UP GREAT. 10/7/2025 update…The last photo, with fencing, is another patio I built, with a connected walkway. Built this summer, in Michigan. The patio built this year, is 13x12 feet or so, edged with red paver bricks store bought, and I poured 45 bags of 50 pound crack resistant quikrete, with fiberglass in it. I used leftovers for a walkway between the other patio I made three years ago, and the new one. Those leftovers are not fitted like the pattern but the rest is. I use two sets of molds, about 2.5 bags concrete for each 12 molds filled, about 7.9 sq feet each set of 12 poured. You can dye some. I used brown, terracotta, black etc. I used a lymphatic drain shaker/exerciser, with garbage bag over it to shake bubbles up from inside the molds, and used old olive and canola oil as mold release agent (coat the molds! before filling them). I mixed pigments (powder), dyes etc, and left some untouched. Concrete batches vary in color anyhow. You can color them afterward too, and will use less (spray bottle and damp cloth but if chipped some day old concrete with no color will show through). Sealed about three weeks after completed, with Behr wetlook sealer. Used leaf blower to even out the coats. I love these molds. A couple are cracking on a lip, but duct tape can fix it. I used popsicle sticks as dividers on a few edge pieces, some I sawed, and some edge pieces I made without the molds, using plastic edging to make the right shape, then poured, and pushed the mold bottoms down on top of my custom pieces (coated mold bottoms with oil) to make look natural. I used the black polypropylene sheets as underlayment for paver base. In summer pavers in the sun with this underneath are SCORCHERS because there is no heat transfer to the cool ground like when you use #1 and #2 paver prep rock and sand. So think about that. They are convenient and I use them…but the pavers will be very hot if in full sun all day.
D**D
Very Good Moulds
Update - I stopped using Pam cooking spray and have begun using corn oil. Reason being, the Pam would cause small air bubbles which ended up on the top of the stone. Instead, I just pour a small amount of corn oil into the mould and then wipe it all around the inside. I also figured out that just scooping a small amount of concrete into the mould while it is on the vibrating table will allow the air bubbles to escape much better. The concrete kind of bleeds out and covers the entire mould. Then just add a bit more concrete and wait for bubbles to dissipate, then add some more and so on. I am using Quickrete 5000 High Early Strength concrete from Home Depot. Through my Home Depot app the 80# bag is $3.98, but in the store it's $6+. I am also using Rapid Set Concrete Pharmacy Flow Control, one 2oz. bag per bag of cement. Three quarts of clean cold water (mark a gallon container on the outside with a sharpie and you'll have the same mix each time). I use the Quickrete color additive also, but using one container for about four bags of concrete. I picked up a 1 1/4 cubic foot cement mixer from Harbor Freight for $169 - 20% coupon and it mixes one bag at a time. Keep in mind that there will be a bit of leftover concrete from each bag, so either toss it or subtract a little mix and water. I have some other moulds that I am making so the excess goes into those extra moulds. For my setup I bought 3/4" plywood and six 2x4s. Cut the 4x8 plywood in half to make two 2x8 tables and supported them with the 2x4s cut into two foot lengths. I took an old hand sander and strapped it to the top of the table on one end and then I pour and vibrate on that end, then move the filled moulds to the opposite end of the table. Let the set for 12 hours and then make another set. They are hard ABS plastic and seem to hold up very well. The first pour were a bit tough to release from the moulds, but every pour thereafter has been a very easy release. It's down to a science now and I'm considering purchasing another set of these moulds to speed up the manufacturing process - I need 160 of these stones. They shipped super fast from Kiev. And to the manufacturer of these moulds - thank you very much. You've provided a very decent product at a reasonable price and your attention to order processing and shipping is noticeably prompt. Kudos.
D**N
Simple to Use, Professional-Looking Results
These molds are excellent! The sizing is exactly as expected, and they’re lightweight and easy to work with. With a light coat of vegetable oil, the concrete releases effortlessly from the molds. The results are both beautiful and functional, making them perfect for creating a great-looking sidewalk.
W**P
Good quality.
Molds are good. If they were numbered the pattern would be easier to follow. Make sure you lube before pouring concrete.
J**L
Great product! Use release agent! Aka olive oil
I'm amazed by the detail you get out of the product. I have a lot of stones to make and so I opted to make a shaker table out of some tires and plywood. I highly suggest this route for those making a lot. I used Crack resistant concrete (contains the fiberglass reinforcement) which came in 50 lbs bags this will fill exactly 5 molds leaving the smallest so you'll need to experiment with portions. I tested my first two batches without a release agent and the second batch had a lot of patches so I used olive oil for its thicker consistency and the third batch popped right out. So far so good I plan on updating review later after installation. (Update) These mold are great for the look you want while staying cheap. I've added finished product photos one is straight concrete and all the stones have a lighter color. I applied a wet look sealant and it looks even better(other pic). There were some different colors but it's because I was going to different stores picking up small batches of concrete. Which turned out really well. I suggest using paver base panels (the black ones) because fitting the stones together with proper gaps took a bit of adjustment and the panels allowed for easy adjustment, no sand under the stones. Undertaking a large project is not for the light of heart I bought two sets and still took a month to make the amount of stones. Happy DIYing
C**G
Fun and easy! First try successes and mistakes
My first try came out nice enough to use in my project. I think I have some great tips derived from my lucky choices and stupid mistakes. Successes. 1. Oiling: I read a couple of reviews before I started and decided to follow the advice of using, used frying (peanut) oil. I wiped the moulds thoroughly with a soaked paper towel; not dripping. I think heavier oil is better than lighter(?). 2. Demolding: I have no idea why anyone has had demolding problems. I flipped the moulds over, held the edges with my fingers and put light/medium pressure with my thumbs and slowly worked the slab out. It took me no more than a minute for the most difficult one. 3. I used Sand Mix concrete. I have no idea if normal concrete would work as well, but for the slightly higher price, my first attempt worked out, so I'm sticking with it. 4. Colorant: I used Quikrete Liquid Colorant. Another poster mentioned that the color at 1/2 bottle per 60/80lbs of concrete is overkill. I second that! I used about 1/3 bottle and it's too much for my taste. 5. Bubbles (lack of): My BEST tip! For a shaker table, I used a 1/3 sheet of plywood on a 2x4 frame and caster wheels. My idea was to slosh the molds back and forth. That worked OK, I saw a few bubbles rise, but then out of the corner of my eye I saw my SDS-Plus hammer drill. I powered it up and set to the lowest setting, and applied it to the table bed. Wow! bubbles popped up like the concrete was made with carbonated water! Mistakes: 1. Mixing Concrete: I planned to mix the concrete in a 5-gal bucket with a drill mixer. When I started to pour the concrete in, at first it was great, but then a few concrete chunks feel into the mix and it was near disaster. It splashed everywhere. I recovered by transfering to a wheelbarrow and spade shovel. It took a lot of work to eliminate the chunks, but as my picture shows, it wasn't a total loss. My tip is empty the concrete into the mixer or tub dry, eliminate chunks and then add colored water. Bottom line: The moulds are over priced, but they work very well. I'm a DIYer to the end and I am having a lot of fun. I understand posters who said they wish the moulds were less expensive, so they could produce the pavers more quickly. As for me I have the rest of my life to perfect the art. I plan to experiment with varying the color shades in the stones to make them look more natural.
N**R
Very useful for DIY projects
These rock... pun intended! We were looking to add some pavers to our side door and after looking into the price to get all of them, we looked for some more (cheaper) options. These molds have been great and we are able to make a whole set of 6 for the 3-4 dollars it costs to pick up a bag on concrete. They release pretty easily if you grease the inside like they recommend, and are not too large if you need to shake them around a bit to get it out. We waited about 24 hours for each paver and that hasn't been an issue. No cracks either! This is an easy recommend. Why would you pay double for the pavers, unless you were crunched for time?
T**.
So far, so good
I was looking for an alternative to expensive flagstone or other pavers and thought I would give these a try. They arrived in about 2 1/2 weeks from Ukraine, which was faster than I expected. I have made 350 so far and have learned from my mistakes. I'm using fiber reinforced high strength concrete and it takes about 75-80% of an 80 lb. bag to make a set. I tried using a wetter mixture to try to get a smoother surface but most of those broke if I didn’t let them cure for at least 24 hours but I’m on a 12 hour rotation schedule so now I use a more typical consistency with the concrete. I add a little Quikrete cement coloring to get more of a brownish color. I have the Buff, Brown and Terra Cotta colors and use about a quarter of a bottle for each batch, which is less than the recommendation but they look fine. I use one or the other color or a combination of the three to get some compatible variations in the colors. I make two batches a day. I tried for three but that didn't give the big one enough time to set up and they broke coming out of the mold so now I just do the two sets and they come out fine after about 12 hours in the molds. I enjoy the process and I have the time so we'll see. It's definitely saving me money. Not sure I like the white silica sand but that’s what was available. I still need to seal the pavers but it says to wait 30 days for that. I have done about 65 of the 75’ path so I’m close to finishing. I’ve noticed if I step on the biggest ones if they haven’t cured at least a week, the tend to break. Another thing is that they cut pretty easily with my Rigid tile saw.
Trustpilot
1 day ago
2 weeks ago