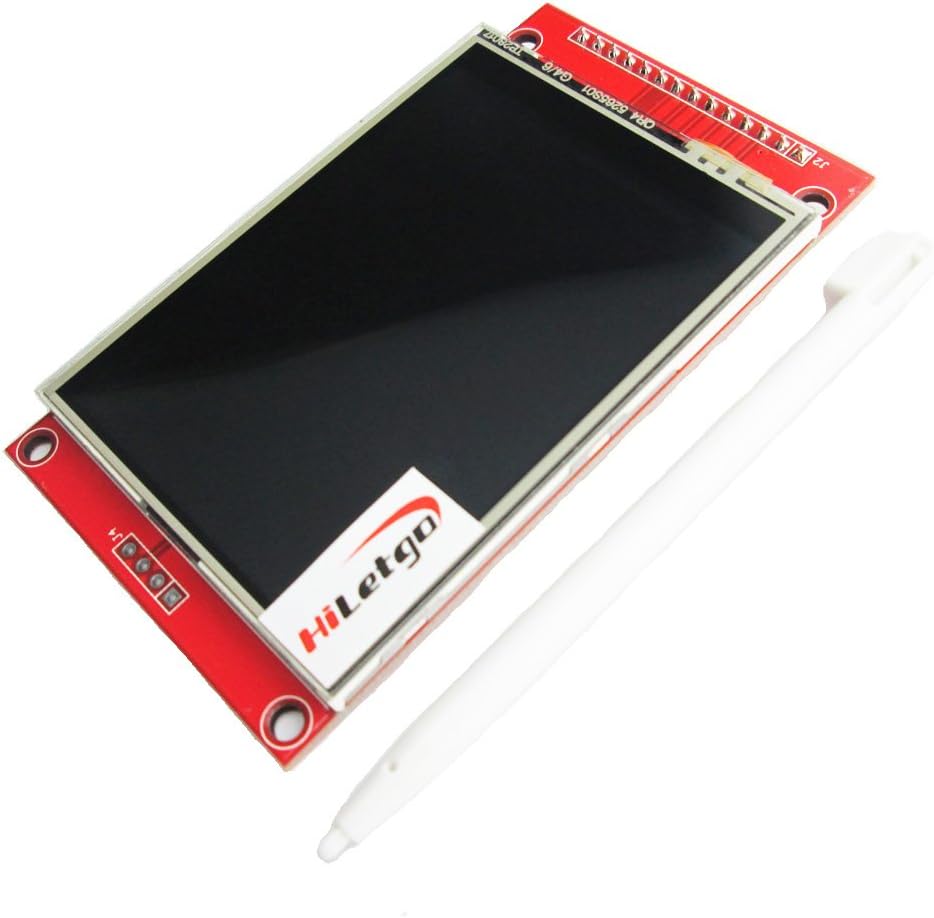


HiLetgo ILI9341 2.8" SPI TFT LCD Display Touch Panel 240X320 with PCB 5V/3.3V STM32
Product ID: 464665052
⚡Dual 3.3V/5V logic compatibility
📏2.8-inch vibrant display
🔆White LED backlight for crisp visuals
Desertcart purchases this item on your behalf and handles shipping, customs, and support to Sri Lanka.
🚀 Elevate your DIY projects with a display that’s as smart as you are!
The HiLetgo ILI9341 2.8" SPI TFT LCD Touch Panel delivers a sharp 240x320 resolution on a vibrant RGB vertical stripe display. Featuring a white LED backlight and a-Si TFT active matrix driver, it supports both 3.3V and 5V logic levels, making it ideal for STM32 and Arduino applications. With an integrated PCB including power supply IC and SD interface, this compact 2.8-inch touchscreen offers seamless integration and reliable performance for professional-grade embedded projects.
| Are Batteries Included | No |
| Asin | B073R7BH1B |
| Best Sellers Rank | #80,534 in Industrial & Scientific (See Top 100 in Industrial & Scientific) #23 in LCD Touch Panels #7,880 in Lab & Scientific Products |
| Brand | HiLetgo |
| Colour | Red |
| Country Of Origin | USA |
| Customer Reviews | 4.4 4.4 out of 5 stars (312) 4.4 out of 5 stars |
| Date First Available | 26 December 2017 |
| Item Model Number | 3-01-1433 |
| Item Weight | 55 g |
| Manufacturer | HiLetgo |
| Model Number | 3-01-1433 |
| Number Of Memory Sticks | 1 |
| Package Dimensions | 10.2 x 10 x 2.2 cm; 55 g |
| Power Source | ac |
| Voltage | 5 Volts |
User
Works with Teensy 3.2 or Arduino - here's how:
I love these displays and use them on all my projects. I've bought about 8 so far and can get them to work with either Teensy 3.2 or an Arduino Nano.For operation with a Teensy 3.21. use the <ILI9341_t3.h> from the PJRC--and this lib is very fast connect directly2. for touch use "UTouch.h"3. for SD I use <SdFat.h>4. no level shifters needed5. you may need to solder J1 (I do on all my displays)4. if you want to use SD, remove the resistors R1, R2, R3 and solder 0 ohm resistorsFor operation with Auduino Nano1. use the <Adafruit_ILI9341.h>2. for touch use "UTouch.h"3. for SD I have yet to get an SD to work with graphics due to not enough memory4. no level shifters needed5. you WILL need to solder J1 (I do on all my displays)EDIT as of 12/29/2019 Usage with Arduino connect as usual but power your Arduino with 3.3 volts (just connect 3.3 to the 5V pin on the arduino). Alternatively you can put a 1K series resistor on all pins to drop the voltage going to the unit (and power with 3v3). THESE UNITS WILL NOT WORK IF POWERED WITH 5 AND IF THE SIGNAL LINES ARE 5 VOLTS.update 2/2/2022 tips on usage to get everything working on a teensy 4.0 (or 3.2)/*This simple program will test1) the display, 2) the SD card, 3) the touch screen, 4) ability to readPixelThe readPixel is only supported by some display driverslike the ILI9341_t3 driver, there is a PrintScreen.h utility that will let yousave your screen to a BMP file and draw the fileif readPixel fails try to adjust speeds above. It's possible the display MISO is not tri stateand will basically own MISO where other devices can't use it. If so, you will need some external buffermagicIf using display with Teensy (3v3) solder J1, replace R1, R2, R3 with 0 ohmpin connectionsDisplay MCUVCC 3v3GND GNDCS 10RESET 3v3 If white screen 1) 8 or 2) use series 1K0 and 10uf to GND to slow chargeDC 9MOSI 11SCK 13LED 3v3 or connect to analog pin and use analogWrite(x) to fade brightnessMISO 12T_CLK 13T_CS 0T_DIN 11T_DO 12T_IRQ 1SD_SCK 13SD_MISO 12SD_MOSI 11SD_CS A3 (other digital pins may work, read data sheet for what pins support CS)*/#include "ILI9341_t3.h" // high speed display that ships with Teensy#include <XPT2046_Touchscreen.h> // touch driver for a TFT display#include <SdFat.h>#include <SPI.h>#define CS_PIN 10#define DC_PIN 9#define T_CS 0#define T_IRQ 1#define SD_CS A3int BtnX, BtnY;// you know the drillILI9341_t3 Display(CS_PIN, DC_PIN);XPT2046_Touchscreen Touch(T_CS, T_IRQ);TS_Point TouchPoint;SdFat sd;SdFile dataFile;void setup() {Serial.begin(9600);while (!Serial) {}Serial.println("Starting...");// start the dispalyDisplay.begin();Display.setRotation(1);// depending on your exact display getting touch + SD + display working// you may need to adjust the clock speed// default is 30 mhz but you may need to slow to 10000000 or set to as high as 100000000//Display.setClock(20000000);// start the touchTouch.begin();Touch.setRotation(1);// start the SD card// depending on your sd card and display, you may need to slow the sd card clock// I find 20 mhz to be pretty reliablebool SDStatus = sd.begin(SD_CS, SD_SCK_MHZ(20));//bool SDStatus = sd.begin(SD_CS);// test SD and write somethingif (SDStatus) {Serial.println("SD OK");dataFile.open("Test.txt", FILE_WRITE);dataFile.print("This is a test");dataFile.close();}else {Serial.println("SD failed");}// test displayDisplay.fillScreen(ILI9341_BLUE);Serial.print("Color of pixel (10,10): ");Serial.println(Display.readPixel(10, 10));delay(4000);Display.fillScreen(ILI9341_BLACK);}void loop() {if (Touch.touched()) {TouchPoint = Touch.getPoint();BtnX = TouchPoint.x;BtnY = TouchPoint.y;// consistency between displays is a mess...// this is some debug code to help show// where you pressed and the resulting map// x = map(x, real left, real right, 0, width);// y = map(y, real bottom, real top, 0, height);// tft with black headers, yellow headers will be differentBtnX = map(BtnX, 3700, 300, 0, 320);BtnY = map(BtnY, 3800, 280, 0, 240);// Serial.print(", Mapped: ");// Serial.print(BtnX);// Serial.print(",");// Serial.println(BtnY);Display.fillCircle(BtnX, BtnY, 3, ILI9341_RED);// delay(5);}}
User
Works well
Works well
User
ottimo display, ma non funziona la scheda SD per leggere le immagini
ottimo display, ma non funziona la scheda SD per leggere le immagini
User
If a logic level shifter is used these displays work with 5V Arduinos
The easiest and least complicated way to use these displays is to connect them to a device that has 3.3V logic, an ESP32 board for example.I chose to connect this display to an Uno R4 WiFi before reading the fine print and it didn't work. In fact I thought I fried the display. After reading the fine print I tried including logic level shifters in the circuit and discovered my "fried" display was still good. I used https://www.amazon.ca/dp/B074M8TM81?ref=ppx_yo2ov_dt_b_fed_asin_title available here on Amazon.The downside to using logic level shifters are: 1) the additional expense and 2) slower display updates. Again the best way to use these displays is with a 3.3V microcontroller.
User
Great, and it is slow, BUT you can do partial refreshes
Works great. As others have mentioned it's slow doing a full screen refresh. However, it does support doing partial updates, which are significantly faster.For example, using the Adafruit Python Driver, you can call the image function and give it just part of the screen you want to update. This is nearly instantaneous, and has worked well for me.
Trustpilot
1 month ago
5 days ago