We remain fully operational. Our teams are working around the clock to ensure your deliveries continue safely.

DOWNLOAD THE APP


Customer Services
Copyright © 2025 Desertcart Holdings Limited
DOWNLOAD THE APP


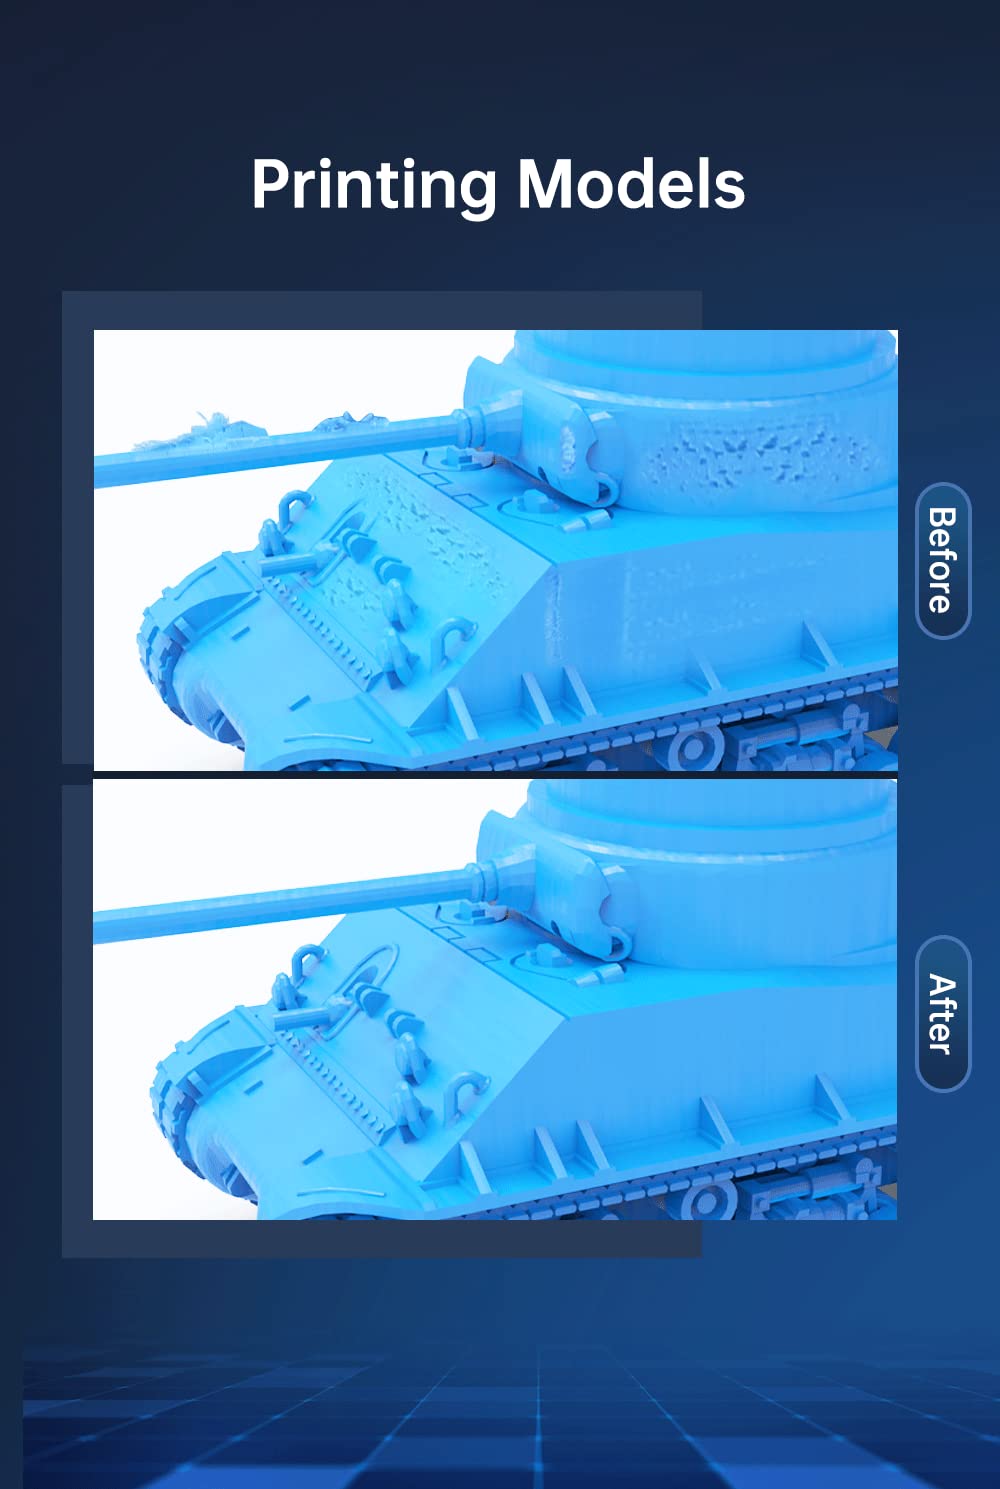

⚡ Elevate your 3D printing precision with BIGTREETECH’s smart accelerometer!
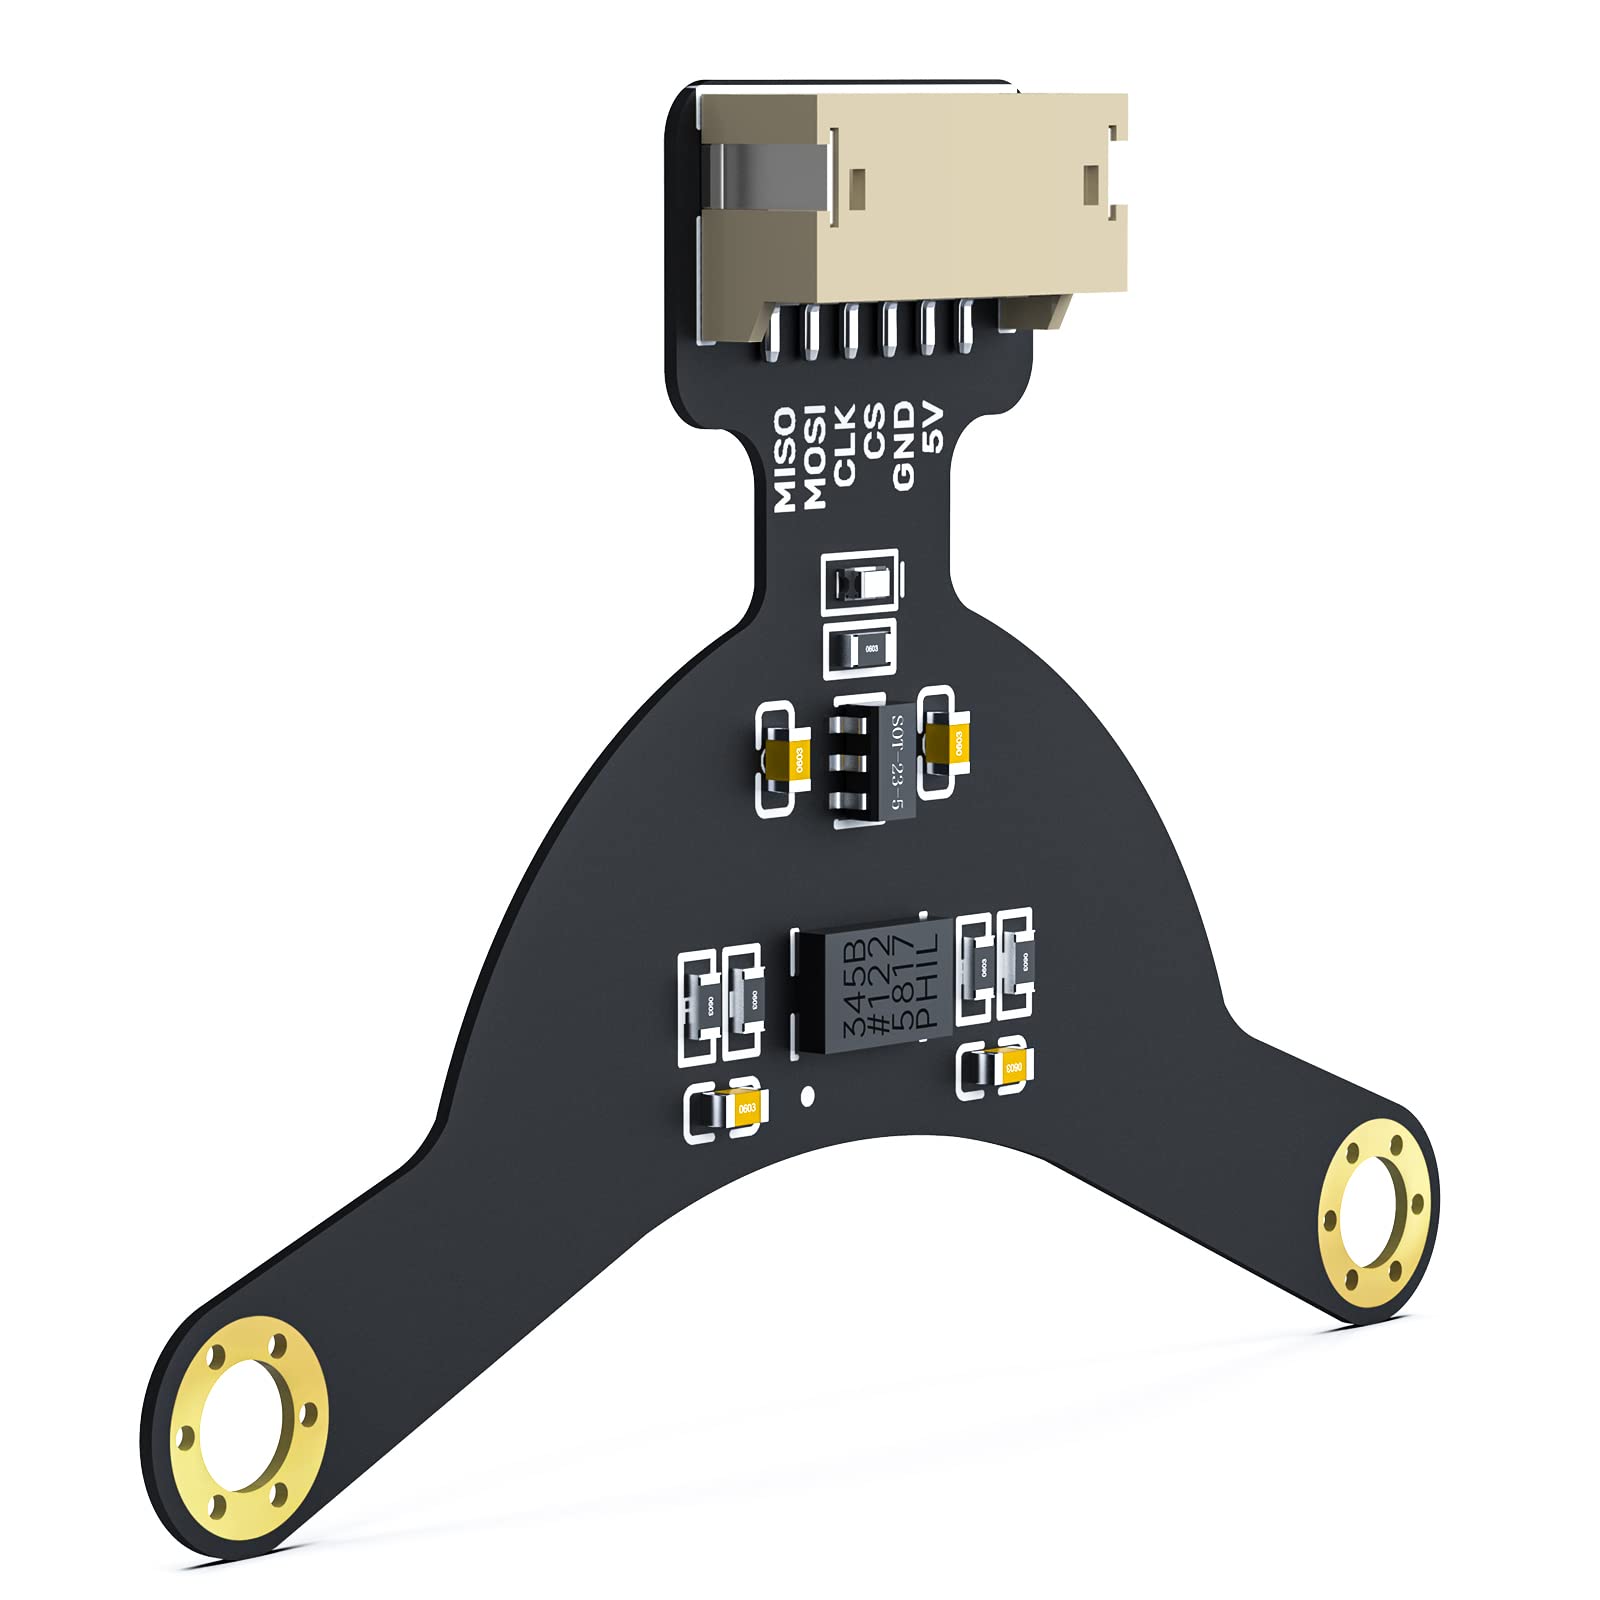
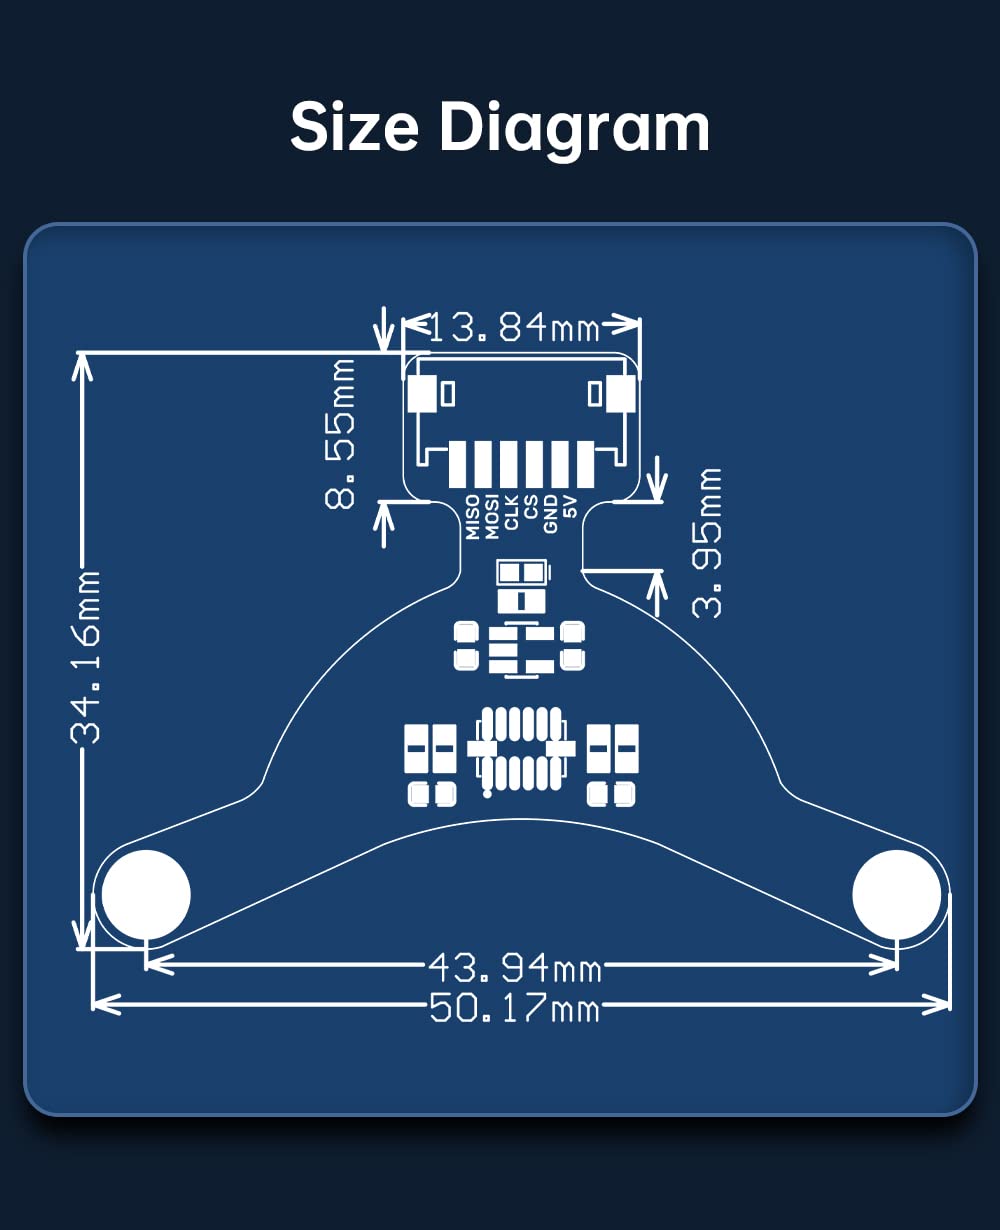
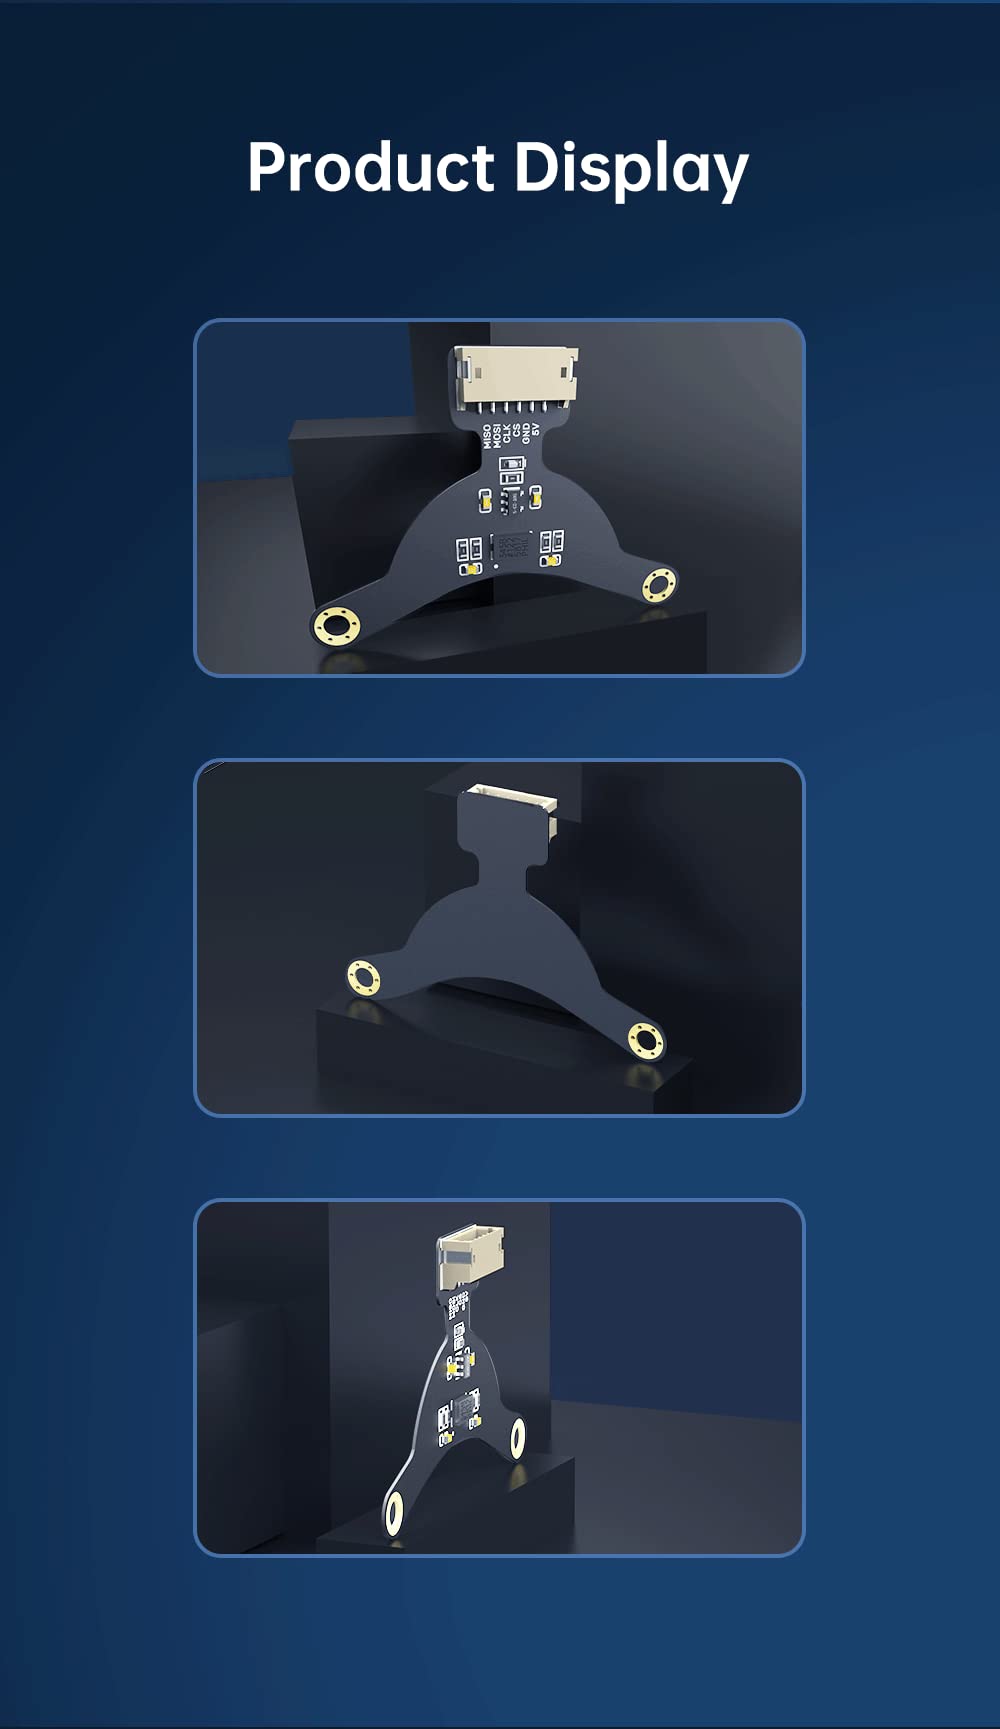
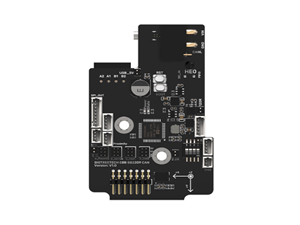
The BIGTREETECH ADXL345 V1.0 is a high-precision 3-axis accelerometer sensor module offering selectable measurement ranges from ±2g to ±16g with 13-bit resolution. Designed for easy DIY integration, it includes a 70cm cable compatible with most motherboards and mounts directly on 36mm stepper motors. Powered via SPI communication and 5V supply, it enhances 3D printer motion sensing and tilt detection, making it an essential upgrade for Klipper-supported setups.
K**N
Good, but not the best
The product quality is excellent. It’s specifically designed to connect to Nema 36 steppers. However there are lots of adapters on Thingiverse and other sites to connect it wherever. It’s accurate, but clumsy. The new ADXL345 and S2DW are much easier to install and setup. They are almost the same price, but newer versions have the Raspberry PI RP2040 built in, for a much better USB cable plug in experience.
B**L
BAD SUPPORT
I found BTT documentation on this to be poor at best. Was able to get it working with help from the community, but would not recommend. The standard ADXL345 per-soldered is a better buy in my opinion. In fact, I purchased two, and threw this in the box of things for another printer.
H**C
No instructions available. NO, REALLY.
Used this with my btt pi and while it did work, it took hours to get it working because there are no instructions available from the manufacturer. I did email them and asked but they just referred me to the other models instructions, which of couse are not useful. My advice would be to spend an extra five dollars and get a USB version of adxl. If I could give this item 0 stars, I would.
C**S
Not usable
There is no documentation other than the Biqu picture. Klipper will not use the pins required either to the spi or directly to the gpio pins. Pass on this waste of time and money. Look for an AXDL with usb interface. Was well documented and worked flawlessly.
H**B
How do you get this working???
I've looked all over and scoured BTT's website and GitHub pages and there isn't anything that I can find that is a straightforward guide on how to get this working with the dedicated port on the BTT Pi v1.2 board. You're MUCH better off buying a standalone and doing it through GPIO pins. Much easier and heaps more directions. As of this one, I can't do anything with it if I don't know how to wire it up and make it work. Disappointing.
G**P
No clear instructions on set.up
Should be plug and play with the BTT CB1 Pi. no instructions on setup!!!
Trustpilot
2 weeks ago
3 weeks ago