
DOWNLOAD THE APP


Customer Services
Copyright © 2025 Desertcart Holdings Limited
DOWNLOAD THE APP


☀️ Stay Ahead of the Storm with Smart Solar-Powered Precision!
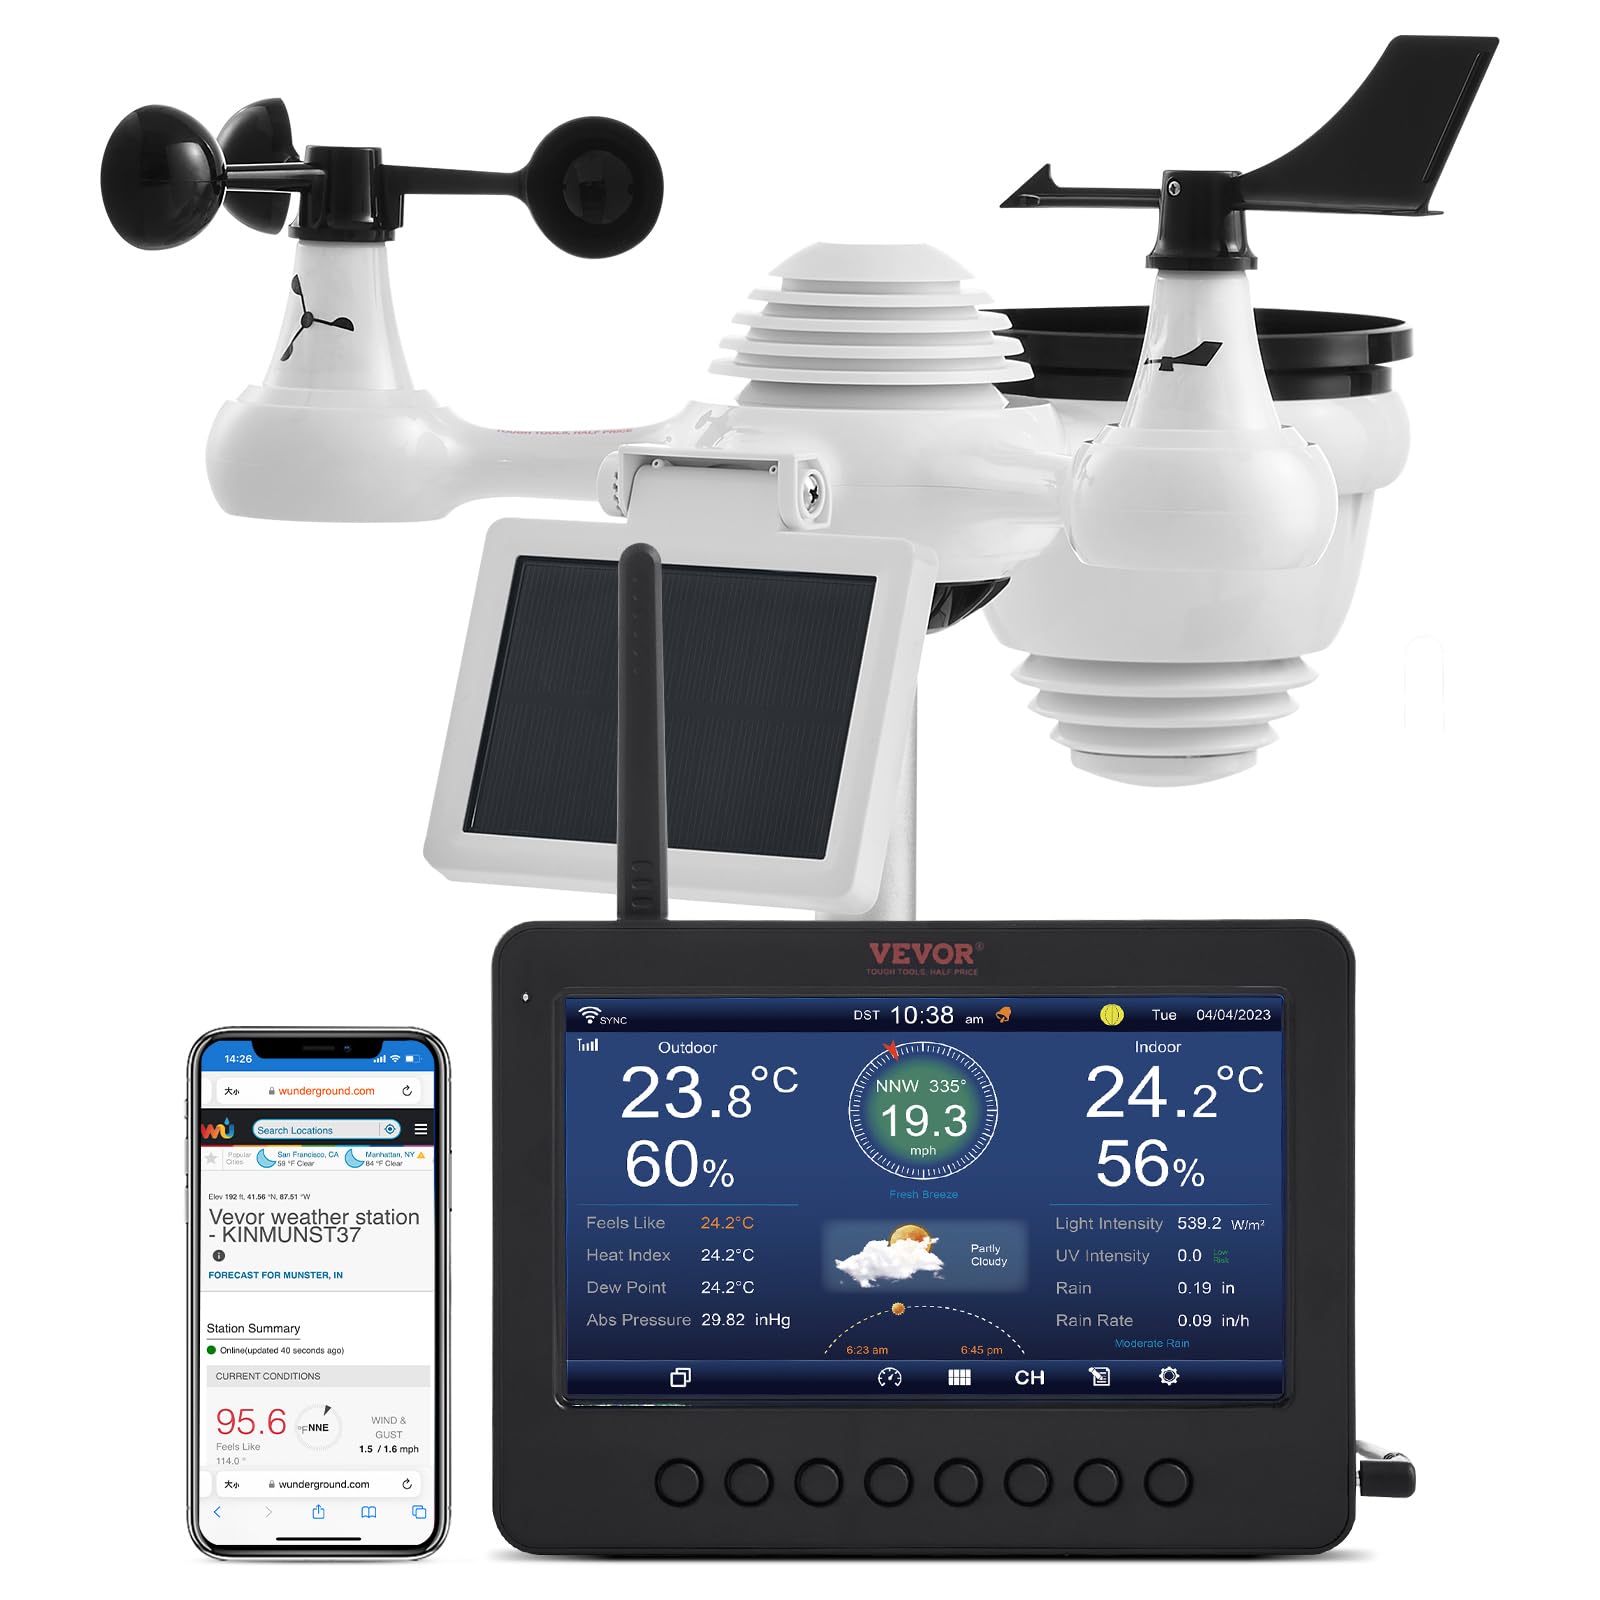
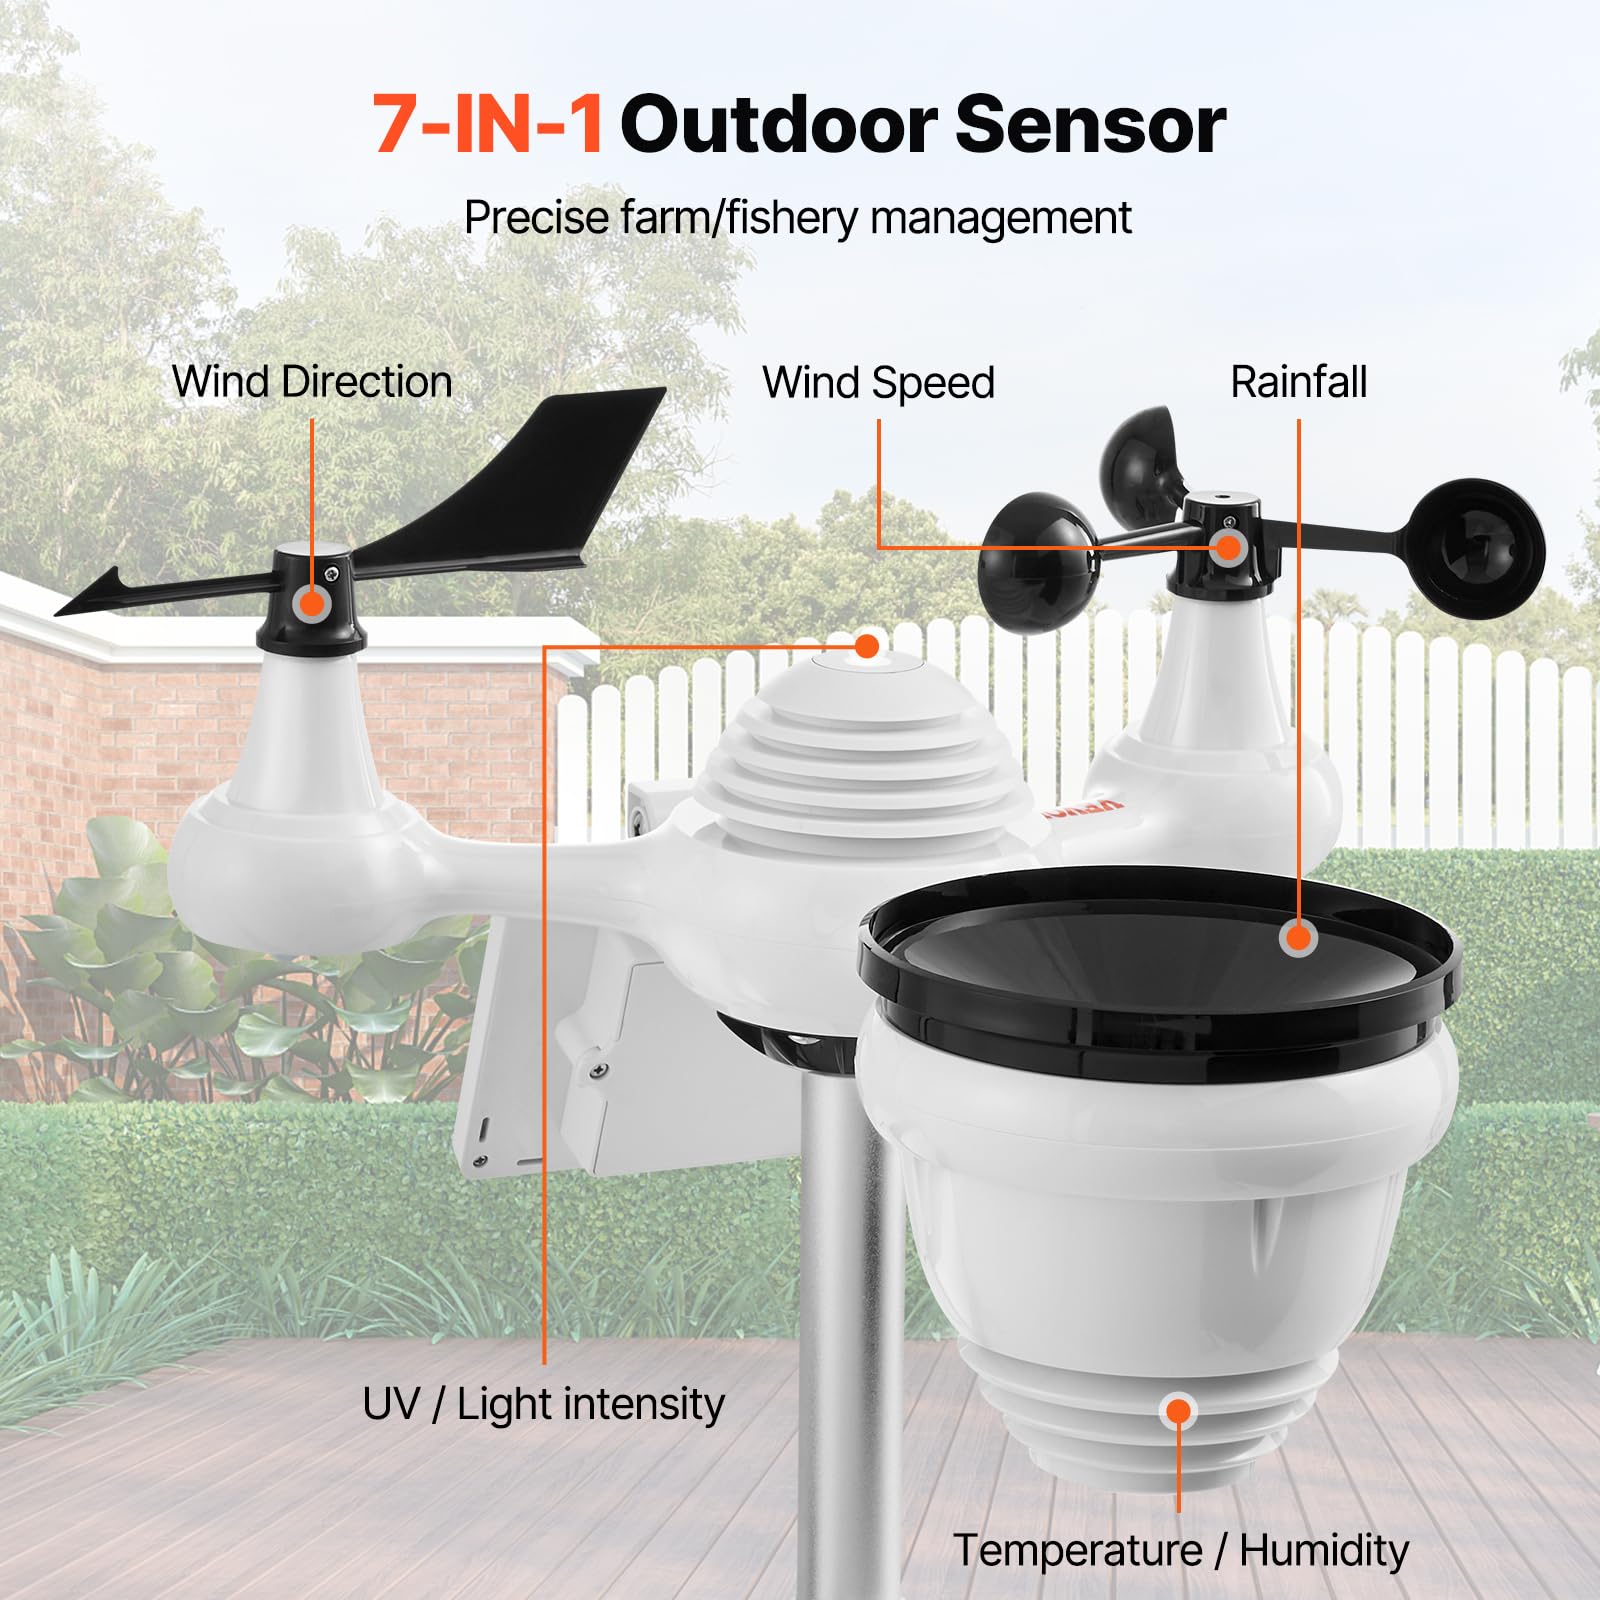
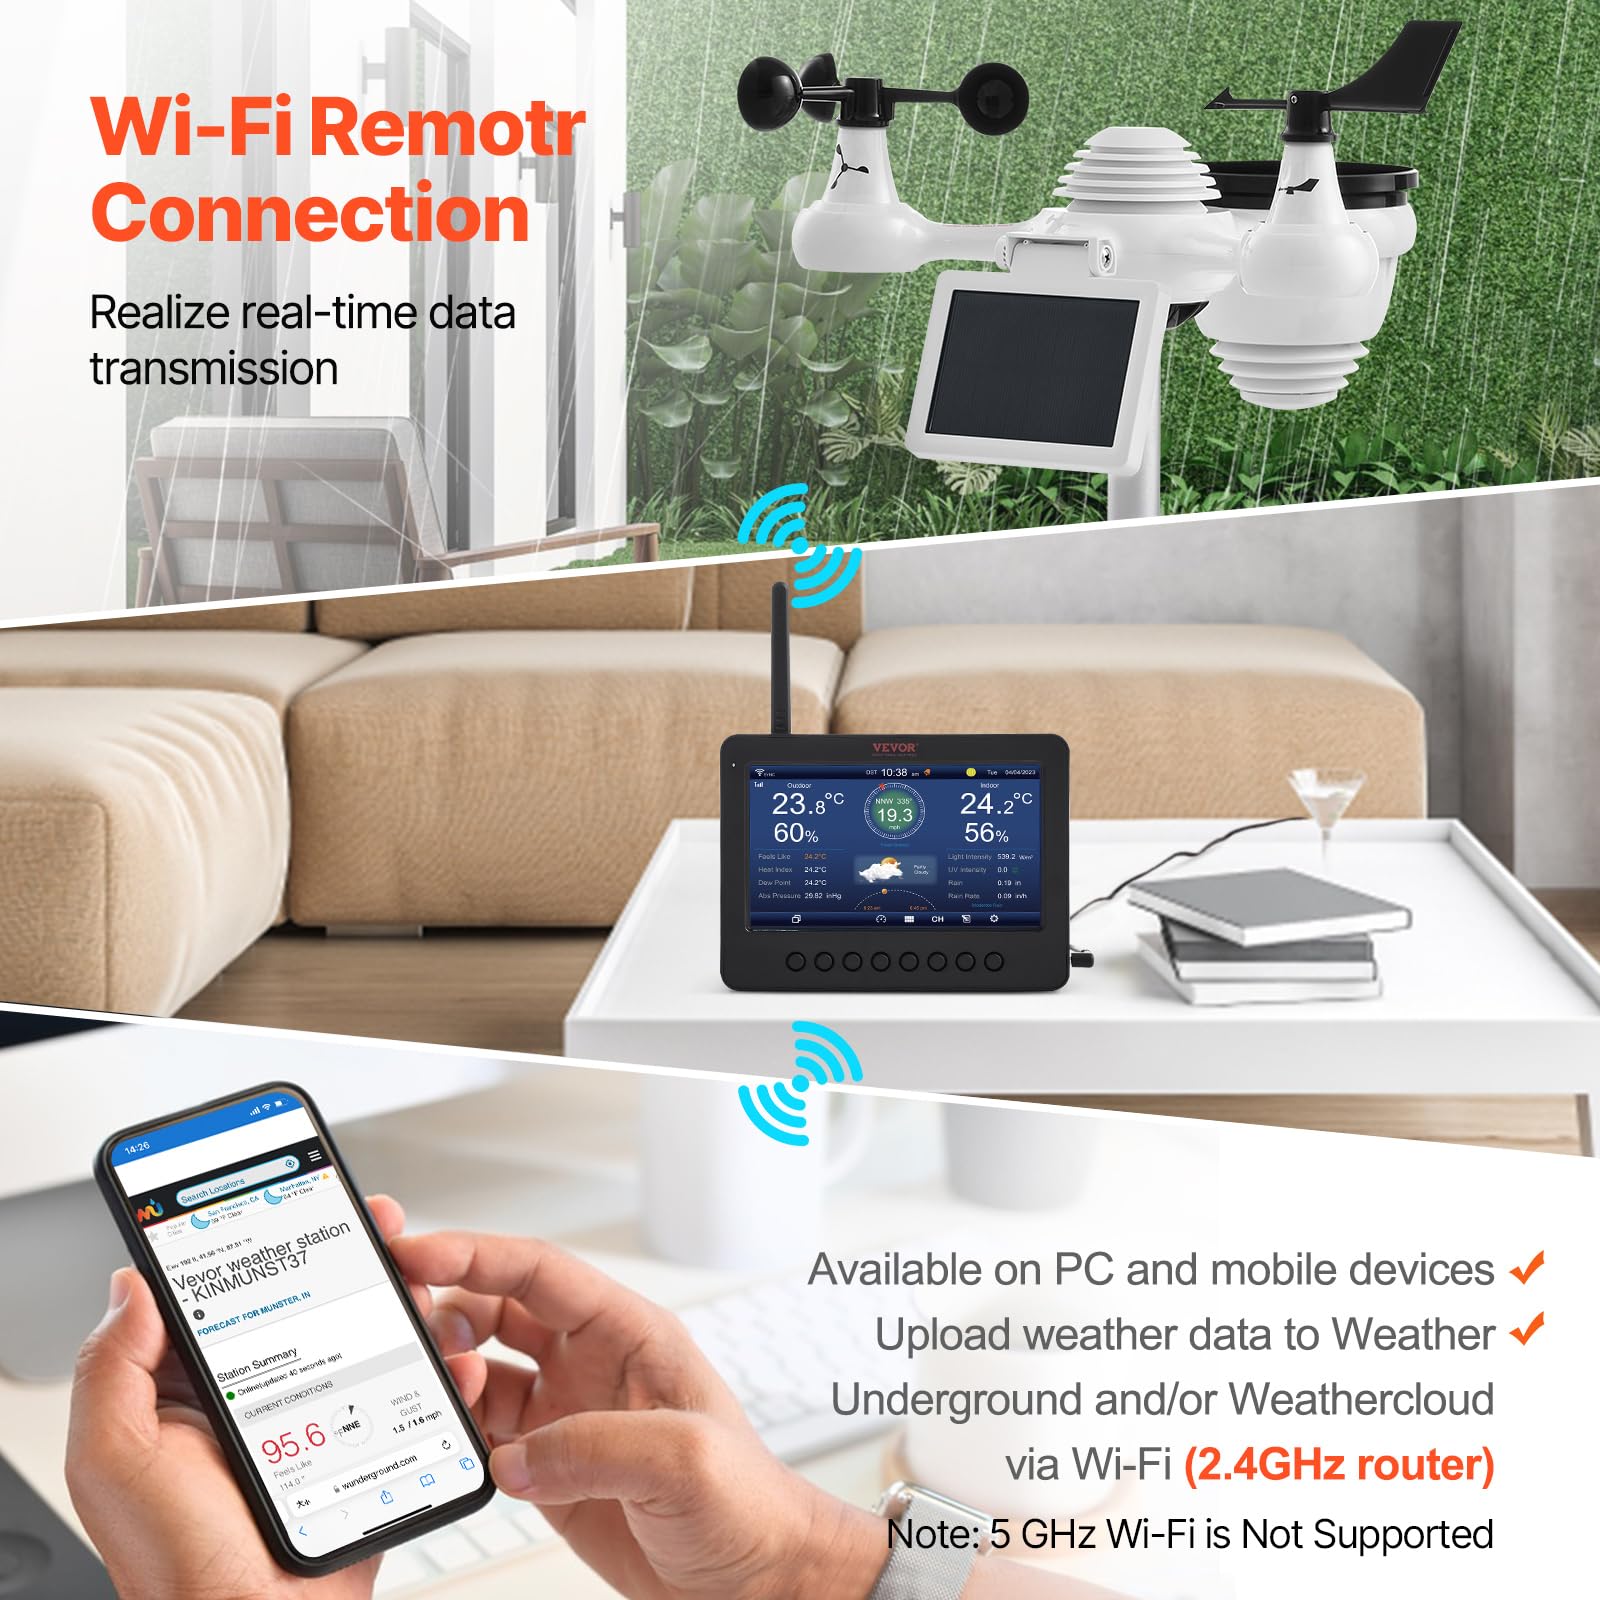
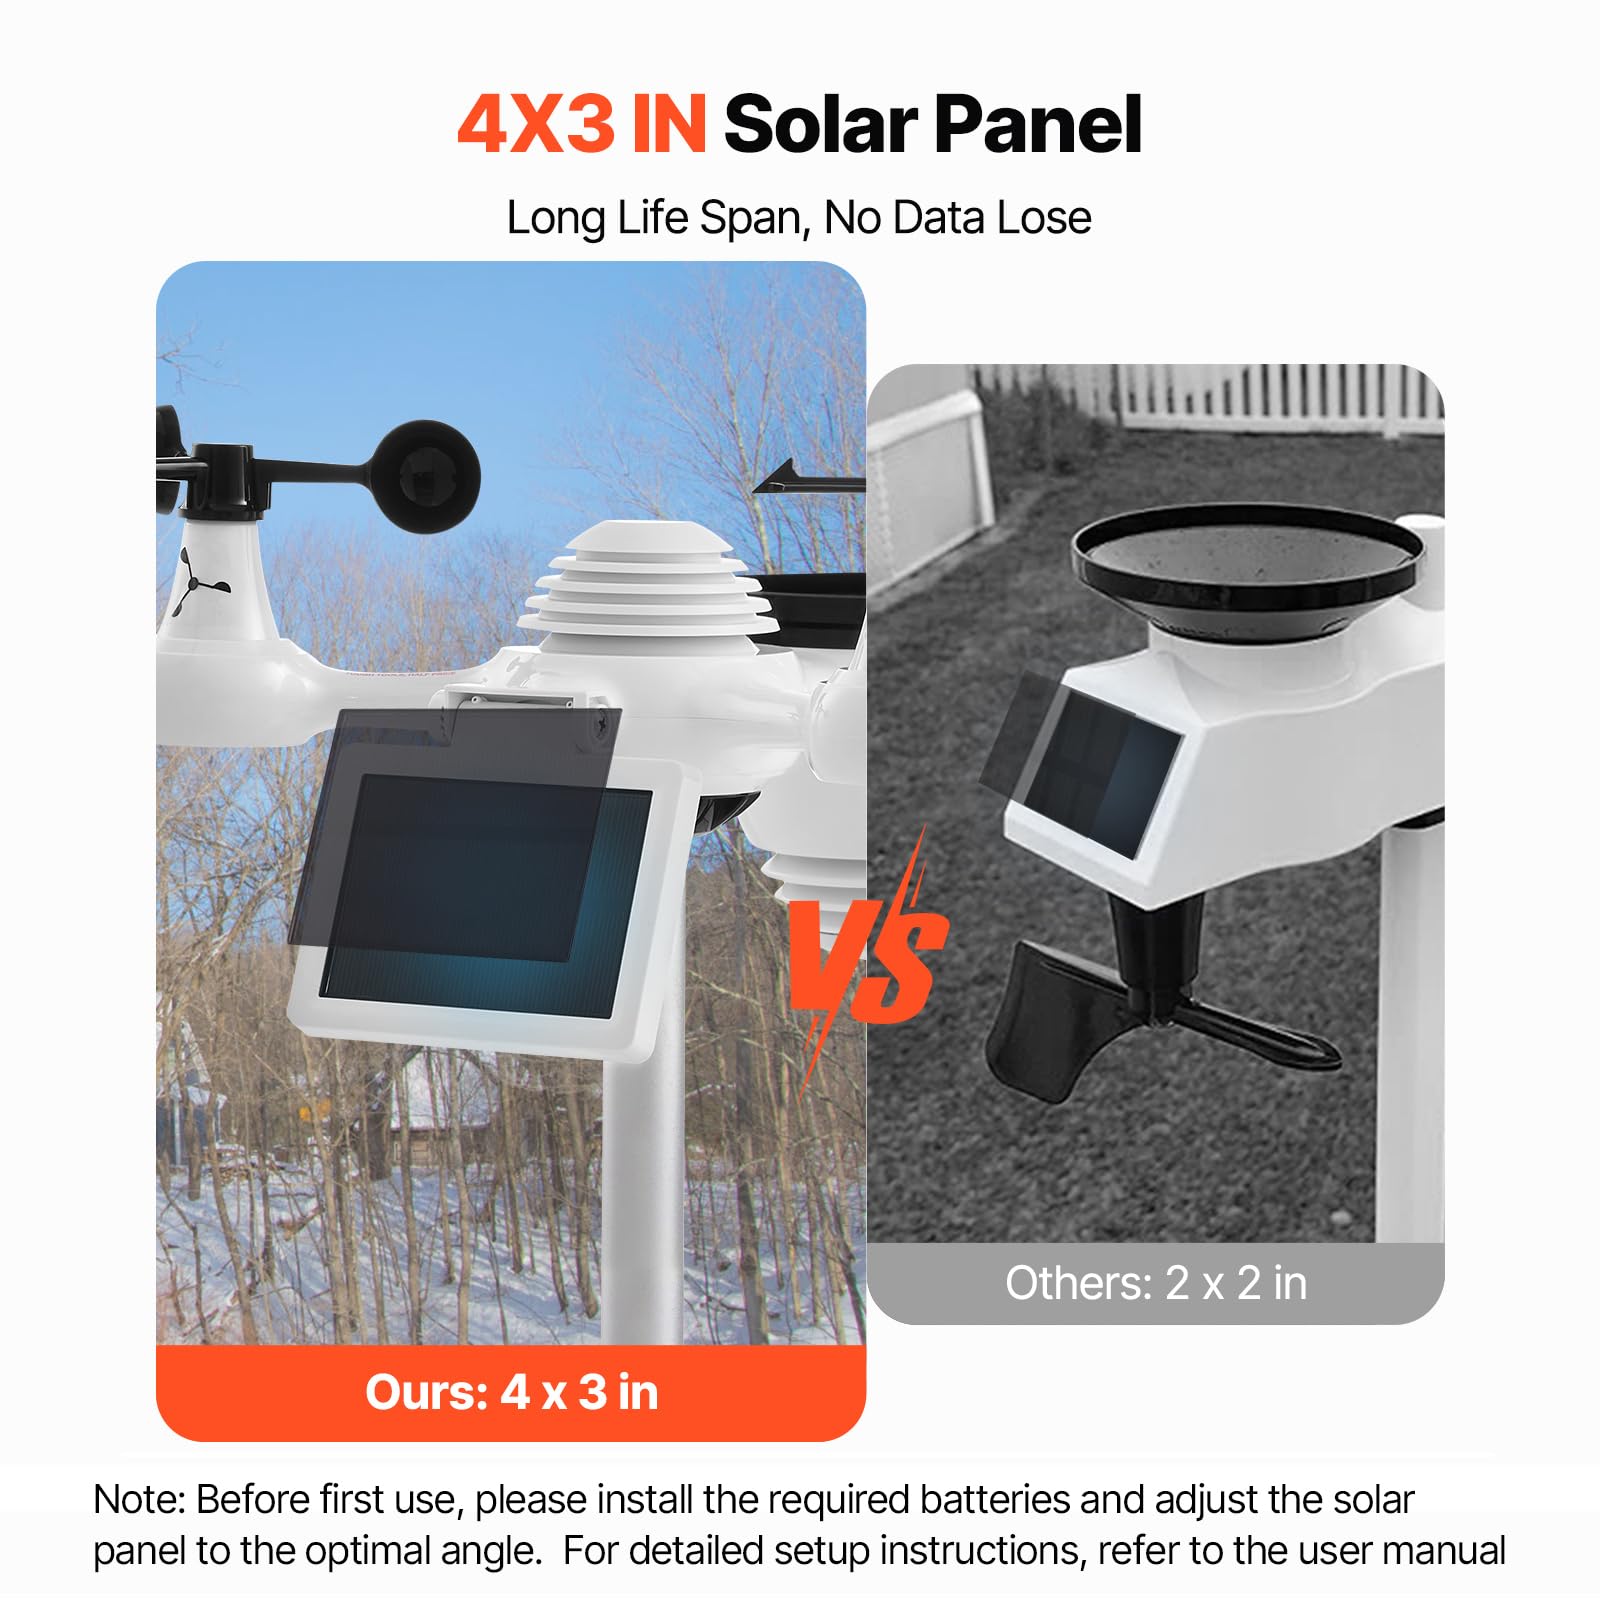
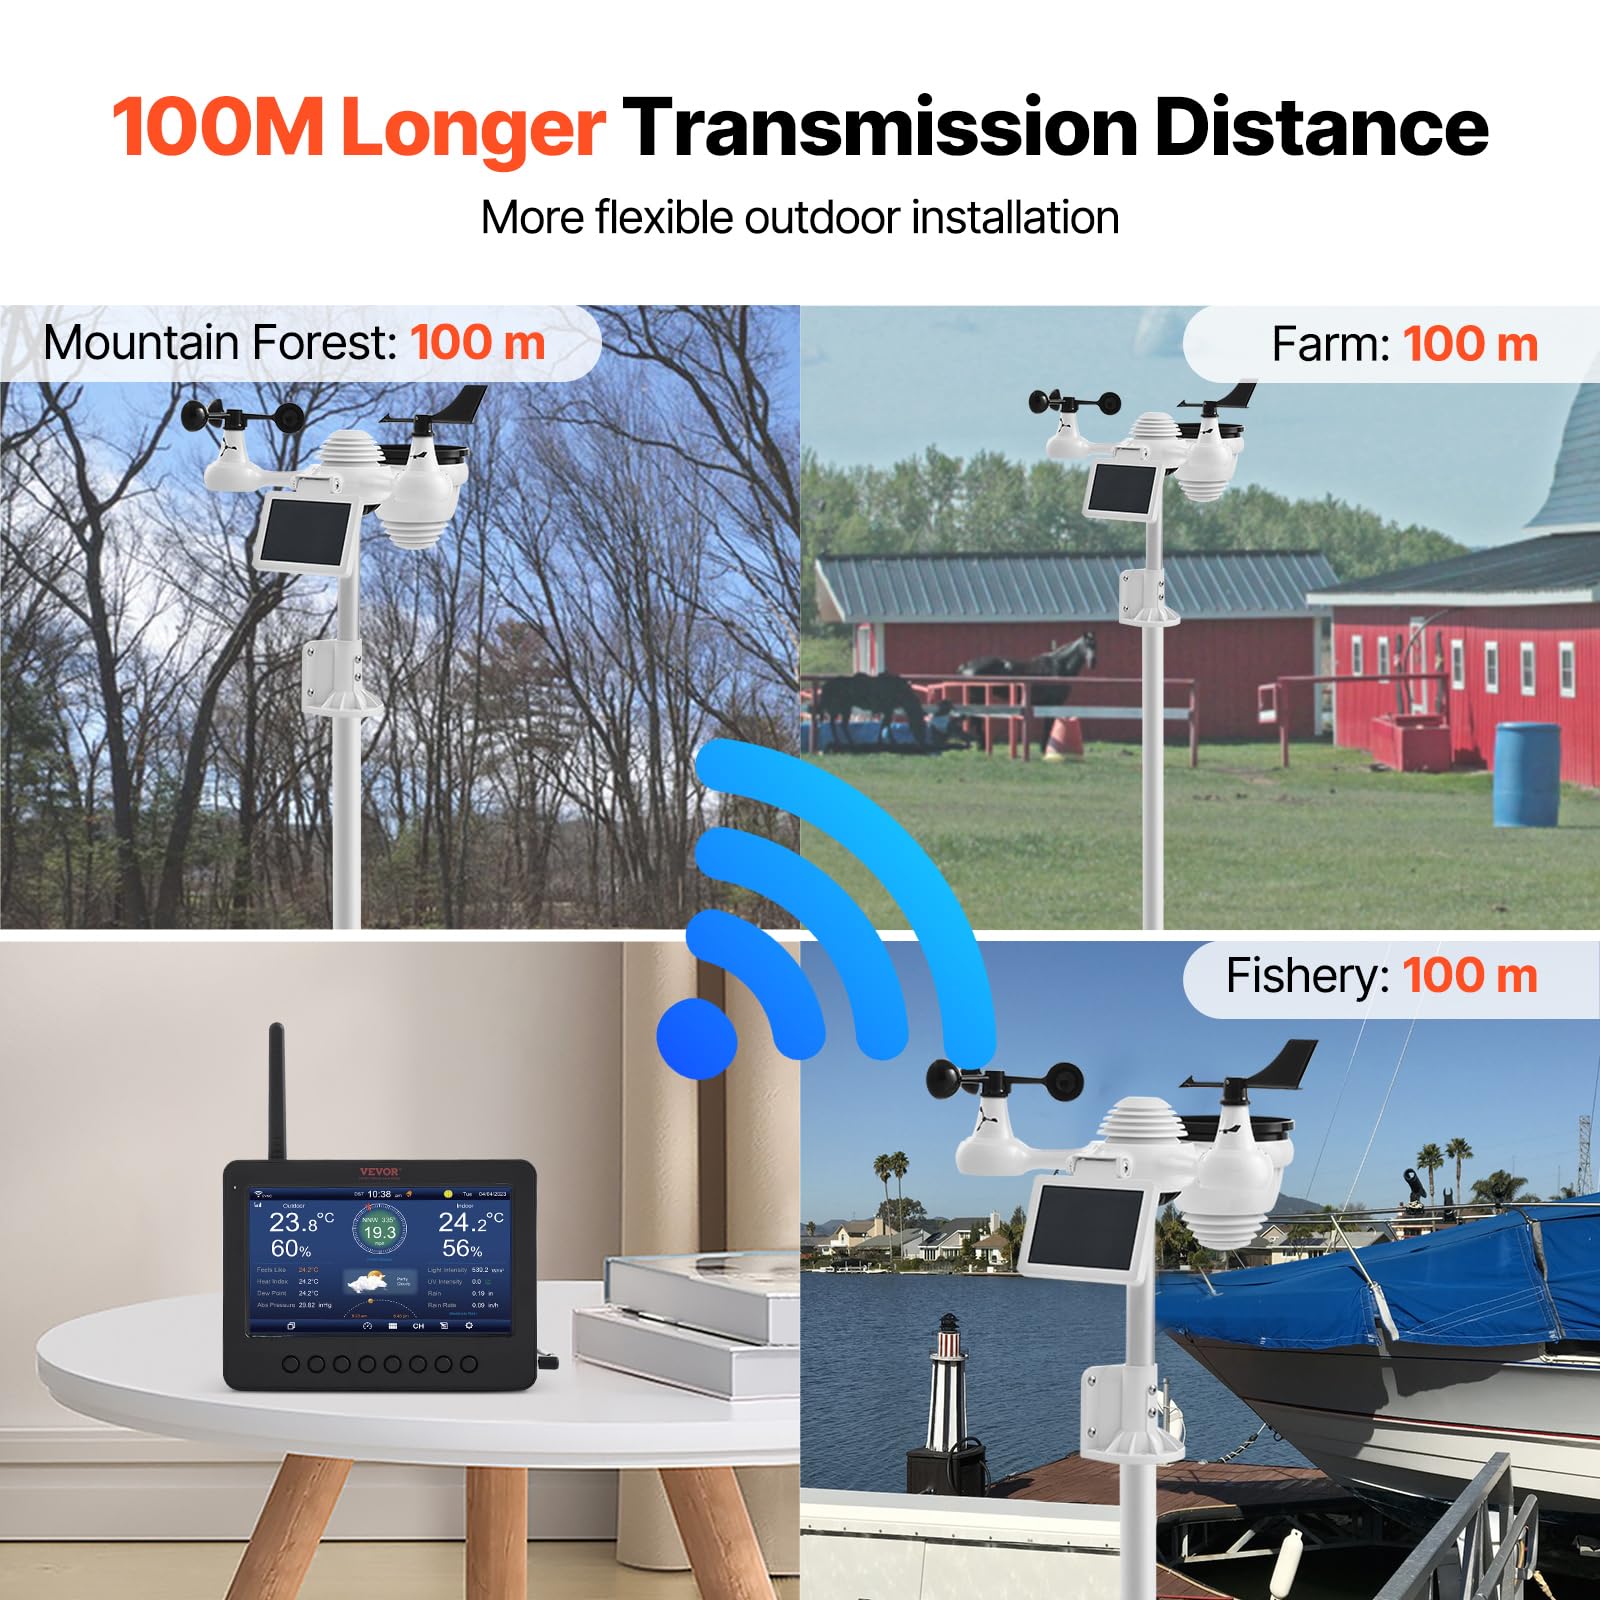
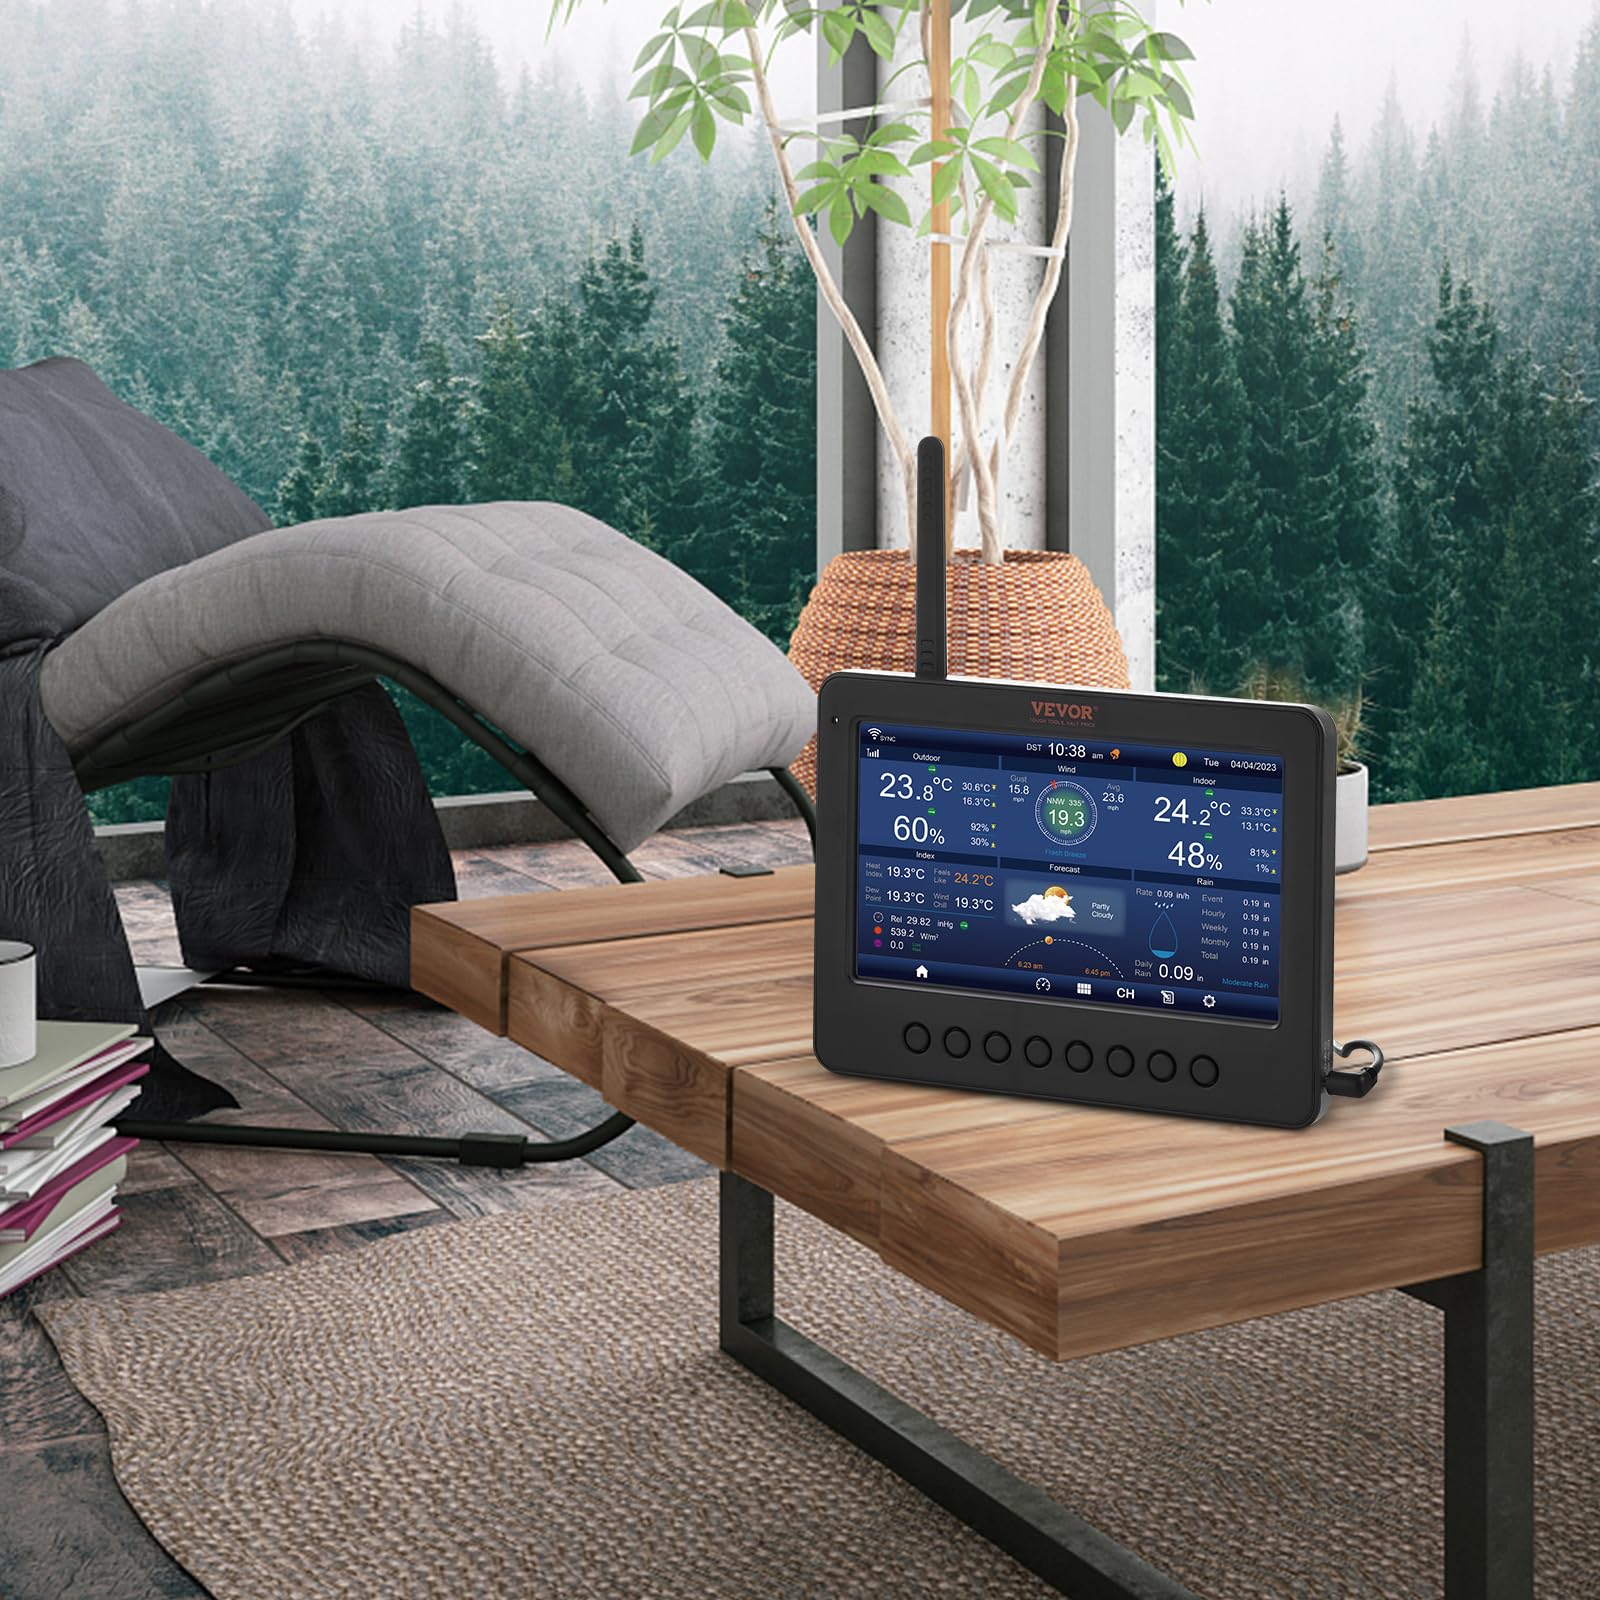
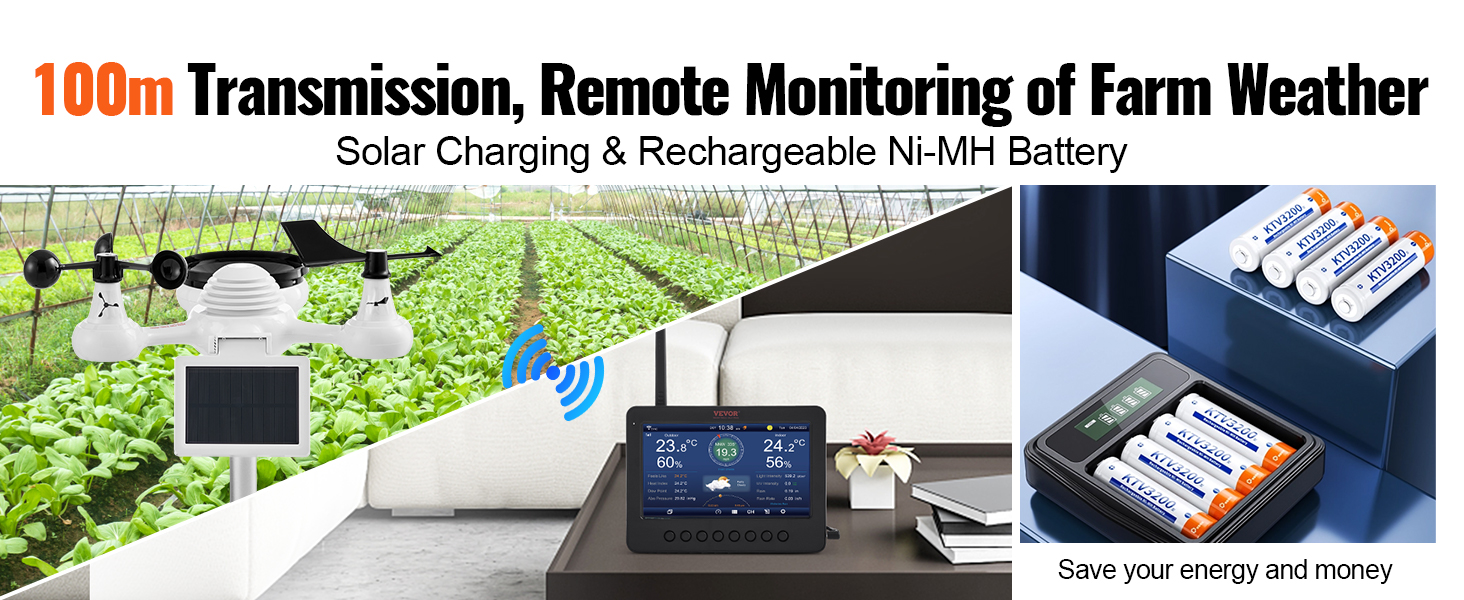
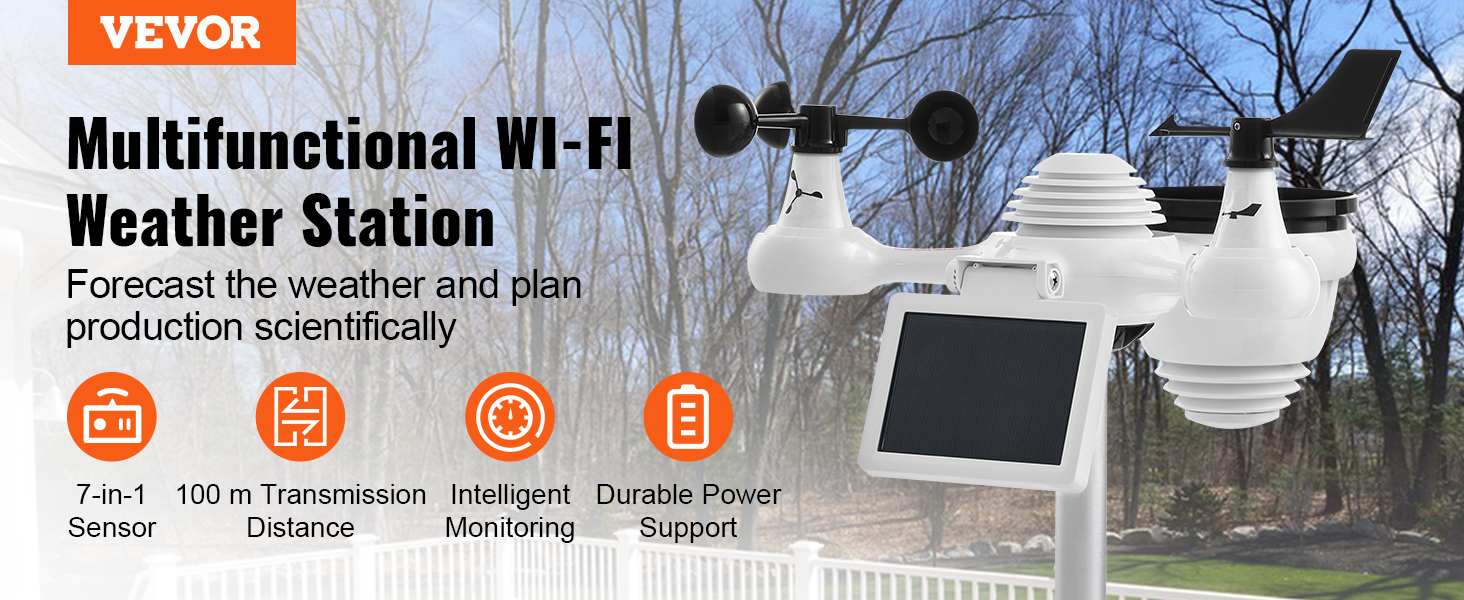
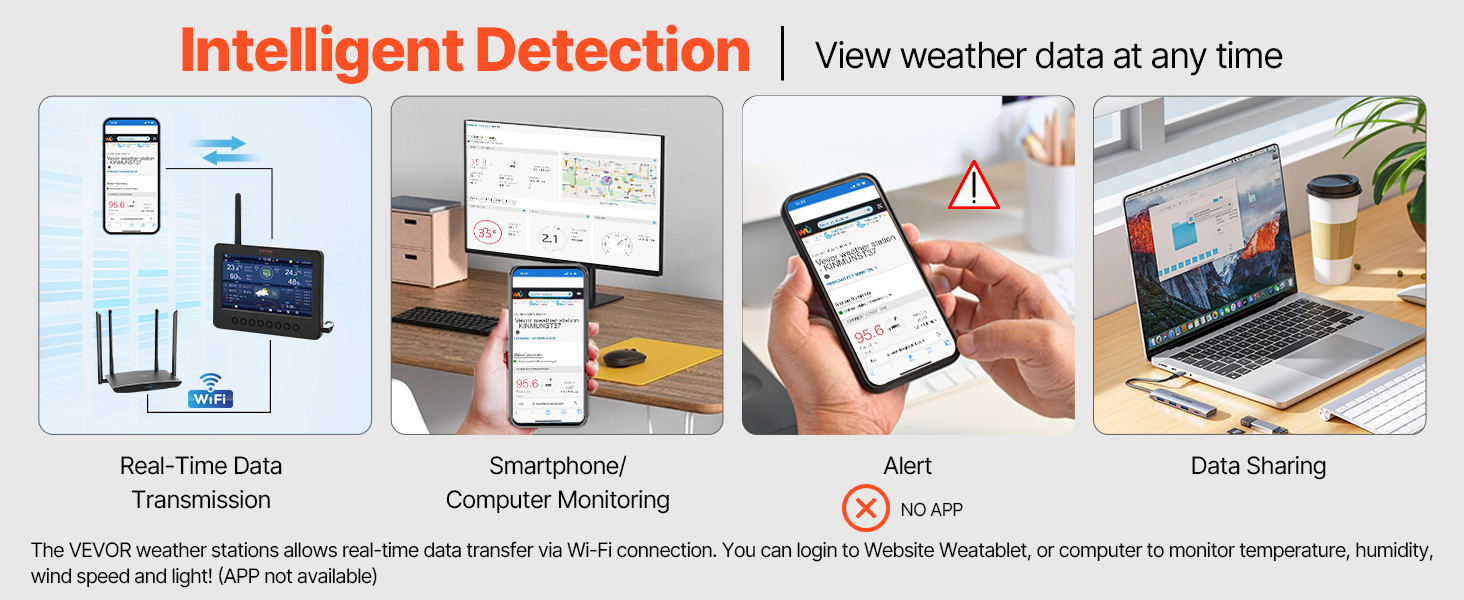
The VEVOR Wireless Weather Station 7-in-1 combines advanced multi-sensor technology with a vibrant 7-inch TFT display and solar-powered external sensors. Featuring a 100-meter Wi-Fi transmission range, it delivers real-time, accurate weather data including wind, temperature, humidity, rainfall, and more. Compatible with popular weather networks, this eco-conscious device offers professional-grade monitoring with effortless remote access—perfect for the modern, connected lifestyle.


| ASIN | B0DBHNZTZ7 |
| Batteries | 3 Nonstandard Battery batteries required. (included) |
| Batteries required | Yes |
| Customer Reviews | 4.0 4.0 out of 5 stars (312) |
| Date First Available | 3 June 2025 |
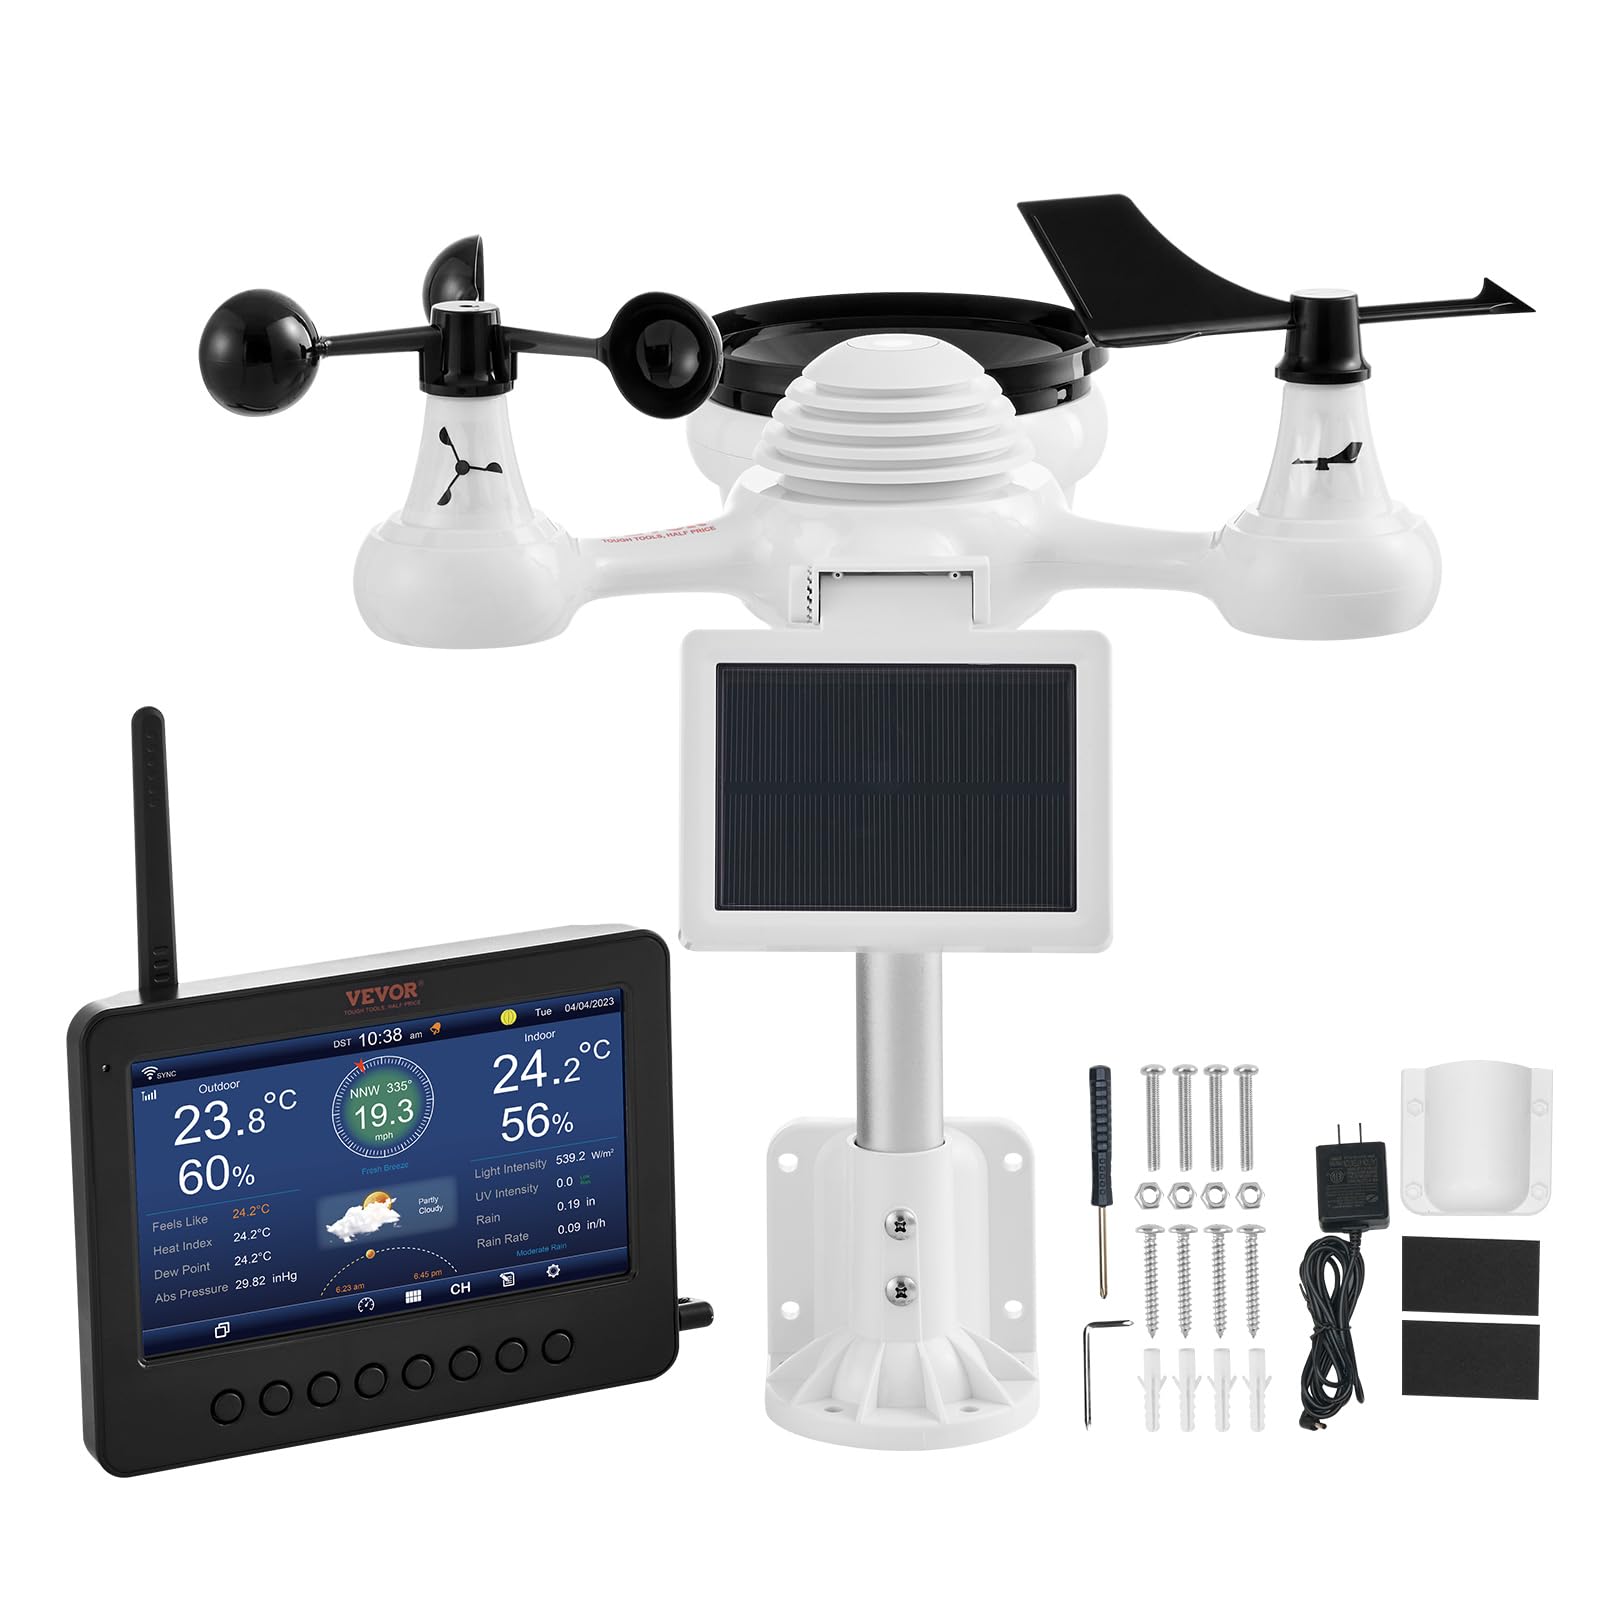
| Included components | Wireless Weather Station |
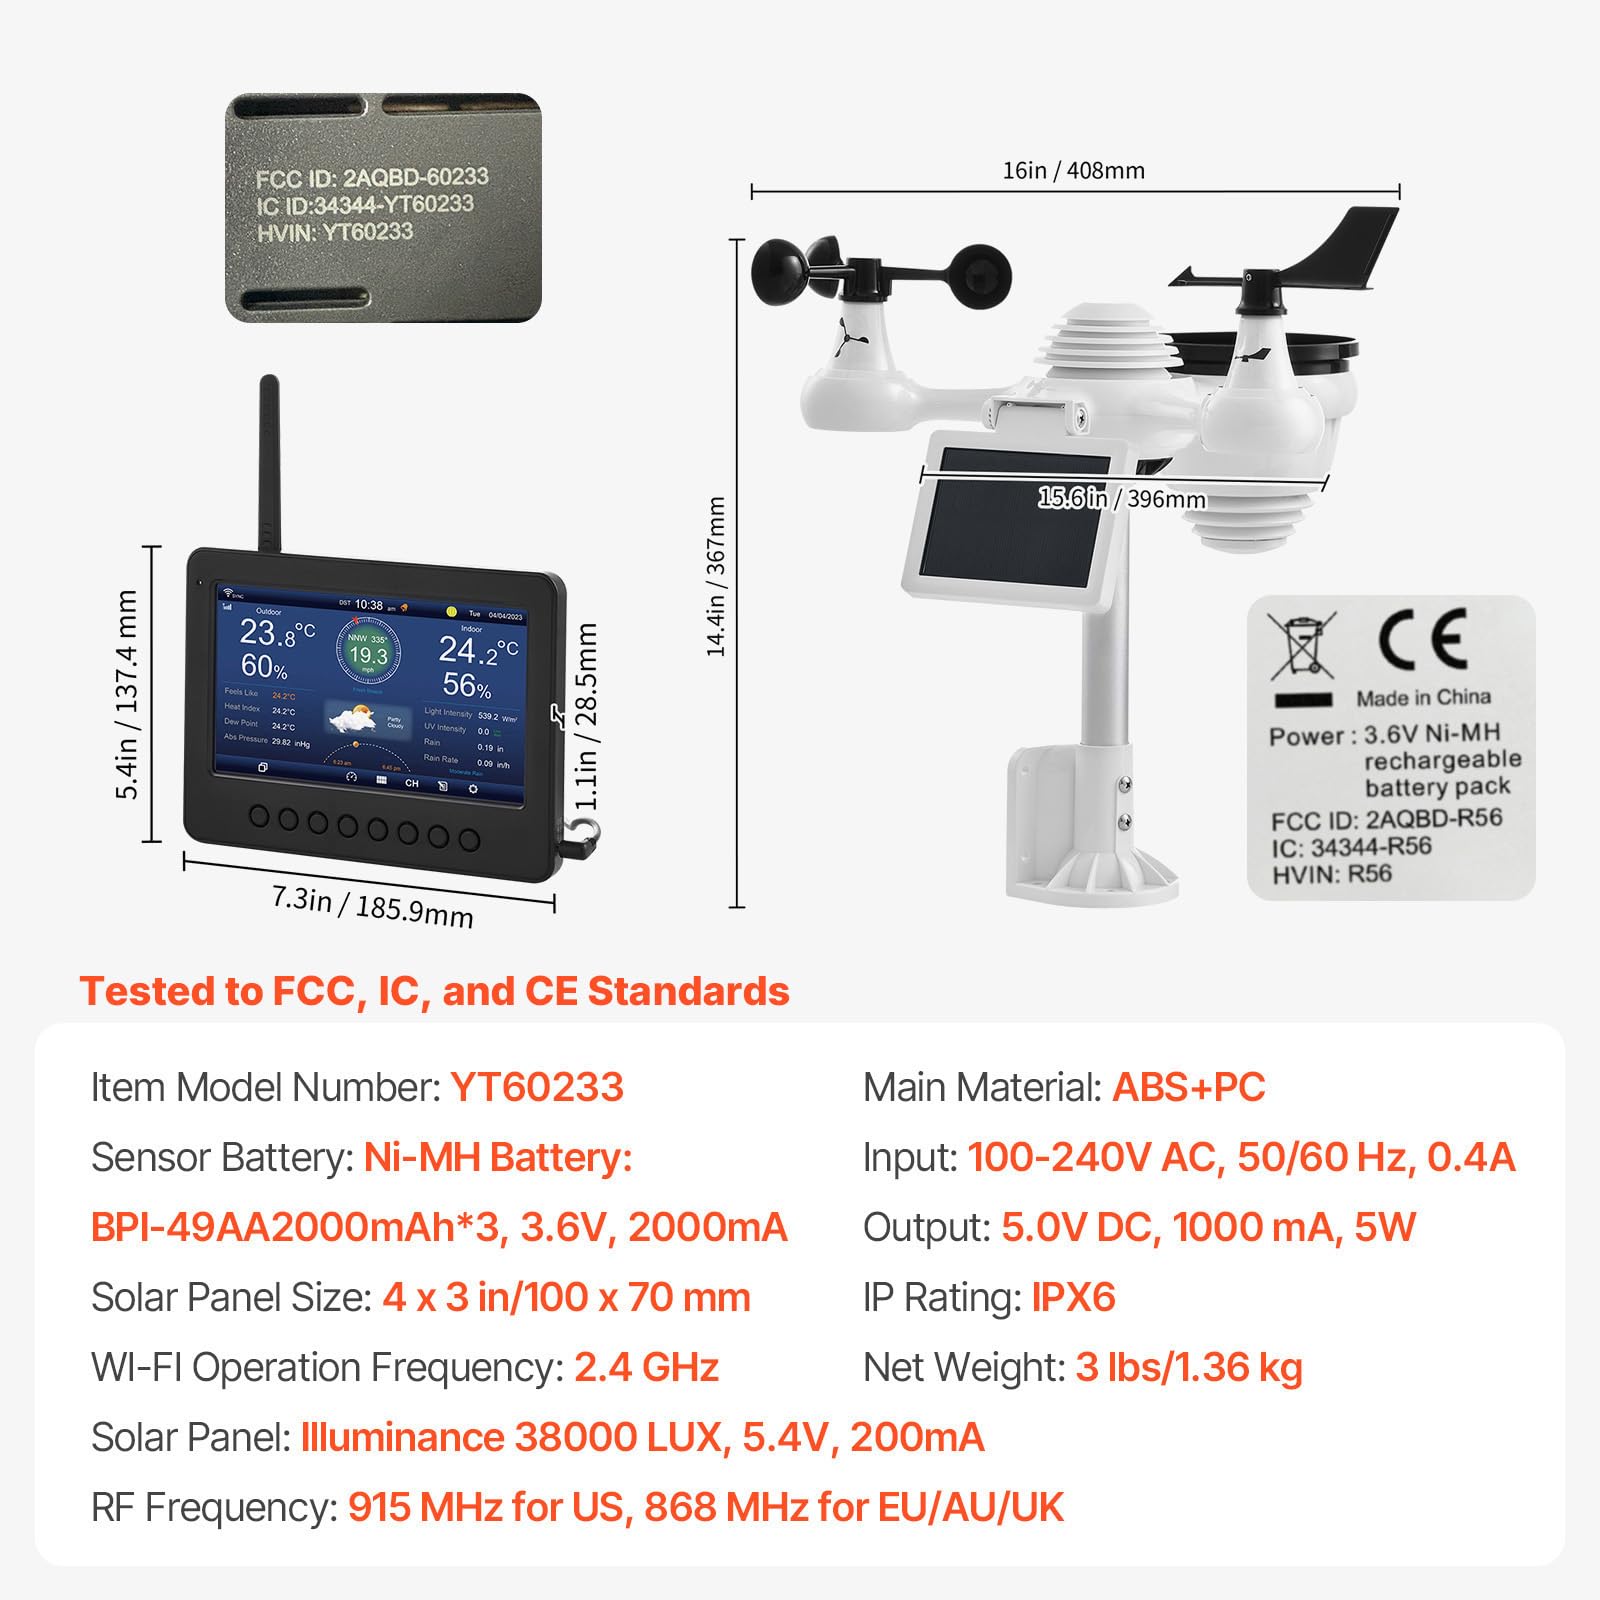
| Item Weight | 1.36 kg |
| Item model number | YT60233 |
| Package Dimensions | 44.79 x 35.9 x 18.2 cm; 1.36 kg |
| Specific uses | Humidity |
L**N
Great weather station! Easy to setup and put together. Ability to add to several weather services online. Display is very clear and bright and data is transmitted by 2.4ghz rather than 430MHz as that could cause issues with the 70cm ham band and I wanted to avoid that.
H**N
Works well easy to set up. Wind speed indicator works great.
J**C
All working and connected and uploading to Weather Underground and Weathercloud. Issues Encountered and Solved was Connecting to the Internet (Below is the solution) The wifi is only located in the 7 Inch TFT display (if wifi option selected). The weatherstation transmits RF to the TFT display and will work without the internet. To connect the TFT to the net you must have 1.) a 2.4Gig wireless router and know its password 2.) a separate wireless device that connects to the TFT display. The steps are 1. Enable "connect mode" on wireless on TFT display, the screen displays you are connected (this mode lasts about 5 minutes then goes back to normal display. When configuing the TFT screen must be left in the "connected" screen and must be restarted again until you get the other steps done otherwise it won't connect when the main screen is being displayed) 2. I used a windows laptop and with it's wireless I connected to the TFT display; after connecting 3. Open a web browser on that laptop and enter 192.168.1.1 (this will connect you to the TFT config display- again, you must have TFT in connect mode screen) 4. A TFT config screen will open on your browser; You can now config: With a drop-down find your wireless router and select 5. enter router password 6. put in you weather underground id and pin (must have already gone online and setup free account to get id and pin. 7. put in you weathercloud id and pin (must have already gone online and setup free account to get id and pin. 8. Save this info. This alone will save to the TFT display and enable it to connect to your router, and stay connected and synced to the internet and then automatically upload your data to these websites. 9. I did all this and it didn't work so I repeated all steps above and it finally worked and has continued to work very well. all this info is in the manual, but my android phone just couln't display the config screen on a web browser (don't know why), so I used a laptop and got it to display on that. 5 stars based on price and overall result.
P**S
I have issues with the rain level it shows a much higher rain level, can i calibrate this, please support on this Thanks in advance Patrick (Netherlands)
M**O
Verry good station. No problems with signal from station to console up to 50m. Working just fine. Just mising batteries in console, and you can not power off the display true the night.
Trustpilot
1 day ago
2 months ago