
DOWNLOAD THE APP


Customer Services
Copyright © 2025 Desertcart Holdings Limited
DOWNLOAD THE APP


Illuminate Your Ride! 💡
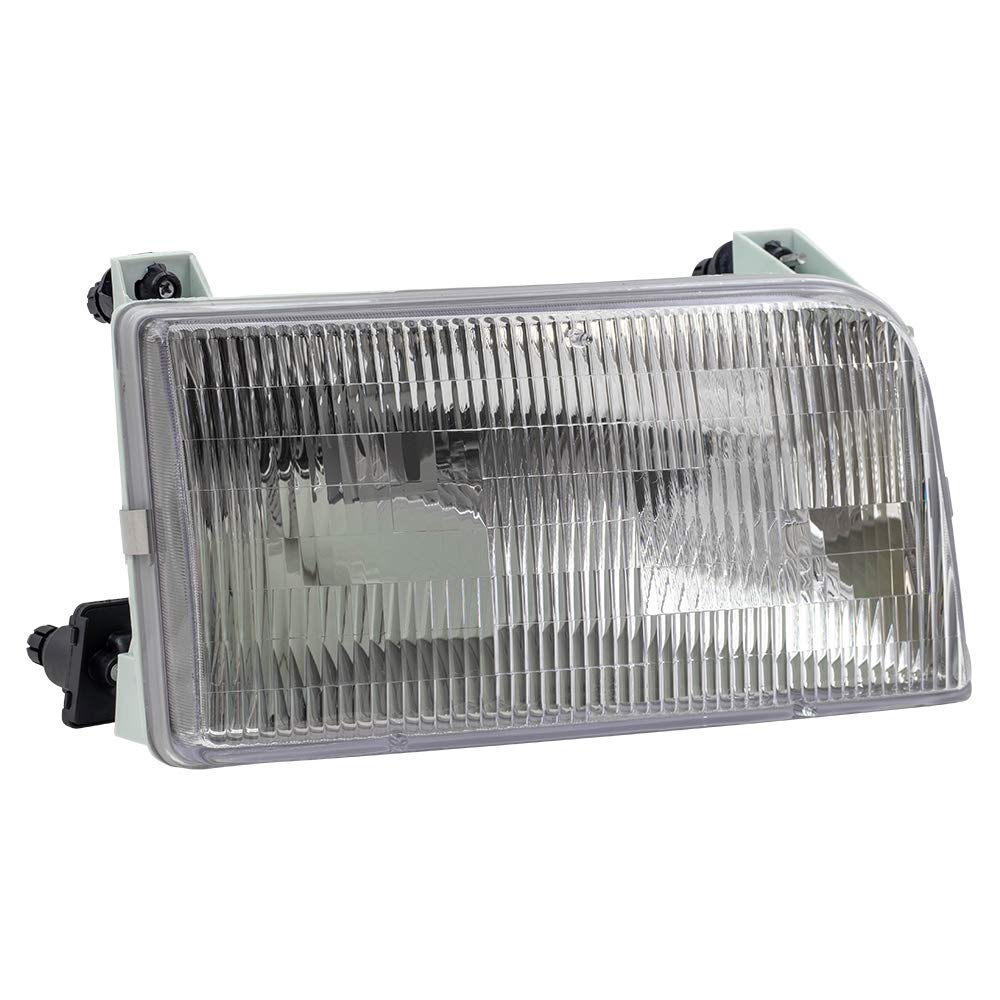
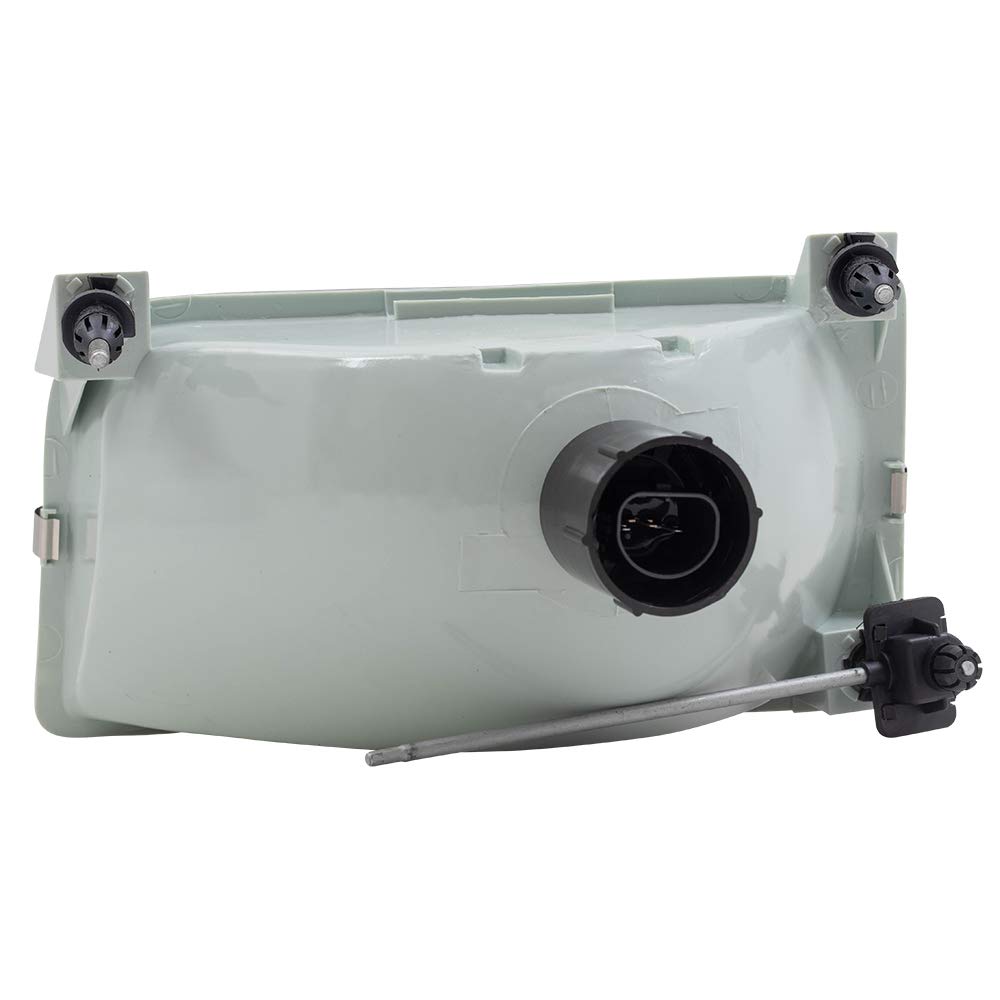
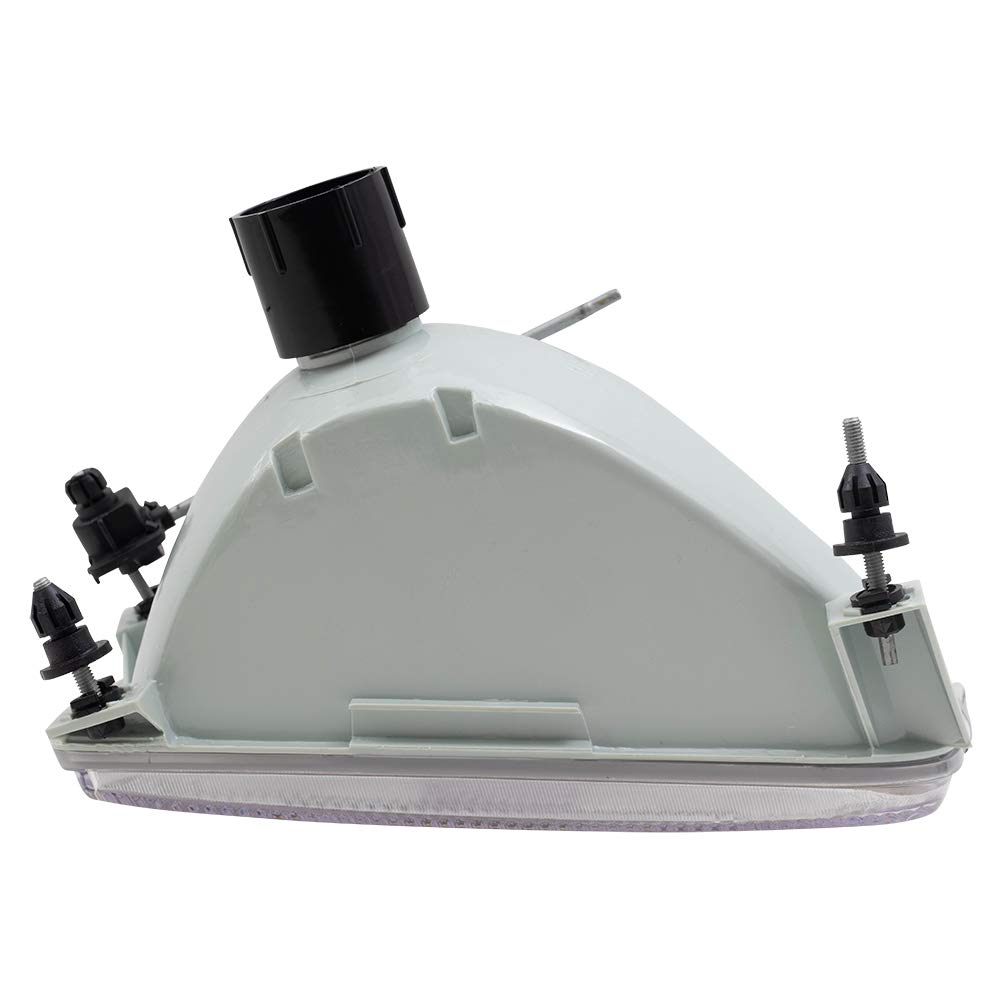
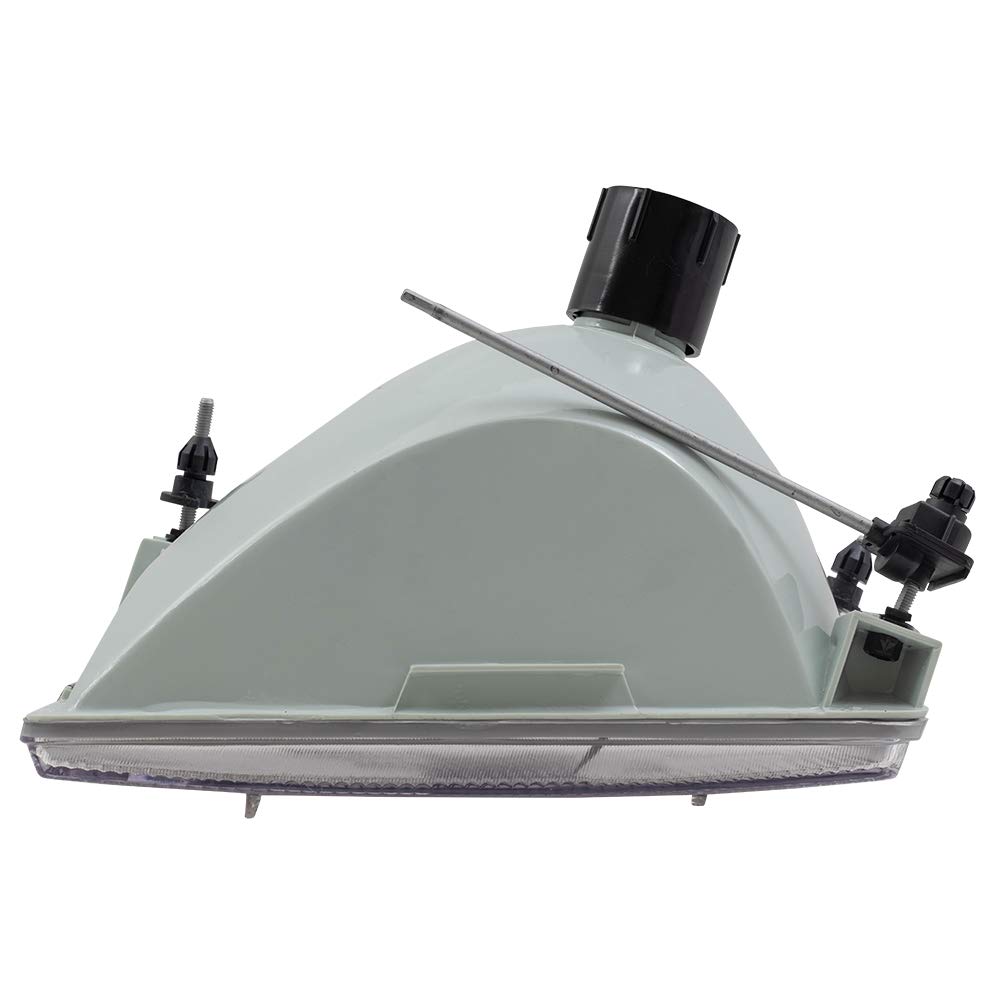
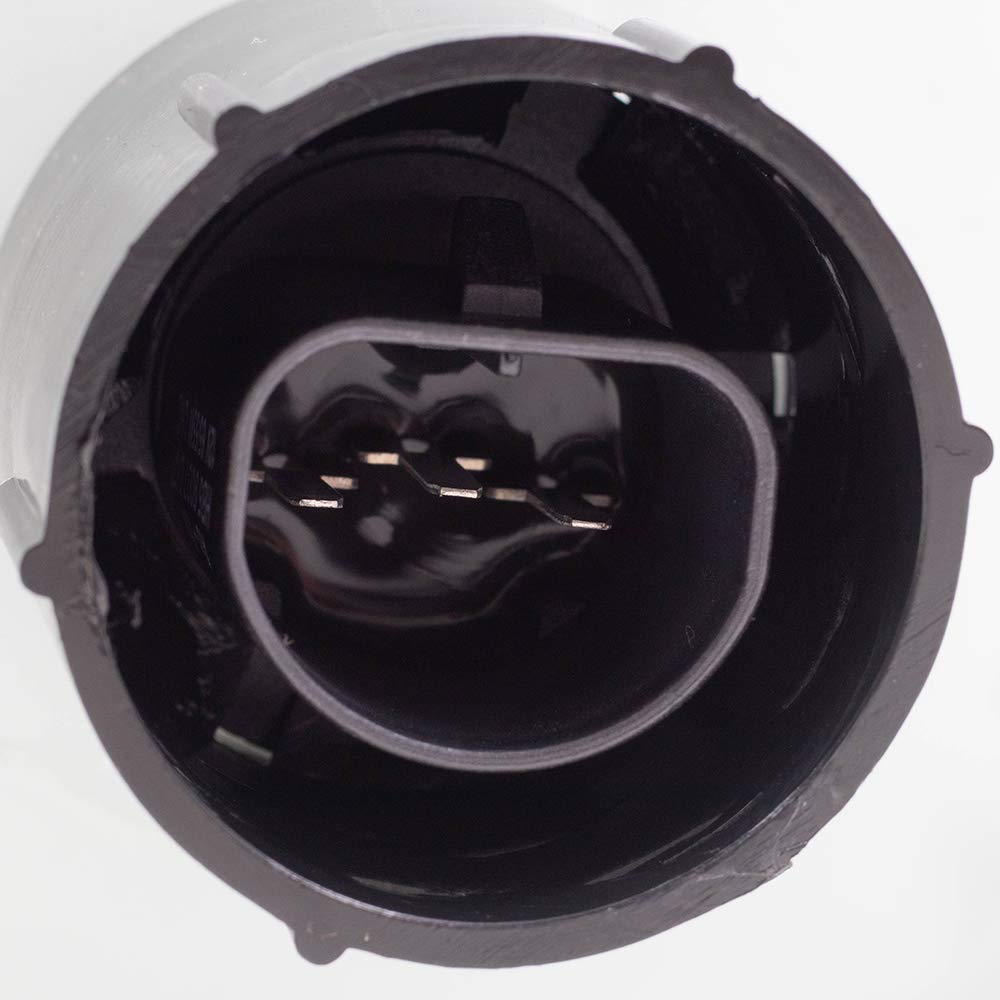
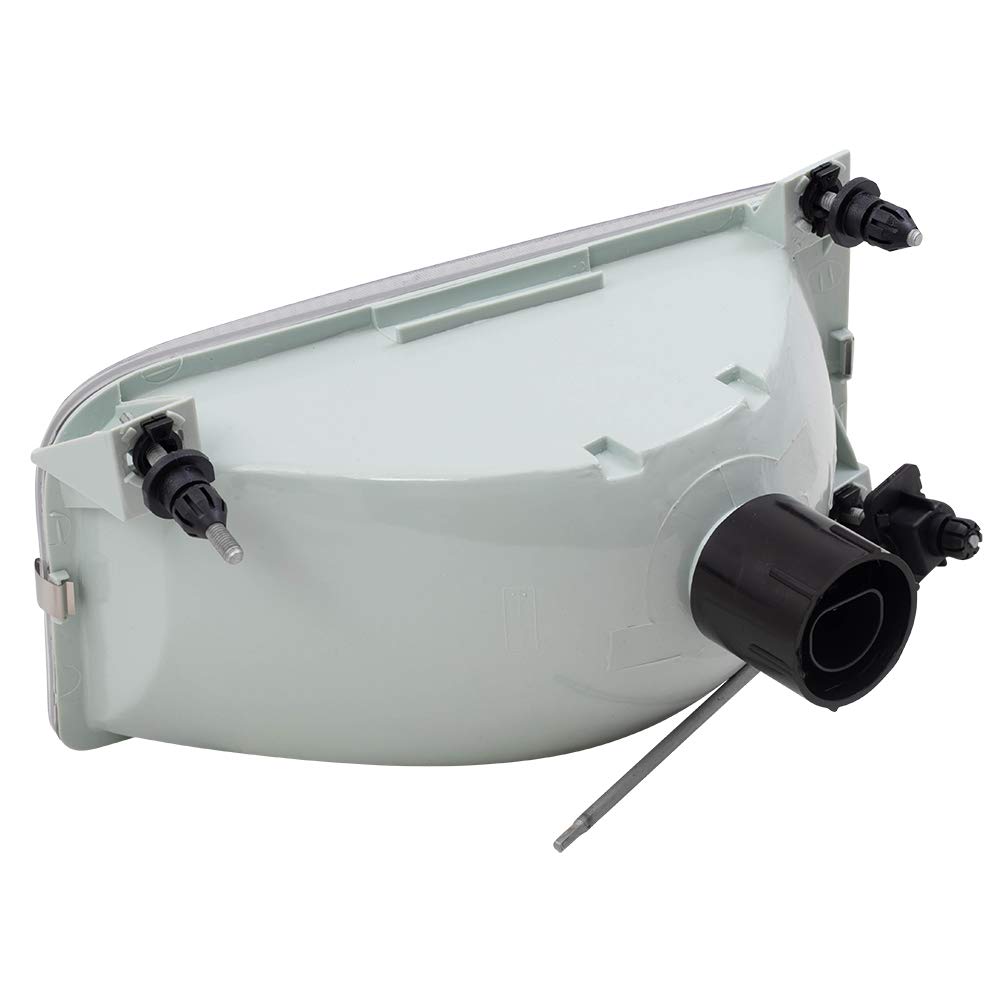
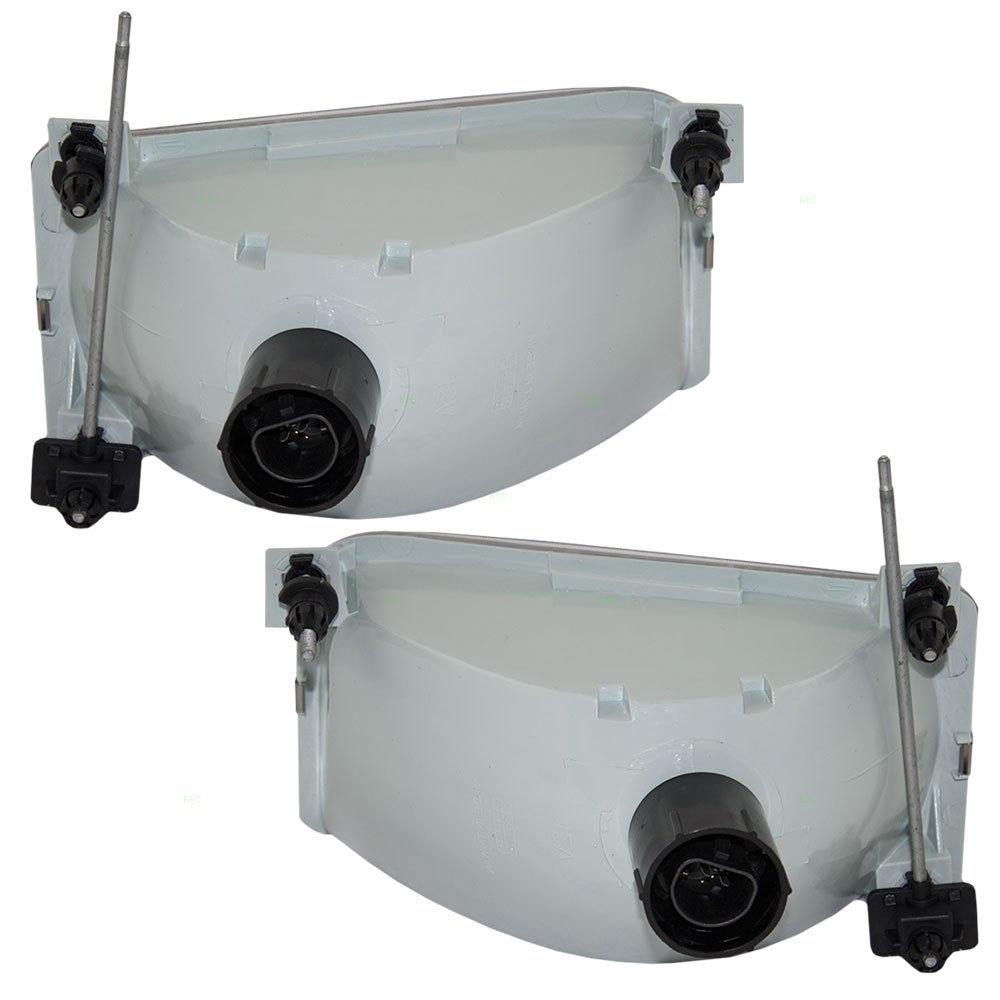
The Brock Replacement Driver and Passenger Headlights are expertly designed for 1992-1996 F150 Pickup Trucks, ensuring a perfect fit and reliable performance. With waterproof features and a 1-year warranty, these headlights are built to last while enhancing your vehicle's visibility and style.
| Brand | AutoandArt |
| Specific Uses For Product | Head Lights |
| Vehicle Service Type | Car, Truck |
| Special Feature | Waterproof |
| Lens Color | Clear |
| Item dimensions L x W x H | 16 x 12 x 9 inches |
| Manufacturer | AutoandArt |
| Model | Replacement Headlight Assemblies |
| Item Weight | 5 pounds |
| Product Dimensions | 16 x 12 x 9 inches |
| Country of Origin | Taiwan |
| Item model number | AA-3221-0003LR |
| Is Discontinued By Manufacturer | No |
| Manufacturer Part Number | AA-3221-0003LR |
| OEM Part Number | F2TZ 13008 A |
| ABPA Partslink Number | FO2503114 |
| Special Features | Waterproof |
S**Y
Got What I Ordered and More for a Great Price!
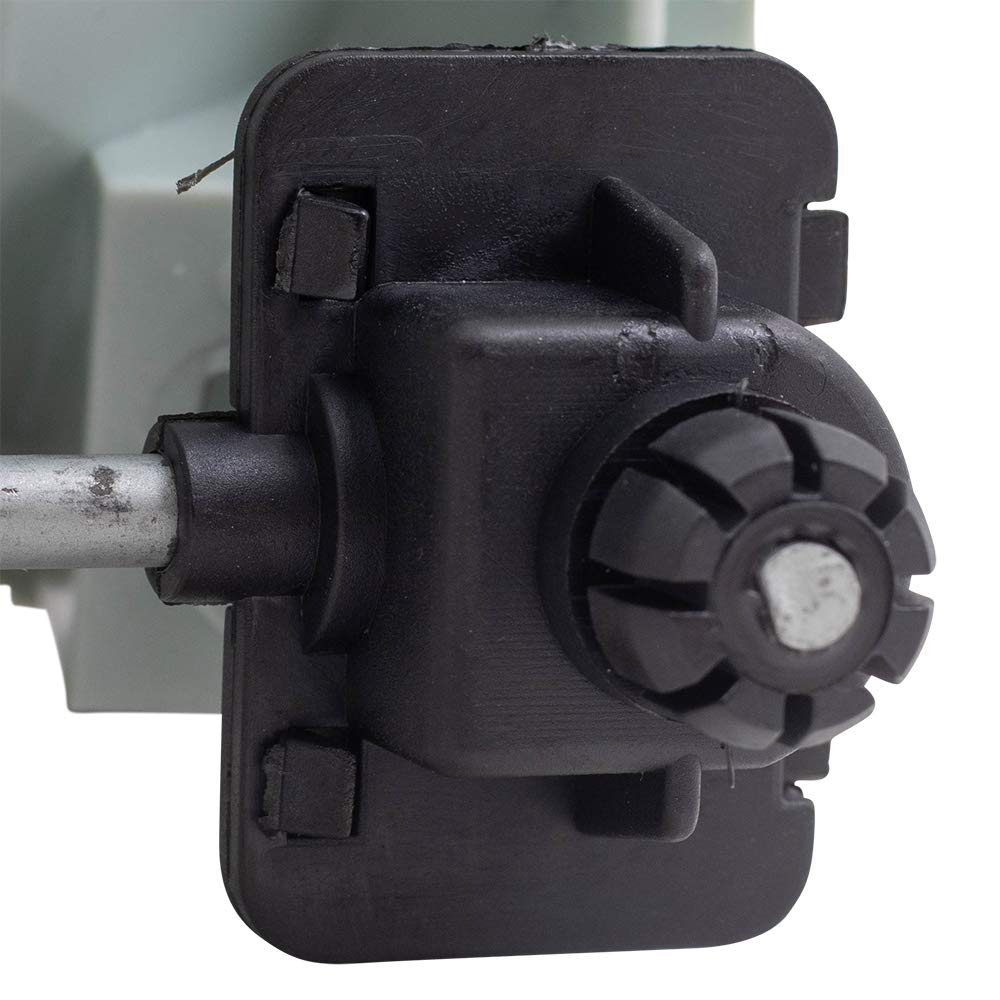
Got what I ordered and more for a great price. These headlight housings look and feel identical to the OEMs I pulled out; however, the internal parts of the new adjusters don't feel quite as stout as the old ones... but they do work. I simply left the old OEM vertical adjusters in place because it is just too hard to remove them anyway, and even harder to put them back in. I also didn't know, and was surprised to find new bulbs came with the order. For this price you can't go wrong even if they are crap... but they're not. These are actually decent quality housings. I also was told that they would ship in 5-7 days, which usually means delivery in 10-14; but, I had mine in hand just three days after I ordered them. I am totally happy with my order, and I can see at night once again.Just be sure you are ordering for your vehicle's proper year: 1992-1996 Bronco/F-150, 1992-1997 F-250/350.Be sure to order a supply of replacement retainer clips too, as you will likely damage one [or all] of your old ones during removal. (3 per light) http://www.amazon.com/Dorman-42190-Headlight-Housing-Retainer/dp/B000COCRW8/ref=pd_sbs_263_3?ie=UTF8&dpID=41-MGCR3enL&dpSrc=sims&preST=_AC_UL160_SR160%2C160_&refRID=0RGA275SQXC1RN0JCKW1Be sure to completely remove your coolant/wiper fluid reservoir, and your battery AND BATTERY TRAY before you attempt to remove old your headlights.Disconnect your headlight plugs, but leave all your blinker/running light plugs attached until later.Also remove the old, slotted, headlight bulb retainer rings. These are like a Chinese puzzle, but stay calm and you will figure it out in under ten seconds. Don't forget to put the new ones on.Remove the rubber dams that cover the gap between the front grill and the front frame on either side of the hood latch.HEADLIGHT ASSEMBLY FRAME:Remove the two screws [per side] on the top of the light assembly frames.Use an 11mm deep socket to undo the two [per side] lower assembly frame bolts. They are accessed from behind the headlight assembly through 2" tapered access holes in the metal frame. I do the outboard nut first because the outboard nut comes completely off the threads. Don't drop it down inside the frame. The inboard nut is actually a captive bolt. I use one 3" extension for the outboard nut, and two 3" extensions for the inboard captive bolt. Once the threads on the other side of teh captive bolt clear the assembly frame, the frame is loose. Pull the frame out a few inches to gain easier access to the blinker/running light plugs from the front side and unplug them.Remove the headlight assembly frame completely.HEADLIGHT HOUSING:Use a heavy gauge wire hook to grasp/hook and remove the old retainer clips. Needle-nose pliers will work almost as well, but may damage the clip. If you bought new clips, then you don't care. Only remove the upper clips. Don't remove the lower-outboard vertical adjustment and retainer clip unless you have to... like if it is damaged or if you don't want to finish the job in one day... or ever.Again, I recommend you leave the lower-outboard vertical adjustment and retainer clip in place, as removing and reinstalling this part is a test of ones sanity. After removing the upper retainer clips, use a 4mm socket and a power driver to spin the [lower-outboard ] vertical adjuster until the headlight housing is free. (It is also possible to leave the old upper-inboard retainer clip and adjuster in place as well, but this one is not as difficult to remove and replace as the lower-outboard vertical clip and adjuster)If you 're going to have shiny, new headlights, then you might also want to make sure all your other lights work too. I recommend that you replace all of your front-end blinker/running light bulbs while you have the assembly frames off. This is when it is easiest to replace them.You'll need to buy:2x 3156 front turn-indicator bulbs2x 916 parking lights2x 194NA amber front side-marker lights.All six bulbs shouldn't run you more than $15-$20 at any chain discount auto parts store.REINSTALLATION:Reinstallation of the headlight housings and the assembly frames are the reverse. Start with the lower-outboard vertical adjustment screw by lining up the adjustment threads with the old adjuster and then turning the adjustment shaft. Push the threads in to the adjuster until the threads bite and the bolt begins to pull itself into the adjuster. Don't over-tighten this vertical adjustment on reinstallation. You should examine the old adjustment gaps and try to eyeball them on the new housing, just for now.Keep the screws, nuts and bolts on the assembly frames just shy of finger tight until all nuts and bolts are biting and aligned. Once it all fits, don't forget to tighten everything.ADJUSTMENT:Once everything is back in place and tight, wait 'till dark and then go find a flat and level surface that faces a big wall. Check your manufacturer's and state's requirements for headlight adjustment height [and angle], and then measure your lights and your projected beams on the wall with a tape measure. Use a 4mm socket on a ratchet or a power driver to make the adjustments: lower-outboard vertical adjuster for up and down, and the upper-inboard adjuster for side to side. The upper-outboard mount is a non-adjustable pivot point.Have fun.
R**Y
Great fit, great price!
This is the second set of these headlights that I have ordered & installed. They work very well, install easily, and greatly improve the looks of the vehicle. Two important notes on the insulation. The clips that hold the headlights in three per headlight have a tendency to break if you are not careful with them in removing them. A suggestion to help getting them removed especially the two on the side of the light towards The outside of the vehicle, is to drill two 3/8" holes in the black support header panel that holds the lights to gain access to the outside edge clips with a screwdriver for both gentle removal and installation. It's saved us roughly 90 minutes of hassles and issues and broken clips from the first installation versus the second.
O**E
Excellent Price, Excellent Product, and incredibly fast shipping...
I purchased these reluctantly hoping for the best. My worries soon were dismissed when I opened the package, and realized that not only had I purchased the lens assembly, but that this order included the bulbs too! This was the COMPLETE lens assembly, so it was an incredible deal, and the assemblies fit like a champ!For the price.....it's less expensive than buying one or two of those lens cleaning kits, and will last much longer.If you are one the fence about this one, don't be, click the button! Buy it here, and don't bother with a salvage yard...it's simply not worth the trouble (fuel, labor & salvaged part expenses).One note though: When un-installing the old lens assemblies, be careful when removing the "retaining clips"....don't lose them (these clips DO NOT come with these assemblies...but I wouldn't expect them too). Also, if you're careful, you'll only have to struggle with 1-2 of these clips (per side), and the other(s), you can cut off with a small cutoff tool (long bladed reciprocating saw), then just remove the clip from the cut off piece(s).
B**R
Installation is fairly easy. Took about a half hour to get both ...
Was the right fit for my 95 f150. Installation is fairly easy. Took about a half hour to get both in. Only issue I encountered was plastic around the lense adjusters was cheap and broke easily first time I tried to install them. Was able to gorilla glue it back together and hold was strong enough and has held up fine. Have been installed for a few month now and have not encountered any further problems. Good looking lenses and would recommend them if your stock or other lenses have clouded or are yellowed
K**O
New look
These lights were easy to install. They were an easy way to give an old truck a new look. Also they are really bright. Looks like original lights from factory. 1992 f150.
W**E
Solid company to deal with and great product and price! Thank you!
Ordered these for my 96 Bronco full size. They came - sorta slow - and when I opened the first undamaged box I found a mounting tab broken off. I was pretty peeved to say the least and emailed the maker because the return instructions were unclear. They emailed back promptly and said to send photos of the box, damaged light, etc. They again responded promptly and shipped me out a whole new set. They appear to be of good quality and all the components (hardware, threading rods, etc.) matched up perfectly with the original Ford pieces, which made installation WAY EASIER AND FASTER as I was able to just keep the Ford stuff in place at certain places. They look great and do not get water in them like the old ones. They make the whole truck look five years newer because on mine they were yellowed, leaking, and the primary eye sore. I am now extremely pleased with both the product and the maker. They could have made me ship the old ones back, wait, then wait longer to get the new ones, but they just took care of it. These are a heck of a deal and I'm happy with the company!
Trustpilot
4 days ago
1 week ago