💖 Elevate Your Nail Art Game!
The Gelish PolyGel Professional Nail Technician All-in-One Trial Kit offers a revolutionary formula that combines acrylic and UV gel, providing a strong, lightweight, and flexible solution for nail enthusiasts. This trial kit is perfect for both professionals and DIYers looking to achieve salon-quality results at home, all while enjoying a dust-free and odorless application.


Z**O
I love PolyGel! Easy and fast my first time, looks great after 2 weeks.
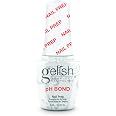
Edit, 3 Weeks later:Should have done a fill after two weeks, started to get more lifting after 3. Still, lifting at the cuticle was minimal and easy to file off. It lifted badly at the tip of the index and middle finger of my right hand, which is where my topcoat chipped off after about a week. I switched to Gelish Top It Off and it seems much stronger and shinier. So, capping the free edge with a good topcoat should prevent lifting there. Since I used Gelish Foundation under the polygel, I was able to soak off the badly lifted nails after filing them thinner. I think now my prep will be cleanse - pH Bond - ProBond - foundation and then PolyGel. I’ve gotten used to the Gelish brush, but I’m still working on keeping it out of my cuticles!So far so good. I did a one-color overlay on short natural nails, so I can’t say how well it works for extensions. I did my left hand 3 days ago, and my right (dominant) hand 2 days ago, no lifting. So I seem to have gotten past the 24 hour mark without the lifting that the 1-star reviews seem to have problems with. I really don’t like the brush that it came with, but I have a good stiff #7 gel brush that works well. Some acrylic techs on YouTube say that acrylic brushes worked best for them for PolyGel, so maybe it’s just what you’re used to.I’m used to clear gel, so applying a product this stiff was kind of awkward the first time. At least it was easy to scrape out of the cuticle area and side walls with an orangewood stick (which is a nightmare with gel!!!). I’m worried that I still put it on too thick at the cuticles, so hopefully it won’t lift too much over the next couple of weeks. On my very first try, it took me about the same amount of time to do an overlay using the polygel as it takes me with clear gel, which is 2-3 hours per hand for prep/application/color/top coat. I’m sure that will get better with practice, so I think I will eventually doing my nails will become even faster and easier. I’m one of those amateurs that learned to do nails from YouTube, so I do this all for fun anyways :-) Unless I get some training, I won’t be doing anyone else’s nails anyway.Application notes:- The Gelish PolyGel website has great detailed instructions with pictures, much better than what comes in the package.- I followed the newest prep instructions on the website and their YouTube channel, which has you put on a coat of the Foundation base coat and wipe it with a dry lint-free wipe instead of using ProBond. I’ve been using Foundation for years so I will stick to that.- It takes some practice to figure out exactly how much product to put on the nail, which is different for each one depending on the size. I always seemed to use too much, but it files VERY easily, so I was able to thin it out and get rid of the lumps and bumps with no problem. The dust makes a big mess and gets everywhere, but it’s easy to clean up and scrub the file clean with a nail brush.- It says “odor free” but the slip solution contains Isobutyl Acetate, which has a strong fruity smell in addition to a perfume, so you might not like it. I’ve not smelled acrylic monomer, but apparently smells better than that.Overall I love this product and I hope I’ve found the best thing for me, as long as it stays on my nails. I think it is worth the price since I’ve heard a lot of bad things about cheaper products. Several YouTube channels have some good tutorials: Nail Caree Education for extensions, Natasha Lee for overlays, and nailcou has a ton of videos on both. Find out all the information you can before you try it, you’ll definitely save yourself some frustration and wasted effort!
P**R
Read the contents!
Warning: this kit is great, but it’s technically for pros and assumes that you have Ph nail prep, gel base coat, and top coat. If you do not, the gel won’t stick! It was pretty easy to find a set of these products sold separately but please don’t think this kit has everything you need to get started.That said - i am THRILLED with the results. I’ve considered polygel for a long time and watched a lot of videos. It was easy to shape nails. I did not use forms, but i did wind up getting the stickers you can paint the gel on top of. With those, it is super easy to build length with no tips. I’d also recommend the stickers even if you don’t want to wind up with super long nails, because it makes it easier to have a nice, smooth, thin coat all the way to the nail tip. Otherwise you can wind up with a big lump at the end of your finger that requires filing. Filing/shaping is also just as easy as everyone says but it is DUSTY, i made the mistake of doing it while wearing black leggings and it was like i got hit with a flour bomb! I have larger, ripper files but honestly the best shaping tool i found was just a plain old emery board. Made it easy to perfect the sides and cuticle. What else? Cured easily in about a minute. Easy to file. Strong but super light. I’m trying to be easier on my nails - i have them short, wearing dish gloves, not picking at them. this is the first product I’ve used at home that actually STAYS ON until it’s time to fill. Like 12-14 days, I think i wound up taking off one nail that had lifted more than half off. But that was it - the rest were just fill and it’s now been 8 days and they are still perfect.I’ll definitely be checking out the different colors of polygel!
S**O
This is so much easier to use than hard gel!
Up front: I am not a professional. I've been a nail art enthusiast since 2011 and the more I explored my hobby the deeper down the rabbit hole I went. Eventually I decided I wanted a product to use for an overlay on my natural nails to reinforce strength.The first product I tried was ibd hard gel from Sally's, but after many months of trying I never got the hang of applying it with the outcome I wanted. Next, I tried Akzentz after watching many YouTube videos. Supposedly, it would be a little runnier than the ibd and therefore self-level nicely. After months of trying to perfect that I gave up and tried it with dual forms. That obviously gave me a perfectly smooth surface with an apex in the correct place, but it was so runny that it flooded my cuticles and side walls and I ended up chewing up my skin pretty bad with an e-file while trying to remedy that. There was also tons of lifting with both products despite how carefully I prepped my nail.Enter Gelish Polygel: This stuff is exactly what I needed! I use it with dual forms to get the perfect surface and apex. No running. No lifting. Files like BUTTER (I swear it took me ages to thin my hard gel when doing a fill-in). The monomer smells pleasant. It's flexible enough that it's staying attached to my damaged, paper-thin natural nails (I was learning to properly use an e-file when I started using hard gel, so I am growing out some damage). It's easy to use and the results are fantastic. I don't have to worry about sculpting or self-leveling or anything like that. I use it with a dual form, blend at the cuticle, and I've got a beautifully smooth surface and reinforced nails. I will definitely be purchasing again!
Trustpilot
1 day ago
1 month ago