
DOWNLOAD THE APP


Customer Services
Copyright © 2025 Desertcart Holdings Limited
DOWNLOAD THE APP


👕 Turn your wardrobe into a canvas—because ordinary is overrated!
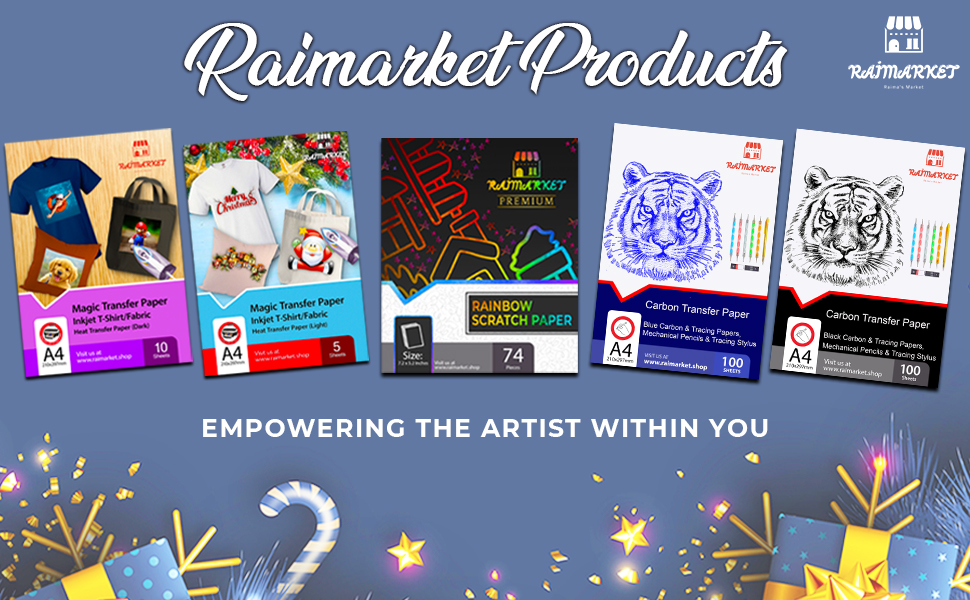
Raimarket Premium Iron-On Transfer Paper offers 10 A4 sheets of 200 gsm matte-finish paper designed specifically for light cotton fabrics. Compatible with all inkjet printers, it enables quick, easy, and vibrant DIY t-shirt and fabric customization in under 10 minutes. The package includes acetate sheets and multilingual instructions, ensuring professional-quality transfers with hassle-free cutting and application.


| ASIN | B07D1VRRF8 |
| Best Sellers Rank | 11,803 in Home & Kitchen ( See Top 100 in Home & Kitchen ) 6 in Heat Transfer Paper |
| Brand | Raimarket |
| Brand Name | Raimarket |
| Colour | blue |
| Country Of Origin | China |
| Customer Reviews | 4.1 out of 5 stars 4,814 Reviews |
| Item Dimensions L x W | 21L x 30W centimetres |
| Item Weight | 140 Grams |
| Item weight | 140 Grams |
| Luminanax Lux | 95 |
| Manufacturer | Raimarket |
| Material Features | Easy-to-use and versatile with vibrant image transfer |
| Paper Finish | Matte |
| Paper Size | A4 Millimetres |
| Paper Weight | 80 |
| Paper finish | Matte |
| Sheet Count | 10 |
| Sheet count | 10 |
| Sheet size | A4 Millimetres |
| UPC | 692456371676 |
| Unit Count | 10.0 Count |
P**K
Works perfe
Easy to use and they stay on the material perfectly, no lifting of edges. Need to make sure iron is hot and go over a few times
B**L
Easy to use
This is the first time I have used this type of thing and was a bit nervous, but it was easy to use with good instructions. Project went well. Very pleased with the outcome.
P**B
Simple and creative
A great product and really easy to use. Advise watching the instructional video on the website found in the instructions. I think the only drawback is finding the hard and smooth surface to iron on the transfer as you can't use an ironing board apparently - hence only 4 stars for the actual product. I used our wooden kitchen table and even after laying down some fabric to protect it as instructed the table has left a mark. Luckily the table is old and heavily marked/scratched and scribbled on by previous owners and our kids so I don't actually mind. After the first t-shirt, I did use a chopping board instead which survived better. Otherwise really easy to use and resulted in a great couple of t-shirts for the kids to use for their school sports day, where we had to think of something themed around their team name for them to wear. Simply found an image online. Copied and cropped it onto an A4 word document and printed. Then iron on as instructed!
J**A
Worth the money
Problem: my nephew wanted to do a piano/singing tribute to Micheal Jackson at school and asked me for help. I didn’t want to spend a fortune on it. Then I discovered the transfer paper and this new brand had very good rating so I bought both the dark and the light colour transfer papers not knowing which the little one prefer at the end. Here is my take on it, working with both the light and dark paper: • Wash and dryer dry your t shirt/fabric first. A shrunk fabric works best • the more time you spend prepping and the closer you follow the instructions the better your end product • don't be afraid of force (pushing down) and heat • Trimming the extra paper on the light paper minimizing areas that will be clear but somewhat glossy • Trimming the extra areas on the dark paper avoids transferring the colour white to the fabric • Through trial and error I figured out it is better to avoid sharp corners to make them round, reducing the risk of corners peeling off • The side of the paper you print on is the white side for both dark and light paper, so make sure you know how to load the paper in your inkjet printer. There is logo printed on the back side. • Your final print area can be larger than a sheet as you can cut images/words from the paper and space them or use them elsewhere on the shirt (for instance, arm badges can be printed in a corner of the same sheet) Trick: • To avoid damage to the reverse side graphics, if you do a front/back design, use a large cutting board or a piece of flat wood slide it in the t-shirt that way the wood sits between the front and back. This also solves the issue of both sides of the t-shirt not being perfectly flat/ironed before you start Light Colour Paper • You need to print in reverse as the image is reflected back on the fabric. I used word and flipped the images and writing. You can simply flip it by selecting an image > format > Rotate > Flip Horizontally. No need to change anything in printer settings. • As mentioned before, you don't have to cut very precisely as you only leave behind gloss/clear where you don't trim Dark Colour Paper: • You DO NOT need to print in reverse. No need for flipping the image. • You need peel of the printed paper BEFORE initiating transfer with an iron -I wasted one sheet not being careful • The portion you don't trim transfer as white and you can create a border, rough or smooth, as I did with the front of the dark t shirt • Peeling the transfer portion from the t shirt before ironing is difficult....I used tweezers and eventually I managed to peel off the backing • You use an included sublimation paper over the peeled paper to press the image onto the fabric Final Impressions: • Don't expect professional grade printing and very long lasting. • Recognize these are not permanent and are intended for fun and event needs • I expect them to last 3-6 months, so it should survive few careful washes. • Mistakes and rough edges on my work is my own haste getting in the way This met my needs, to have a front/back t-shirt design on both dark and white t-shirts, using the appropriate paper for each colour.
A**R
Poor product
Awful followed instructions, ironed my second one for twice as long and still don’t work! Waste of money, ink and a bag! Only gave it one star as it would t let me leave a review without any.
S**U
Brilliant product, great results
I had tried many ways to create my own labels for handmade textile items but wasn’t entirely happy until I came across a tutorial on youtube on how to use transfer paper with cotton ribbon. I had been using a special setting solution and printing my labels directly onto the fabric but the results were not crisp and saturated. Using transfer paper was the solution! My labels look FANTASTIC now! Incredibly saturated colour, crisp lines, great result! I get many labels out of just one sheet of paper so it's very cost effective. For other crafty types, these would also be perfect for ironing onto sew-in labels (my next project). I can't speak to how they stand up in the wash yet, but I also read that if, after they've cooled, you iron again with just a piece of parchment paper on top, you'll remove a little of the excess "plastic-ey" coating and also set the design a bit more, but I haven't done that yet. Either way, my new labels made with this transfer paper look great, very professional and polished!
J**P
Decent but not perfect
The paper itself seems good quality, but I had some issues with the transfer. It didn’t fully copy over to the fabric, even though I followed the instructions carefully. It might work better with some trial and error, but based on my experience I can only give it three stars.
S**K
Great start out item
This item is brilliant for anyone who wants to transfer print or pictures to their own clothes. So simple to use and gives great results, I have done t-shirts for my a neighbours cleaning service, My university society and my DJ Business. Just print your design in mirror image, trim it down a little and iron on (preferably on a hard surface, not an ironing board), then you either peel the backing of whilst warm or can leave until cooled down. . Set the design with the included silicone paper and your done. This is the best paper i have used for iron on work and will always be using this company from now on.
Trustpilot
1 day ago
3 days ago